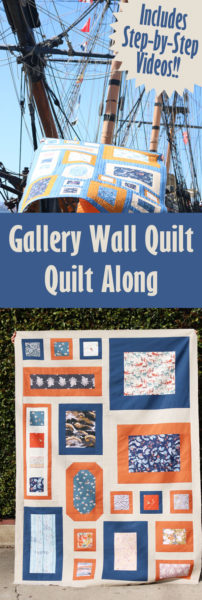
I’m so excited that you’re joining in for the Gallery Wall Quilt Along! Make sure to bookmark this page – I’ll be adding details here as we go along!
To start purchase your copy of the Gallery Wall Quilt Pattern HERE.
If you’d like to follow along weekly, make sure you’ve subscribed to the Gallery Wall QAL weekly e-mail blast! You can find the sign-up below. Once you’ve subscribed, you’ll get a welcome e-mail with the free coloring page and planning sheet!
After you’re all signed up, you’ll get weekly e-mails as we progress through the Quilt Along!
Ready to start? Here is the week 1 video:
In the week 1 video, I’ll go over cutting fabrics, including fussy-cutting the centers for your pieces, how to cut long strips, and sorting your pieces to get yourself ready for the upcoming weeks!
Once you’ve done all the cutting and sorting, you’re ready to start sewing! I show you how to put together Section A in the Week 2 video:
Putting together Section B isn’t quite as straight forward as Section A. It isn’t hard – there are no “fancy” techniques (unless you consider sewing straight lines a fancy technique I suppose?). But, the pieces do need to be stitched together in a very specific order to get it all put together properly. If you can follow along with the pattern, you’ll be fine. If you want a little more support, that is what the video is for! I’ll take you through the sewing step-by-step!
Need things to ease up a bit after the craziness of Unit B? No problem! We’re making Unit C and it is a snap! Check out the video for all the details of how it comes together. The biggest things to pay attention to are keeping the background strip on the LEFT of the second frame, and making sure that all your directional fabrics stay in the correct direction. Easy-peasy, right?
Unit D is the bottom of the quilt. This is the last segment of the quilt before putting it all together! And, if you’re anxious to finish your quilt top, I give you a quick overview on how it all comes together at the end of this video, so that you can finish your quilt top today if you like!
Finish up your quilt by stitching the units together, and then adding on your borders. I’ll give you all my tips for getting your borders on the right way!
Remember to post your progress on Instagram using the Hashtag #GalleryWallQAL and tag me @craftmoore!

