• Skip to primary navigation
  • Skip to main content
  • Skip to primary sidebar
Home About Subscribe Summer Sew Camp Disclosures

Always Expect Moore

Quilts & Pattern Design

  • Cricut Maker BOTW
  • Quilty5k
  • Gallery Wall QAL
  • Trunk Show
  • Guild Resources
  • Pattern Shop
  • Free Patterns
Home About Subscribe Summer Sew Camp Disclosures
  • Cricut Maker BOTW
  • Quilty5k
  • Gallery Wall QAL
  • Trunk Show
  • Guild Resources
  • Pattern Shop
  • Free Patterns
Home » Blog » Quilt » How to Machine Bind a Quilt

How to Machine Bind a Quilt

Created On: January 12, 2015  |  Updated: January 8, 2015  |   Leave a comment

Adding binding is the final step in making a quilt. I love the look of binding that has been hand-stitched down. But that takes a lot of time – four hours or more to hand-bind a quilt. And, although that isn’t a lot of time when you consider the overall time it takes to make a quilt, if I’m up against a deadline, or making a quick and easy quilt, I turn to machine binding. It takes a quarter of the time (or less), and although it doesn’t look quite as nice as hand binding, it is possible to make it look very professional.

You can use whatever size binding you like. I like to cut mine into 2″ strips.

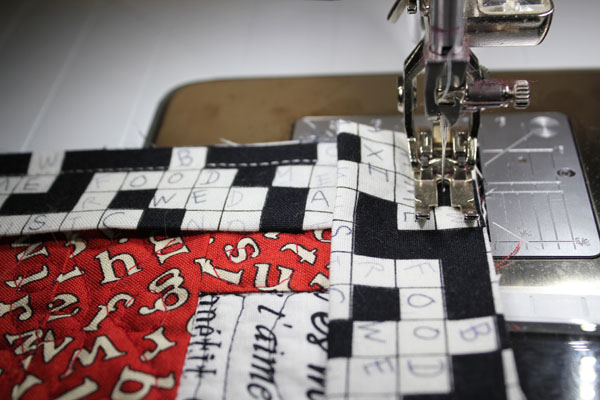
Stitch the strips together, on the bias, to make one long strip. Press open these seams, then press the entire length of the binding in half, making it 1″ wide. Stitch the raw edge of the pressed strip against the raw edge of the trimmed quilt top, with a 1/4″ seam. The binding goes on top of the quilt, it will get stitched to the back later.

stitch down binding

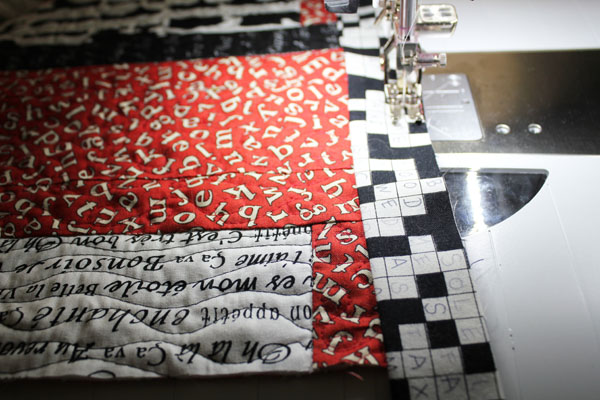
When you get to a corner, fold the binding away from the quilt to make a 45 degree angle.

fold away corner of binding

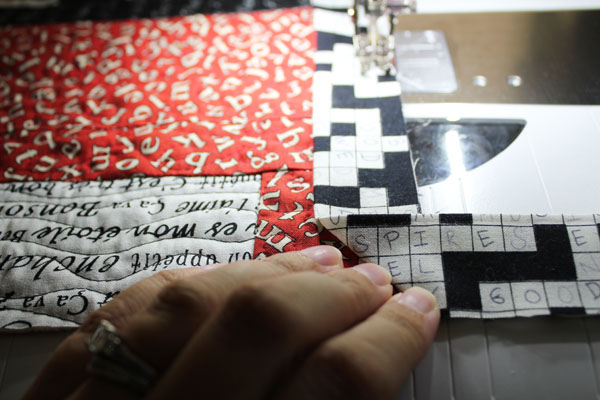
Then fold the binding back to the quilt, so it lines up with the next side of the quilt.

fold corner of binding

When you get to the corner, fold down the triangle so it is out of the way. You do NOT want to stitch this triangle down.

tuck corner as you stitch

Stitch up to the fold. I like to go backward and forward a couple stitches right at the corner, just to make it extra secure.

stitch to corner

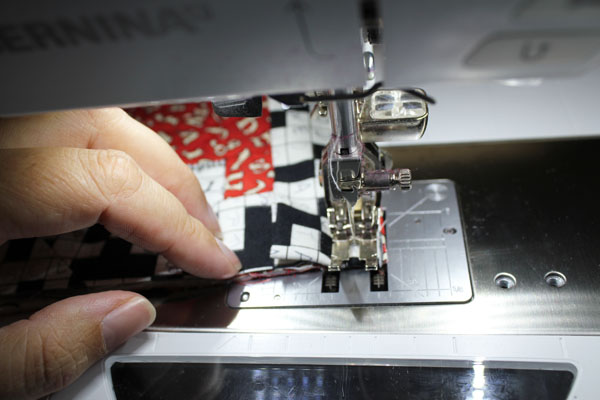
Lift up your needle and presser foot, fold the triangle flap back, and start stitching again at the fold. I like to go back and forth a couple stitches here, as well.

move fold

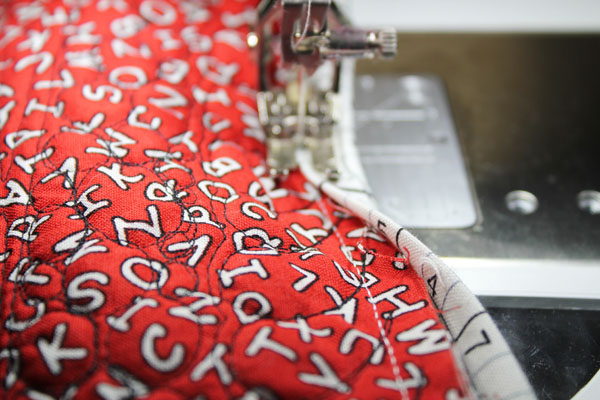
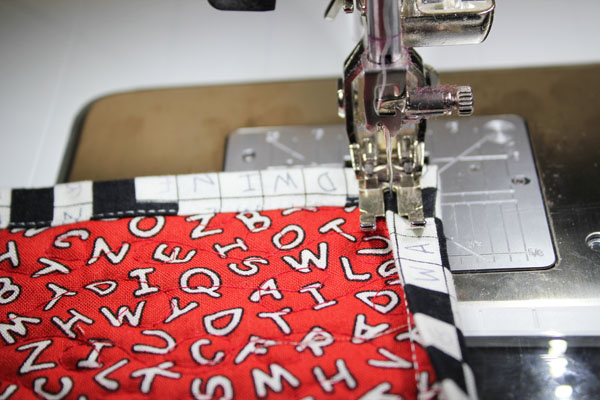
Continue all the way around the quilt. When you all the way around, back to the beginning, secure the two ends together. Then it is time to stitch it over the edge, to the back. Flip the quilt over, and pull the binding around to the back. Stitch right at the edge of the binding, and just to the left of your stitching line. This keeps your stitching off the binding on the front. The closer you get to that stitching line, the neater the front of your quilt will look. If you use a thread that matches your quilting, and it will blend right in to the front.

fold over binding and stitch

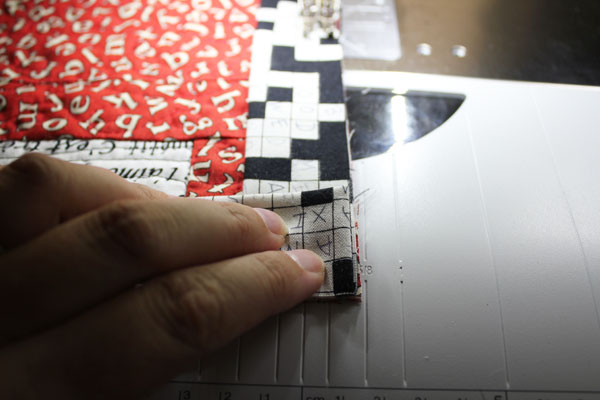
When you get to a corner, fold the binding into a point.

fold corner

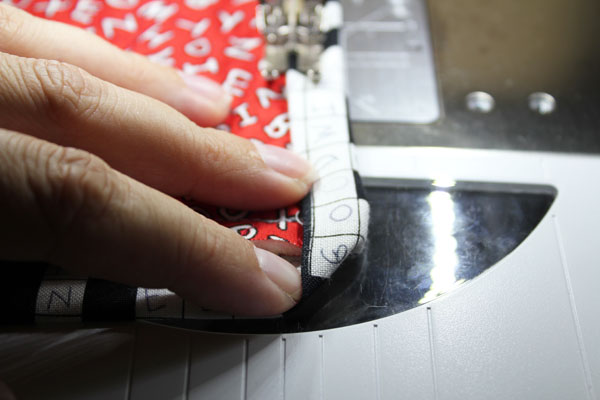
Before you stitch the corner, flip the point up. I find that pinning moves the fabric too much, so I hold the edge down by pressing a pin down on top of the binding. This slips under the presser foot, and I can move it out of the way before the needle comes down.

stitch corner in place

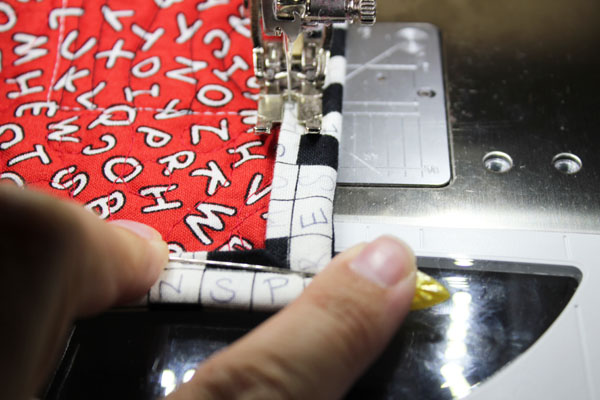
Stitch to the corner, and with the needle down, pivot.

pivot at corner

Keep stitching this way, all the way around the quilt.

stitch down length of binding


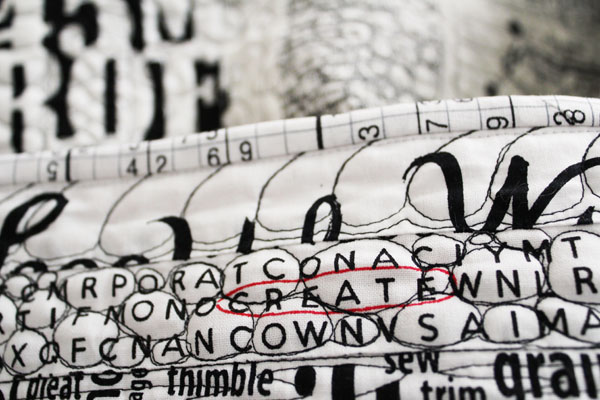
You can see what it looks like from the front – nice and neat!

Stitched on binding from the front


posted in: Quilt, Sewing, Sewing Tutorials

Previous
How to fix a quilt mistake (after it has been quilted!)
Next
Babysitter Information Sheet

Reader Interactions

Leave A Reply! Cancel reply

Share your thoughts!
Your email address will not be published. Required fields are marked with *

This site uses Akismet to reduce spam. Learn how your comment data is processed.

Primary Sidebar

Hi, I'm Carolina!

I’m a Quilt Pattern Designer, Award Winning Quilter, and fan of all things quilting. I live in San Diego with my husband, our two boys and our pets. I love keeping both my hands and mind busy, so I’m always working on lots of projects. You’ll find lots of them shared here!

More About Me

Let's Keep In Touch!

I'll let you know about what's new in quilting, freebies you'll want to snag, and brighten your inbox about once a week!

subscribe
90% Faster Than Rotary Cutters

Fat Quarter Shop Quilting Fabrics and Supplies

Instagram Facebook Pinterest YouTube

Recent Posts

  • Flying Pig Quilt Block
  • Bunny and Carrot Quilt Block
  • Free Fancy Drink Quilt Block
  • Dutch Row Houses Quilt Block
  • Quilted Sports Jersey Numbers

Archives

Featured Projects

  • Everything you want to know about Pre Cut Fabrics!
  • Scrappy Placemat - easy to make scrap project
    Scrappy Placemat using Strips and Scrap Tape
  • Sewing Kaleidoscope SVG File
  • Drawstring Backpack
  • Carolina holding fabric marking pens
    Choosing Fabric Marking Pens

Let's Keep In Touch!

Brighten your inbox about once a week!

Always Expect Moore Submark Shop Patterns

Browse

  • Ruler of the Month
  • Quilty5k
  • QuiltMath
  • Cricut Maker BOTW

Shop

  • Digital Download Patterns
  • Quilting Notions
  • Quilt Stickers
  • Quilt Tees

Connect

  • YouTube
  • Instagram
  • Facebook Group
  • TikTok
©2025, Always Expect Moore. All Rights Reserved. About Disclosures
Back To Top
Design by Pixel Me Designs
×

Let's Keep In Touch!

I'll let you know about what's new in quilting, freebies you'll want to snag, and brighten your inbox about once a week!