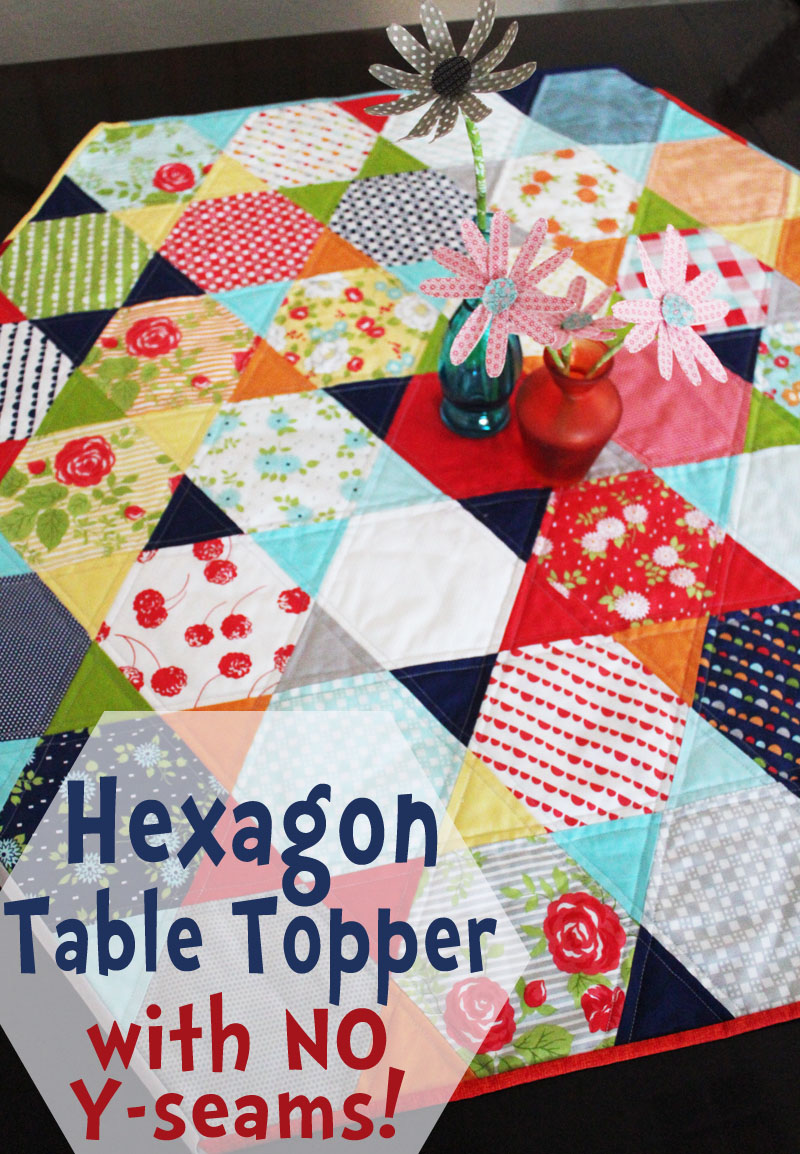
I’m still getting my monthly pack of Charming Solids from Pink Chalk Fabrics. It is like getting unfattening chocolate in my mailbox each month, and even when I don’t have time to make anything with the fabric I’m sent, I love it. I’ve thought about cancelling… but I just can’t. Not yet. And I’m so glad I didn’t because last week I got an awesome surprise in my mailbox! Usually, the Charming Solids club pack has 2 charm packs and coordinating solids. This month they sent me one of the new precut hexagons along with coordinates! That was all it took to get my quilting mojo going, and I whipped up this little hexagon table topper. The best part? NO Y-seams!
A Y-seam is unlike a traditional seam. A Y-seam is when 3 seams come together in one spot, often forming a Y shape. It can be hard to get a perfect Y-seam with no pucker. And a quilt full of Y-seams can be a challenge. By cutting triangles out of my solid coordinating fabrics and creating diamond units, I eliminated the need for Y-seams. And I also have ideas for more fun no-y-seam-hexagon projects!
To make this hexagon table topper, you need:
– Bonnie & Camille Happy Go Lucky Honeycomb Hexies
– 8 Coordinating Solids. I had an “extra-wide” fat eighth of each. A regular fat eighth will be fine.
– Coordinating fabrics for scrappy binding. I used fabrics I had on hand, plus some of my coordinates from the pack. If you start with fat quarters of your coordinating solids, you will have plenty for a scrappy binding.
– 1 1/4 yards backing fabric
– batting of your choice
Cut 72 triangle units from the coordinating solids. I created a template for mine. Each side is 3 3/8″, and the whole unit is 3″ from base to point. I cut 3″ strips from my fabric, and then cut the triangle units from the strip. If you cut your strips from the length of your fat eighth, rather than the width, you’ll have more usable fabric to use in your binding.
Set aside 5 hexagons. Stitch the triangle units to each side of your remaining hexagons to create diamonds. Of the 5 hexagons you pulled aside, select 2, and stitch a triangle to only one side of each. These two will go on either side of the middle row. You will have leftover triangles that you’ll use later.
Set aside 3 diamonds. Stitch your remaining diamonds into pairs, being careful to line up your seams.
Use your pairs, the diamonds you set aside, the single-triangle units, and your leftover triangles to create rows:
2 rows of 4, with an extra triangle
2 rows of 5, with an extra triangle
2 rows of 6, with an extra triangle
1 row of 7, using the single-triangle units on each end
Stitch your rows together to make your quilt top, being careful to line up your seams.
Quilt as desired, and bind. I used a 2″ scrappy binding.
Makes a great baby play quilt or table topper.


Comments & Reviews
This comment has been removed by the author.
aww that is so cool 🙂 everytime we use the quilt you made me back in 2003… OMG has it been that long since we used to get to hang out all the time?? …
i think of you!!
miss you
Love this!!! Thanks for sharing!!
This quilt turned out so great! Somehow I missed getting a picture of it though 🙁 But I did just post a summary of our MQG mtg last night. It was such fun!
What a beautiful quilt and a great tutorial!