I’m swapping blogs with Brenda from Therapeutic Crafting today! She’s got a cute coloring tote project here for you, and I’ve put together a tutorial on making a pattern for pants that you can find over on her blog! : ) Thanks for stopping by, Brenda… take it away!
Hey there! I am Brenda from Therapeutic Crafting. I just wanted to thank Carolina for doing this fun blog swap with me. She has some great ideas huh!?!
Well, the name for my blog is kind of near and dear to my heart. Through a crazy ordeal with post partum depression, I found out that crafting, sewing, painting, and creating with my hands was a form of therapy for me.
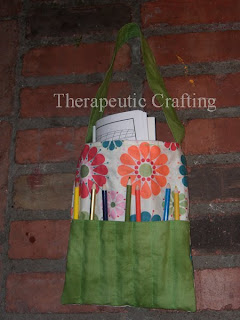
So, here is a really simple and quick bag that will have that little person in your life coloring on the go.
I have about 1234875809476503 pieces of left over fabric that have been DYING to be used. So, this bag was made with that in mind. I used a fat quarter, but it would look adorable all patch worked. You will need 2 pieces that are 9 X 42.
I had a fat quarter. I cut it in half length wise. so I had 2 pieces that were 9 X 42
Folded one of the pieces in half and sew the long 2 sides up. Leave the top open. Then cut a little hole at the bottom (on fold). This step is really important because it will allow you to turn the bag right side out in the end.
***This piece is the inside liner***
The other piece you fold in half width wise and then cut it in half. You should now have 2 pieces that are 9 X 11.
I cut a piece of coordinating fabric that was 9 X 6 3/4. Fold over width wise (9 inch across) 1/4 inch and press. Fold over again 1/4 inch and press. Top stitch.
Place the coordinating fabric on top of one of the pieces that is 9 X 11. To make the pencil holders you will sew lines down 1 inch apart. I had seven pockets to put coloring pencils in.
With RST sew the two 9 X 11 pieces together. Snip the corners. Turn right side out and push corners out to a point.
For the strap, I cut a piece that was 24 X 4 1/2. I wanted my strap longer because my daughter likes to carry her bags around her neck. With RST sew the length of the strap. Leaving both ends open.
Use a safety pin and flip the tube right side out by pushing the pin down the inside of the tube.
Pin the strap onto either end of bag.
With RST place the inside liner around the outside of the entire bag (pictured above). Then sew around the entire top.
From the hole you cut in the beginning, pull your bag through so it is now right side out.
It should look something like this. Sew the hole closed that you pulled the bag through.
Push the liner into the inside of the bag and top stitch around the top.
Put coloring pencils in the slots and a few coloring books inside the bag and let your little person enjoy coloring on the go.
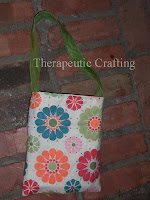
Here is the bag I made for my little man!
Don’t forget to stop by Therapeutic Crafting, where a little therapy goes into every craft.
Thanks for stopping by, Bren! This has been so much fun! 🙂
Always,


Leave A Reply!