• Skip to primary navigation
  • Skip to main content
  • Skip to primary sidebar
Home About Subscribe Summer Sew Camp Disclosures

Always Expect Moore

Quilts & Pattern Design

  • Cricut Maker BOTW
  • Quilty5k
  • Gallery Wall QAL
  • Trunk Show
  • Guild Resources
  • Pattern Shop
  • Free Patterns
Home About Subscribe Summer Sew Camp Disclosures
  • Cricut Maker BOTW
  • Quilty5k
  • Gallery Wall QAL
  • Trunk Show
  • Guild Resources
  • Pattern Shop
  • Free Patterns
Home » Blog » Uncategorized » Belt Made Bigger (and Cuter!)

Belt Made Bigger (and Cuter!)

Created On: September 22, 2010  |  Updated: September 22, 2010  |   5 Comments

Quick Edit: I’m so excited to be entering this project in Sew Dang Cute’s Crafting with the Stars!

Pick Me! Pick Me! Pick Me!

Going back to work means that some days, I don’t wear jeans to the office. Some days, I wear slacks. And those slacks need a belt.

It seems that somewhere between the freshman 15 and now, my childbearing and ice cream-bingeing has caused my waist to… expand. Which is a nice way of saying that my poor little belts don’t meet up at the front anymore.

I thought “Wouldn’t it be nice if there was a cute way to make these belts bigger?” So… I came up with one! Now we don’t have to think of our too-small belts as Goodwill fodder, or guilty reminders of sweets gone by… instead, they are an excuse for something crafty! Here’s how to make your own:

Start off with a belt that mysteriously “shrunk” while sitting in your closet. Pick out a fun fabric. I have a “thing” for fabric with words, so I used a wordy fabric from my stash.

Measure the belt around your waist. It is best to do this while wearing the pants you’ll wear when wearing the belt. Mark where you’ll cut one end, adjust, mark where you’ll cut the other end. Then… {scary part!} cut into your belt!

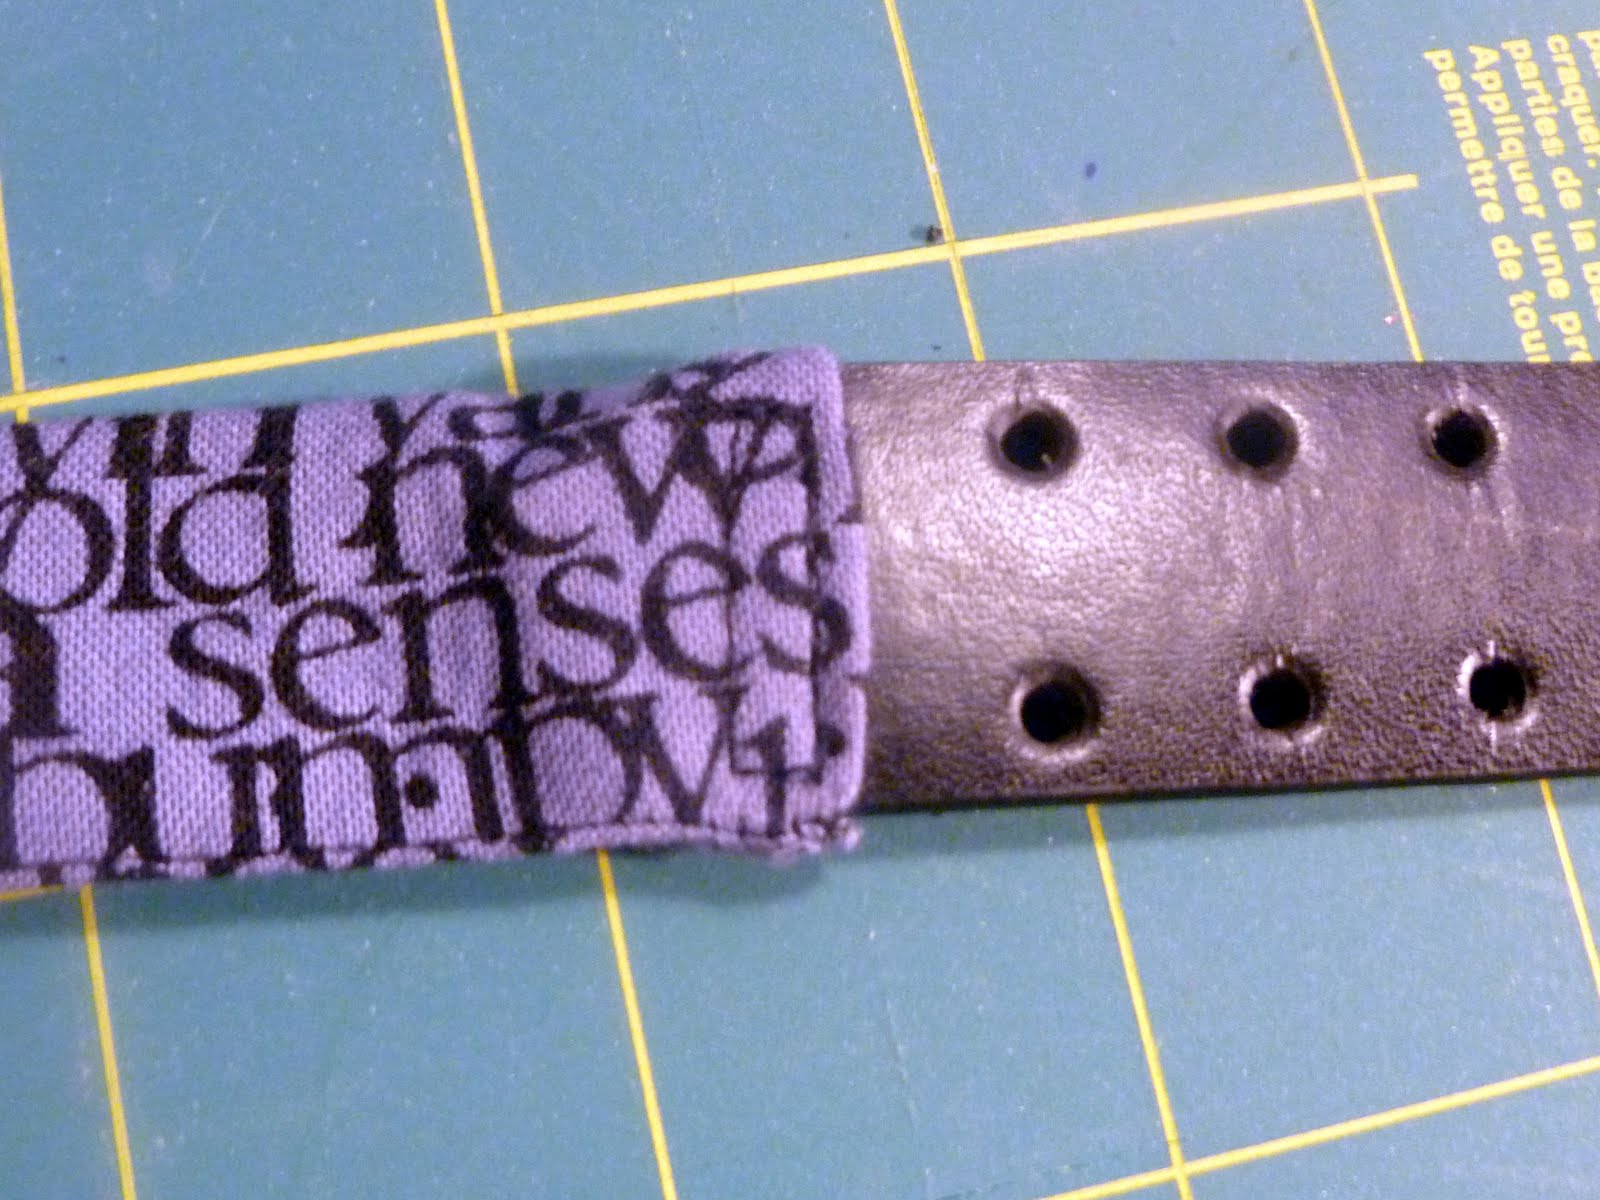
Cut the ends of the belt to taper, which will make it easier to insert into the fabric piece we are about to make.

Measure the width of your belt. Mine is about 1.” Add .5″ for seam allowance (.25″ on each side), and cut your strips… so, mine were 1.5″ wide. Then, cut two lengths of interfacing just the width of your belt. You could cut these the width of the fabric, but that’ll cause a lot of extra bulk in the seam allowances, and I didn’t want that. Iron the interfacing into the middle of the strips of fabric.

Stitch the two fabric strips right sides together, with a seam allowance just smaller than 1/4″ which will make it easier to attach it to the belt. Turn the strips right side out (this is going to be a little tricky with a belt this narrow, because the interfacing makes it so stiff, but be patient, the end result is worth it!), then tuck in the ends. Iron the fabric smooth, then tuck the belt into an end. It helps to curve up the belt (like in the photo below) to get it into the fabric tube.


Once you have it tucked in an inch or so, stitch down the end by stitching in a little rectangle on the end.

Repeat with the other side, then top stitch down the long sides of your fabric, to keep it all together, and give it a finished look.

You’re all ready to rock the cutest belt ever… now that it fits you perfectly! : )

Always,

posted in: Uncategorized

Previous
Pincushion Pass
Next
Before and After Sewing Machine Cover

Reader Interactions

    Leave A Reply! Cancel reply

    Share your thoughts!
    Your email address will not be published. Required fields are marked with *

    This site uses Akismet to reduce spam. Learn how your comment data is processed.

    Comments & Reviews

  1. craftystaci.com says

    September 22, 2010

    I love this! One of my favorite belts just broke, but I couldn’t bear to throw it away…this might help me save it. And fabric with words – totally with you on that one!

    Reply
  2. Jennifer says

    July 13, 2016

    Great idea and thanks for the clear pictures. I am going to use this on a hip bag that is too small for my mom bod.

    Reply
  3. Margie says

    November 23, 2019

    I am a beginner at best, so please forgive me. The fabric is sewn onto the belt I presume. What kind of needle goes through leather?

    Reply
    • Carolina says

      December 4, 2019

      You can get leather needles, or a denim needle should work.

      Reply
    • Carolina says

      February 5, 2020

      A denim needle is a good option for going through leather. But you will want to stitch slowly!

      Reply

Primary Sidebar

Hi, I'm Carolina!

I’m a Quilt Pattern Designer, Award Winning Quilter, and fan of all things quilting. I live in San Diego with my husband, our two boys and our pets. I love keeping both my hands and mind busy, so I’m always working on lots of projects. You’ll find lots of them shared here!

More About Me

Let's Keep In Touch!

I'll let you know about what's new in quilting, freebies you'll want to snag, and brighten your inbox about once a week!

subscribe
90% Faster Than Rotary Cutters

Fat Quarter Shop Quilting Fabrics and Supplies

Instagram Facebook Pinterest YouTube

Recent Posts

  • Flying Pig Quilt Block
  • Bunny and Carrot Quilt Block
  • Free Fancy Drink Quilt Block
  • Dutch Row Houses Quilt Block
  • Quilted Sports Jersey Numbers

Archives

Featured Projects

  • Everything you want to know about Pre Cut Fabrics!
  • Scrappy Placemat - easy to make scrap project
    Scrappy Placemat using Strips and Scrap Tape
  • Sewing Kaleidoscope SVG File
  • Drawstring Backpack
  • Carolina holding fabric marking pens
    Choosing Fabric Marking Pens

Let's Keep In Touch!

Brighten your inbox about once a week!

Always Expect Moore Submark Shop Patterns

Browse

  • Ruler of the Month
  • Quilty5k
  • QuiltMath
  • Cricut Maker BOTW

Shop

  • Digital Download Patterns
  • Quilting Notions
  • Quilt Stickers
  • Quilt Tees

Connect

  • YouTube
  • Instagram
  • Facebook Group
  • TikTok
©2025, Always Expect Moore. All Rights Reserved. About Disclosures
Back To Top
Design by Pixel Me Designs
×

Let's Keep In Touch!

I'll let you know about what's new in quilting, freebies you'll want to snag, and brighten your inbox about once a week!