It has been less than a year since I moved into my new craft space, though it feels like longer. We’ve lived in this house for almost seven years, and my craft room has been in three different rooms. This is the second time I’ve had my craft room in this room! Before moving into this room, I shared a space with my husband. We had a Craft Room/Man Cave combo. Which is like a sewing room with a flat screen TV and an extra desk. But as I’ve done more and more blogging (and more and more crafting), it became apparent that I needed my own dedicated space. Space where I could close the door to keep children away from projects in progress. And a room where my husband didn’t have to constantly see the mess that projects in progress look like! So, I moved into this room, and have been getting settled ever since.
Several months ago, Angie from The Country Chic Cottage asked some blogging friends if we’d like to join her in a big craft room tour. I thought it was the perfect excuse to get my craft room done. Because nothing helps to get work completed like a looming deadline, right? And since the deadline was MONTHS away, I had plenty of time, right? I did get some work done each month, and although the room isn’t perfect (I don’t know if it ever will be?) it is presentable, and that’s really what I was shooting for.
So, if you’re on the Craft Room Tour, and you popped in from the last stop over at Mad In Crafts, Welcome! If this is your first stop, you can go to the beginning of the tour, or you can enjoy this post and click on the link at the end to go to the next stop on the tour.
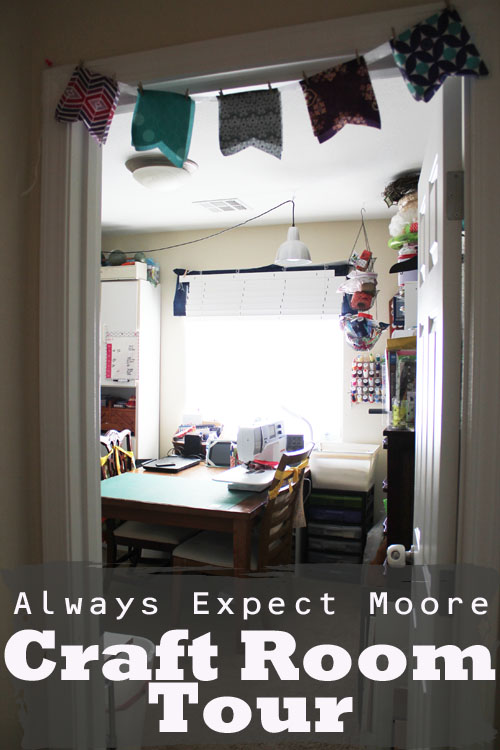
So, ready to take a peek into my space? Let’s get started! When you first walk into the room, you’ll see my main crafting area right in the middle.
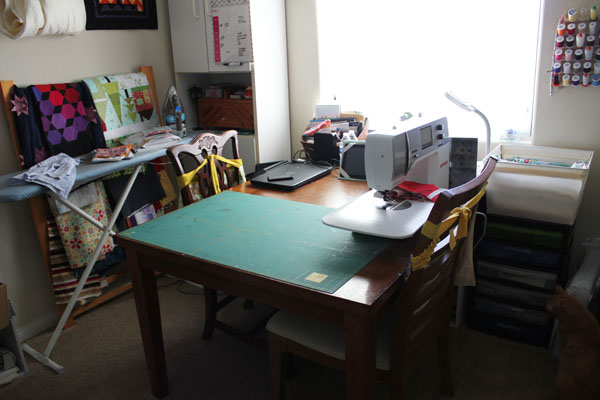
This is a dining room table I bought at a furniture outlet. It is super sturdy, and gives me plenty of room for my large cutting mat. It is more-or-less centered underneath the large window. If you go back and look at the first picture, you’ll see that the window has a very… um… interesting valence. The valence that is there is the old sports-themed valence from when this was my son’s room. I have plans to switch it out. It is covered by the blinds, which are tucked up. That’s because my son cut the cord from the blinds, so they no longer function properly. Instead of blinds, I have a plain piece of cotton covering the window. This does a great job of diffusing the light when I take craft photos in this room on bright days. On cloudy days, I just flip it up over the valence, and out of the way.
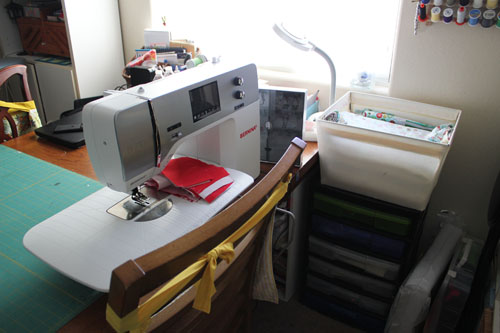
On one side of the craft table is my sewing machine. This is a Bernina 710, and she is brand new. I’m loving playing with this new machine! On the sewing side of the table is a tall unit with small bins that hold various projects in progress. On top of it is a fabric bin that currently holds two quilts that need quilting.
On the other side of the table is my laptop. That’s where I’m sitting right now as I write this!
You might notice that I have aprons tied to both my chairs. I love both these aprons, but never wear them – this way they get a little use, I can enjoy them, and they are close at hand if I ever need them!
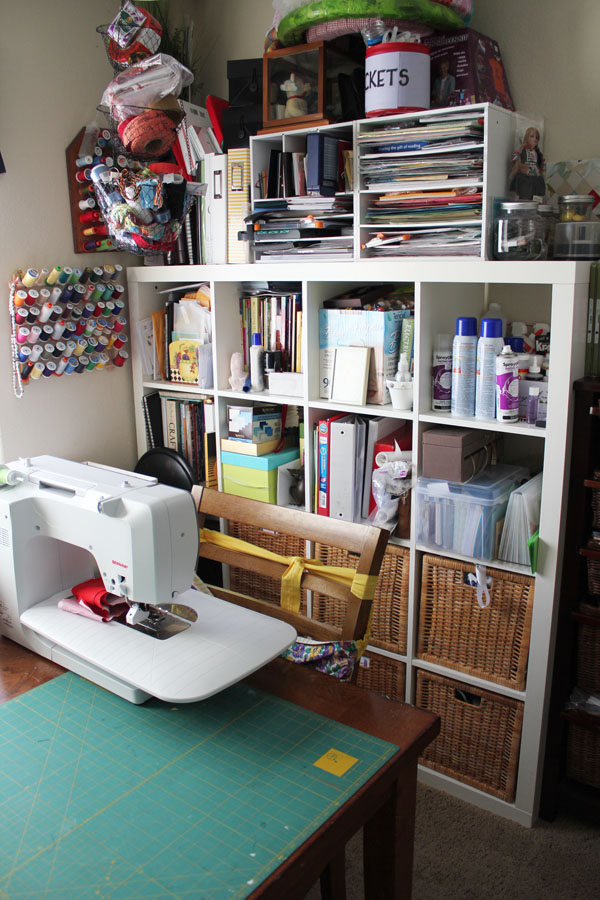
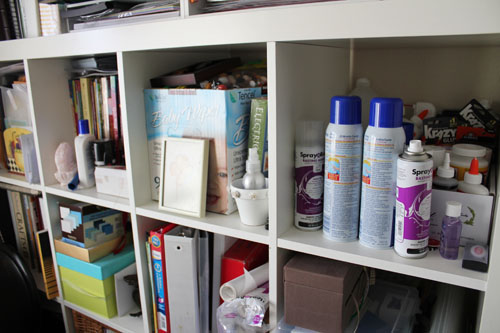
Behind the sewing machine is a large shelving unit that I bought at IKEA about a decade ago. I love this shelving unit! It is sturdy enough to have made it through several moves, and has been used in lots of different ways. Currently, it holds lots and lots of craft supplies! On top of this unit are a bunch of wreaths, and two smaller units filled with scrapbooking supplies.
The cubbies are somewhat organized. The far right cubby holds all my adhesives and glues, the next has kids’ crafting supplies (like pom poms and pipecleaners) in the wipes box, and the last two hold books and binders.
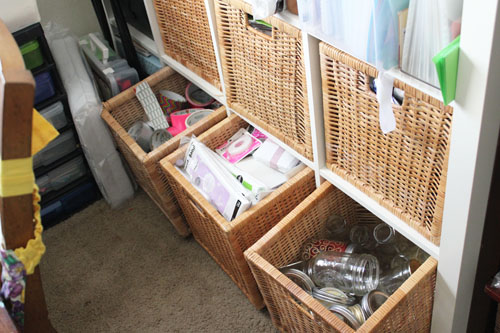
The bottom cubbies have baskets filled with supplies. From back to front: Duck Tape, Therm-o-Web, and Mason Jars.
The other side of the room is just as stuffed!
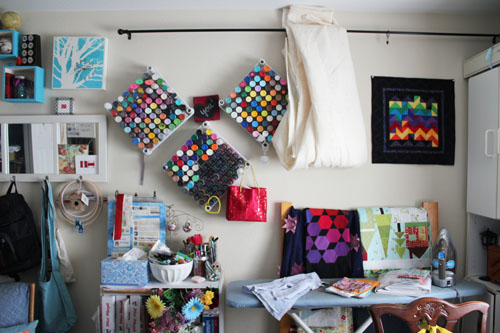
I have a large rod with batting hung on it. Right now the batting is all tucked up, but when I need it, I unpin it from the top, and spread it out to make a design wall for quilting. To the right of the batting is a mini quilt I made, and to the left are my paint storage racks. Jessica from Mad in Crafts had paint storage racks like these that her dad made for her. I showed the post to my mom, and asked her to make me some! I love how it frees up drawer space, and adds color to the walls!
Over on the right you’ll see another tall shelving unit.
Inside are various sewing notions, buttons, ribbons, and more. It looks nice and neat when the doors are closed.
Next to that is my ironing board.
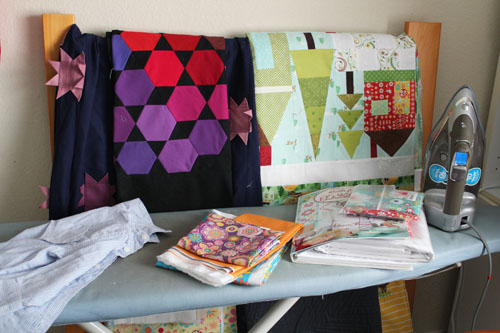
The ironing board never comes down. The mechanism for holding it up broke, so I tied it in place with a shoelace (true story). Now it stays up permanently. Which is fine – it gets a lot of use.
Behind it is a quilt rack. It is actually a piece from the crib we no longer use, and the slats are perfect for hanging quilts. Most of these are waiting for something – borders or quilting.
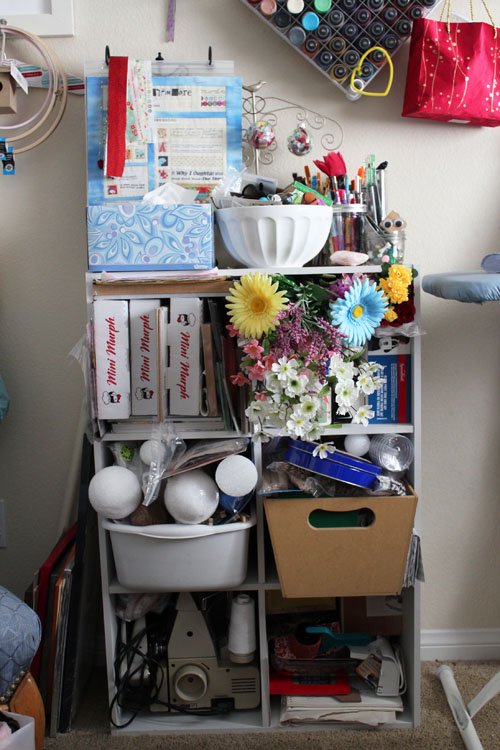
To the left of the ironing board is another shelving unit.
On top are some mason jars filled with pens, pencils, and paintbrushes. And a bowl filled with more odds and ends. In the unit are all kinds of things – clay, styrofoam balls, dowels, maps, flower stems… even some mini pizza boxes! Most of the items in here are things that I hope to use in a craft project one day. It is like a mini hoarding unit. At the bottom you’ll see my serger tucked away.
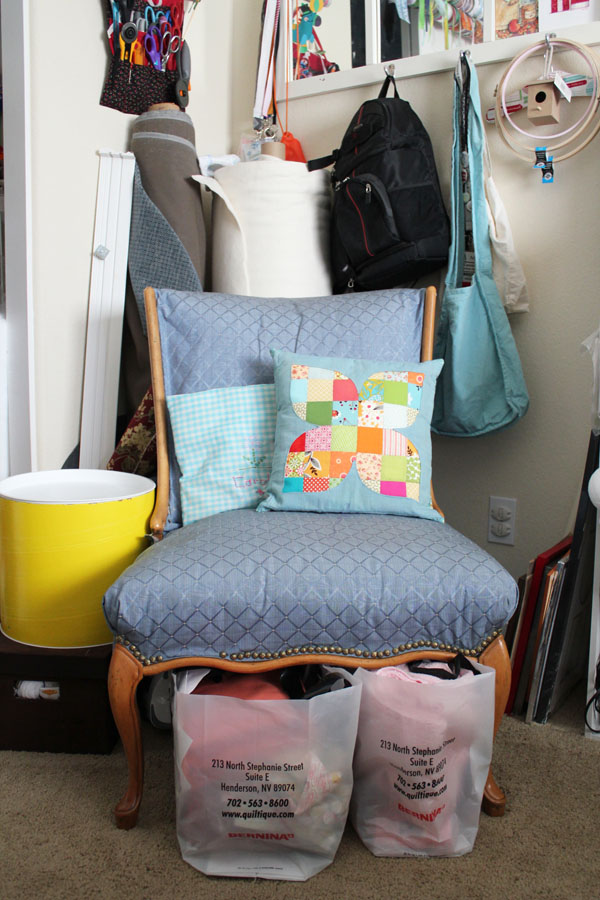
To the left of that is my comfy chair.
I bought this chair about 15 years ago at a thrift shop. It was covered in yellow velvet, and all the wood was painted black. I stripped off the paint, and re-upholstered it. On the chair are a couple pillows. I made the one on the left as a child. The one on the right was a gift at my Modern Quilt Guild Meeting. Under the chair are a few bags of fabric – all the fabric in these bags has deadlines. There is a quilt, and some projects for upcoming classes at the quilt shop.
Behind the chair is a large bolt of batting, and a bolt of upholstery fabric. Also bags and embroidery hoops hanging from a mirror. To the left of the chair are two more storage bins. The one on the bottom holds embroidery and yarn. The top holds denim squares for a jeans quilt I want to make. Someday.
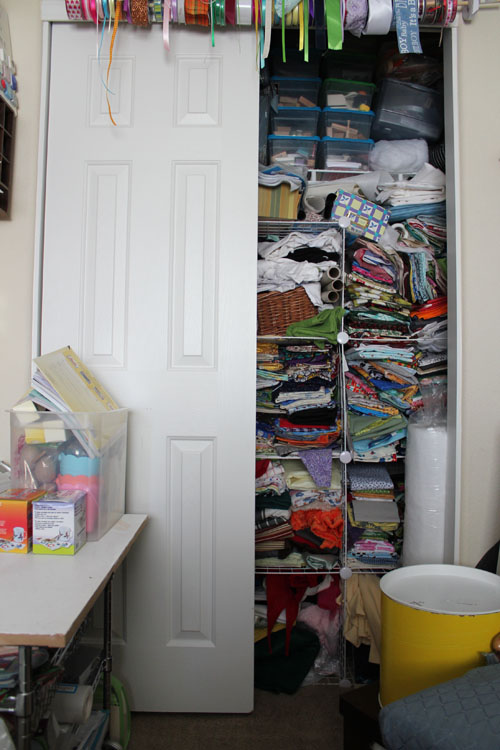
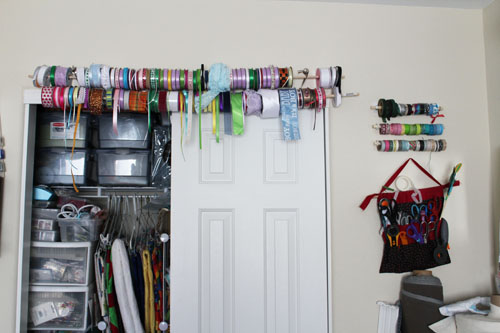
That brings us to the closet. I’ve been quilting since I was 12, so I have a decent fabric stash. That needs some organization. Ugh! Above the fabric, on the shelves, are boxes filled with stamping supplies.
On the left side of the closet are boxes with UFOs (that is Un-Finished Objects for you non-quilters) on the bottom, and bins with jewelry making supplies on the top, and a bin with my glue guns on top of that. Also hanging in the closet are more quilt tops. Some need quilting, some just need binding.
Above the closet I have two long dowels of ribbon. I used to have my ribbon in a giant, messy box. This makes it so much easier to find the ribbon I need for a project.
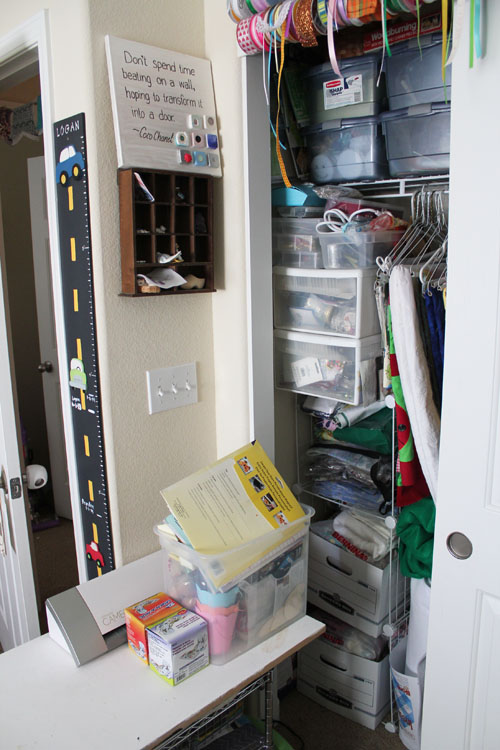
On the right you’ll see a similar solution for washi tape, and underneath the washi tape holder, my scissors pocket storage, which was one of my early blogging tutorials, and I still love.
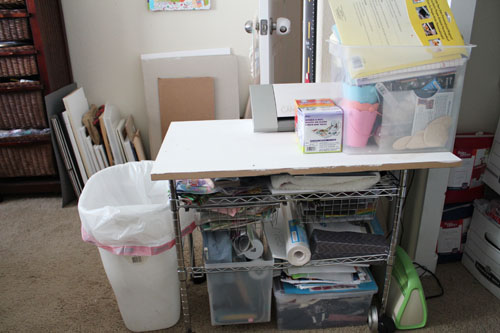
Partially in front of the closet is a small rolling table. On top is my Silhouette, and a bin of supplies for upcoming projects – reviews for Craft Test Dummies and some more Easter crafting I’m hoping to get done. The top of this table is often used for craft projects. One side is white, and the other side is black chalkboard. I can just flip over the table top if I want a different background.
All that leaves us is the area over by the door that we came in!
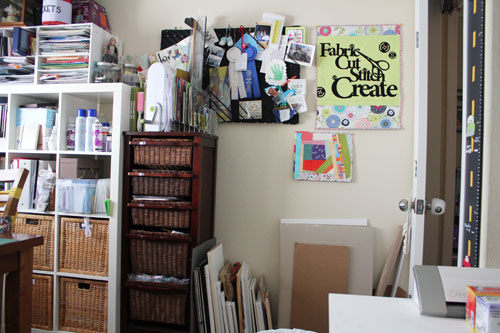
Behind the door are a few mini quilts – the top one uses the Laser Cut Applique, and the bottom one is from the improv piecing class I took. To the left is a ribbon-crossed black bulletin board. I made this for my wedding, and it held all the seating cards. Now it holds all kinds of little treasures! On the left is a tall brown cabinet, on top of which is my AccuQuilt Go! and a rack with my quilting rulers. The drawers hold extra paint, RIT dye, fabric, and other odds and ends. To the right of the cabinet, leaning up against it, are canvases, extra cutting mats, and trays that I use as backgrounds when taking tutorial photos. Leaning up against the wall is extra cardboard for crafting.
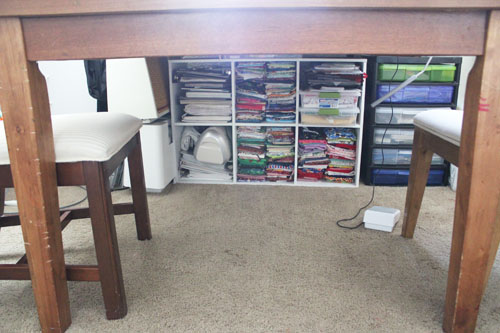
WHEW! We made it all around the room… almost! There’s one spot we haven’t looked yet!
This is under my table! I have shelves that hold projects, binders, and all my fat quarters of fabric. It keeps them accessible, but away from the sun that might make the fabric fade. To the left of this unit are my two older sewing machines. They are no longer used on a regular basis – but I like to have them handy.
I cram a whole lot of stuff into a relatively small space. That’s what happens when you’ve been crafting and sewing for as long as I have… and when you hate letting things go! While getting this room all spiffed up to show you, I did manage to fill one large box with craft supplies that I’ll be mailing off to a family member. I can’t keep everything forever… it is good to purge every now and then! … just don’t tell my husband I said that, or he’ll encourage me to purge a lot more often. I’m not sure I’m ready for that…
Thanks for joining in today! To continue on to the next crafty space on the tour, go check out Amy at The Idea Room.


Comments & Reviews
That new sewing machine looks fun! I just finished a quilt and I honestly don’t know how quilters can get all the seams straight; it’s tough work! Thanks for sharing your space!
You made it!! It looks great! And that fabric stash….amazing!!
Rooms like this make me wish the quilting/sewing genes hadn’t skipped me. I can only sew squares. Love how you are using your space!
what fun 🙂 love your crafting space!! miss your beautiful face! xoxox