• Skip to primary navigation
  • Skip to main content
  • Skip to primary sidebar
Home About Subscribe Summer Sew Camp Disclosures

Always Expect Moore

Quilts & Pattern Design

  • Cricut Maker BOTW
  • Quilty5k
  • Gallery Wall QAL
  • Trunk Show
  • Guild Resources
  • Pattern Shop
  • Free Patterns
Home About Subscribe Summer Sew Camp Disclosures
  • Cricut Maker BOTW
  • Quilty5k
  • Gallery Wall QAL
  • Trunk Show
  • Guild Resources
  • Pattern Shop
  • Free Patterns
Home » Blog » Quilt » English Paper Pieced Quilt Block

English Paper Pieced Quilt Block

Created On: April 14, 2014  |  Updated: May 7, 2018  |   1 Comment

Have you tried English Paper Piecing? EPP is a method for hand-stitching together fabric with a paper template to keep its shape. Most English Paper Piecing you see nowadays uses hexagons (or hexies), but triangles and squares are popular shapes as well.

If you’d like to try your hand at EPP, here is a simple printable sheet that will take you through EPP basics so that you can stitch up your own project. I like to start beginners off with 1.5″ hexagons, but you can use whatever size you like. Grab the free English Paper Piecing Basics Printable here.

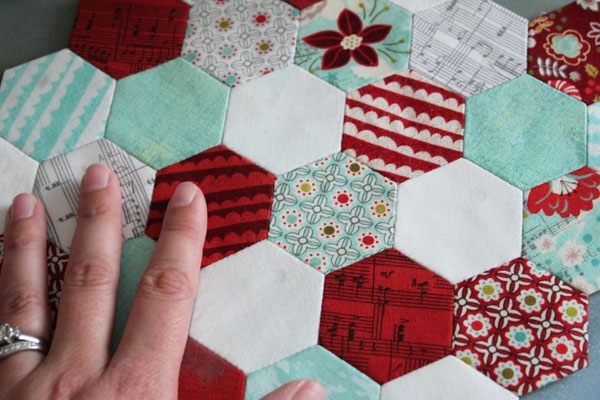
But once you’ve stitched together your Hexagons, where do you go next? What do you do with this masterpiece? A great option is to turn it into a quilt block for a larger quilt. I made this block as part of a charity quilt, so it will be combined with lots of other blocks to make one amazing quilt! I’ll show you how I did it.

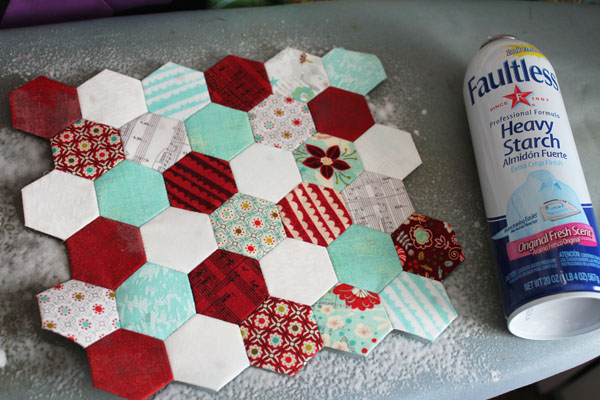
Start with your EPP piece. You want to measure it to make sure that it is larger than the unfinished size of your block.

block ready for trimming


Lightly spray with spray starch or Best Press.

spray with starch

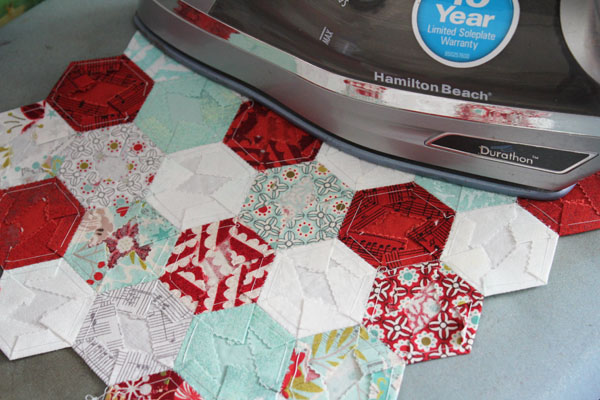
Iron flat. Since you starched the front, be sure to iron from the back – this is the easiest way to not burn the starch!

When it is as dry as possible, it still may be slightly damp to the touch.

still damp to touch

Carefully remove any remaining papers from the back of the block.

taking out papers

Press again.

pressing again

Start trimming up your block. Take as little off as possible, you can always cut it smaller later.

trimming block

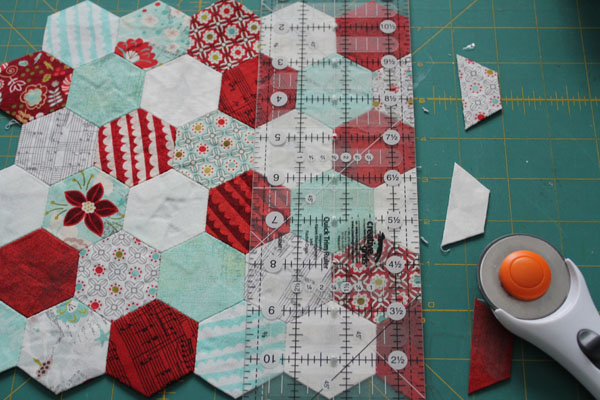
Cut all four sides. My block was to be 8″ finished in the quilt, so I made it 8.5″ (to accommodate seam allowances).

back of trimmed block

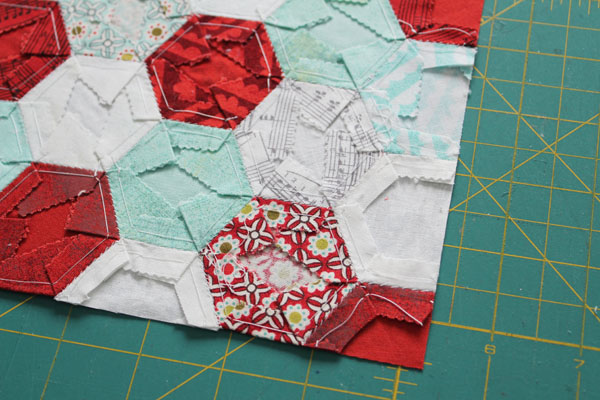
Be VERY careful with your cut block. Where the seams are cut, it is very weak. Add stay-stitching at about 1/8″ to support the block. This will be inside the seam allowance, and not visible on the final quilt.

stay stitching block

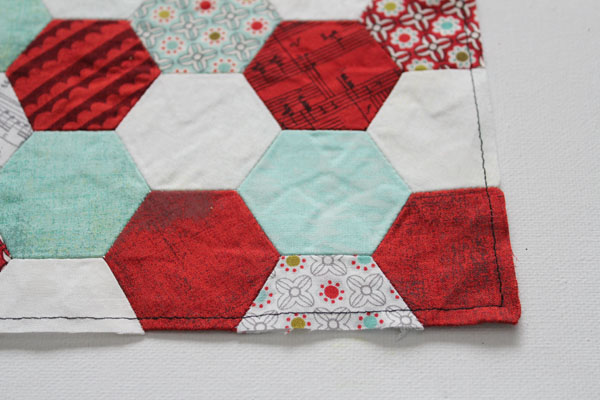
Your block is ready! Make some more if you like, and stitch them together with some fun sashing for a great quilt!

posted in: Quilt, Sewing Tutorials

Previous
Craft Room Tour
Next
Easter Bunny Pocket Shirt

Reader Interactions

    Leave A Reply! Cancel reply

    Share your thoughts!
    Your email address will not be published. Required fields are marked with *

    This site uses Akismet to reduce spam. Learn how your comment data is processed.

    Comments & Reviews

  1. Keri Lee Sereika says

    November 2, 2014

    Wow that is a beautiful block. Oh the time it must have taken to get all those pieces handsewn together! EEEKS!

    Reply

Primary Sidebar

Hi, I'm Carolina!

I’m a Quilt Pattern Designer, Award Winning Quilter, and fan of all things quilting. I live in San Diego with my husband, our two boys and our pets. I love keeping both my hands and mind busy, so I’m always working on lots of projects. You’ll find lots of them shared here!

More About Me

Let's Keep In Touch!

I'll let you know about what's new in quilting, freebies you'll want to snag, and brighten your inbox about once a week!

subscribe
90% Faster Than Rotary Cutters

Fat Quarter Shop Quilting Fabrics and Supplies

Instagram Facebook Pinterest YouTube

Recent Posts

  • Flying Pig Quilt Block
  • Bunny and Carrot Quilt Block
  • Free Fancy Drink Quilt Block
  • Dutch Row Houses Quilt Block
  • Quilted Sports Jersey Numbers

Archives

Featured Projects

  • Everything you want to know about Pre Cut Fabrics!
  • Scrappy Placemat - easy to make scrap project
    Scrappy Placemat using Strips and Scrap Tape
  • Sewing Kaleidoscope SVG File
  • Drawstring Backpack
  • Carolina holding fabric marking pens
    Choosing Fabric Marking Pens

Let's Keep In Touch!

Brighten your inbox about once a week!

Always Expect Moore Submark Shop Patterns

Browse

  • Ruler of the Month
  • Quilty5k
  • QuiltMath
  • Cricut Maker BOTW

Shop

  • Digital Download Patterns
  • Quilting Notions
  • Quilt Stickers
  • Quilt Tees

Connect

  • YouTube
  • Instagram
  • Facebook Group
  • TikTok
©2025, Always Expect Moore. All Rights Reserved. About Disclosures
Back To Top
Design by Pixel Me Designs
×

Let's Keep In Touch!

I'll let you know about what's new in quilting, freebies you'll want to snag, and brighten your inbox about once a week!