Getting your quilt top finished doesn’t mean you’re done with your quilt! In the quilting world, we call a finished quilt top a “flimsy.” Which isn’t derogatory at all… it just means the quilt doesn’t have the batting and backing attached to it yet… and it is still, well, flimsy! So, this week I’m sharing with you two ways for quilting a mini quilt. Which is really one of the first times you have options in making this quilt… and you have a lot of them! There are a couple different ways you can baste your layers. I’m going to show you the two most popular ways – spray basting and pin basting. And there are lots of different ways to quilt your quilt. I’m going to show you two different techniques – Walking Foot Quilting and Free Motion Quilting.
This post contains affiliate links which help support this site at no extra cost to you.
Basting the Quilt
First let’s talk about basting the quilt. “Basting” is a sewing term that basically means to temporarily secure layers together. I have used three different kinds of basting – Pin Basting, Spray Basting, and Thread Basting. I’m going to go over the first two here.
With Pin Basting, you use safety pins to secure the layers together. This is a fairly quick way to baste. Pins are placed at intervals (every 6″ or so is a great number) to hold the layers together. As you quilt through the layers, securing them permanently, you remove any pins that are in your way. Once you’ve finished quilting you remove any pins that have been left behind. The pros of pin basting are that it is inexpensive – safety pins are inexpensive to purchase, and reusable. Once you have a stash of pins for basting, you won’t need to buy them again. Also, pin basting is preferred over spray basting for people who are sensitive to chemicals. However, it can be tedious to pin across a large quilt. And, the quilt is only secured in the pinned spots. It could potentially shift in the spots between the pins. You’ll see me go over Pin Basting in the Walking Foot Quilting video below.
Spray Basting is my go-to method, because it is fast. I can spray baste even a large quilt in less than 30 minutes, and have it ready to quilt. It can be expensive – the cans are more expensive than safety pins, and when they run out you have to buy more. I have used all of the following basting sprays, and they have all worked well: Thermoweb Basting Spray, Dritz Spray Adhesive, 505 Temporary Spray Adhesive, and Sulky KK2000. If you are sensitive to chemicals, you might want to look at the label before using one of these sprays. They should always be used in a well-ventilated area. If I’m gifting the quilt to a baby or small child, I like to pre-wash the quilt before gifting to remove any spray residue.
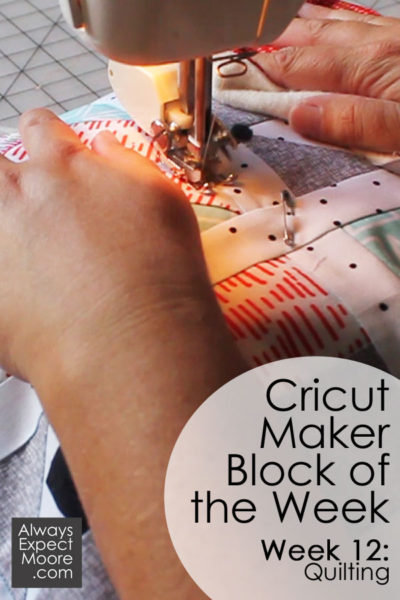
Quilting a Mini Quilt with Walking Foot Quilting
Now that we’ve talked about basting, let’s talk walking foot quilting. If you’ve never quilted a quilt before, this is a great option. You need a different foot for your machine. This foot is called a “walking foot.” With a standard sewing machine foot, the feed dogs on the bottom pull the fabric through the machine. When you have several layers, you want the whole thing (we call this a “quilt sandwich”) to feed through evenly. The walking foot essentially adds a set of feed dogs to the top that pair up with the feed dogs on the bottom. This pulls the whole quilt through evenly and prevents puckers or shifting.
Check out this video which shows you how to pin baste, and shows you how to use a walking foot to quilt your quilt:
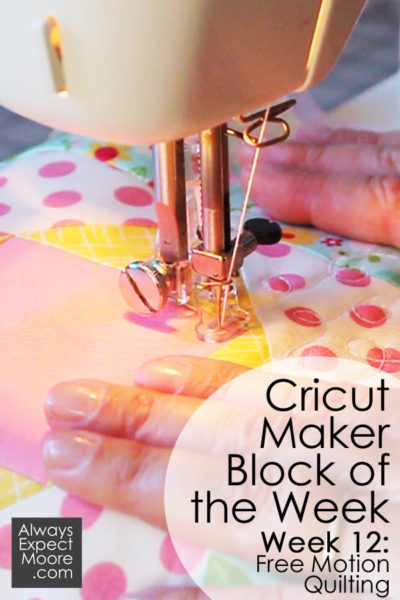
Quilting a Mini Quilt with Free Motion Quilting
For Free Motion Quilting, you don’t use the feed dogs at all. You move the fabric around under the needle. To do this, you engage the lever that lowers the feed dogs. Also, you use a sewing machine foot that has less drag on the top of the fabric (and more visibility around the needle) like a free motion foot or embroidery foot. It can take a little practice to get even stitches while free motion quilting. You want to sync the speed at which you move the fabric under the needle to the speed at which the needle is moving (which is controlled by how hard you press on the presser foot). I liken this to turning a corner in a car. You want to turn the steering wheel at a speed that is in sync with how fast the car is going – once your foot, hands, and brain are all on the same page, turning corners is no problem!
Check out this video which shows you how to spray baste, and shows you the basics for free motion quilting your quilt:
If you’d rather not bind the quilt, you can skip to Week 14. This is a bonus video that shows you how to turn the quilt top into a lovely large pillow, instead of a mini quilt!

Comments & Reviews
Many thanks for the tutorial!