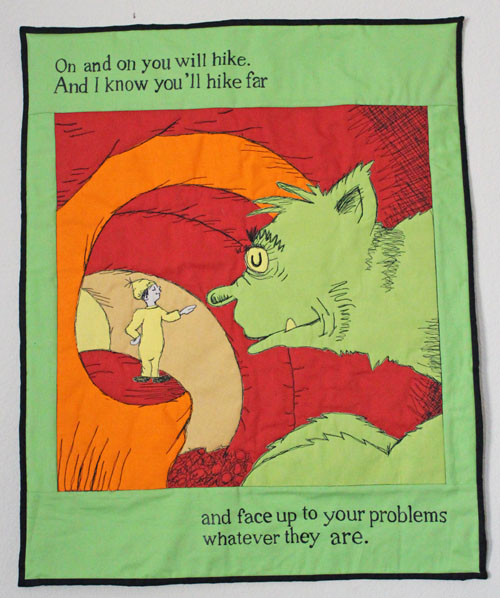
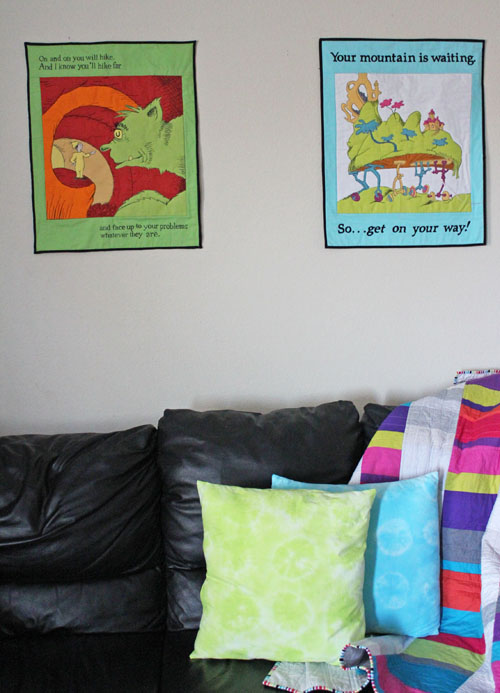
Last year I made a quilted wallhanging using a simplified version of one of the last images in my favorite Dr. Seuss Book – “Oh, the Places You’ll Go.” I think the Dr Seuss Quilt is one of my favorite things I’ve made, and now it has a companion in a second Dr Seuss Quilt. I love the quote from the book. I love the whimsy of the image, and I love that it is the first thing I ever free-motion quilted. I decided to make a companion piece this year, using the same techniques, but a different image from the same book. My hope is to make another one next year so that I can have the three hanging side-by-side in the playroom. Here are the two I have so far.
I used basically the same technique I did last year. I started by drawing out the image, and picking fabrics. I labeled my drawing so that I would know what color each part would be.
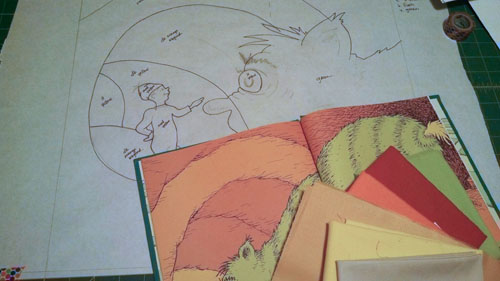
Then I created Printable versions of each part, fused them onto the right color fabric, and fused those onto the background. I used the dark orange as a background color, cut it to 18″ square before fusing on all the pieces.
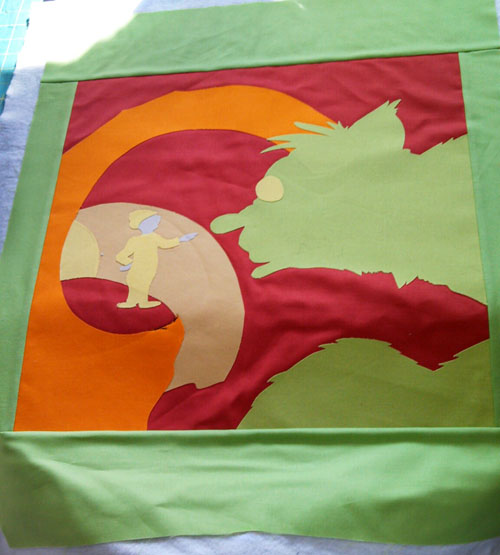
Then I started stitching. Using the image from the book as a reference, I spent about 4 hours quilting, which adds all the beautiful detail. I love that it doesn’t have to be perfect. In fact, the less perfect, the better! Here it is quilted, but not bound.
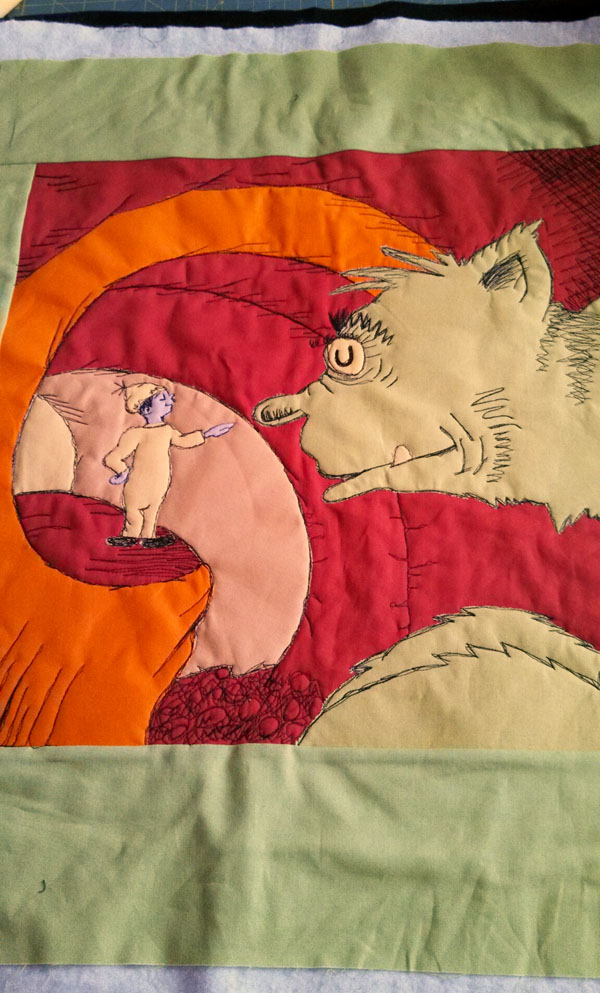
I did make one change from last year. I painted in the lettering. Last year I took the time to cut out each individual letter, then press it, and stitch it in place. Since I was doing four lines of text this year, and they were going to be smaller, I decided that painting them in was the best choice. It was tedious, but so much better than cutting and stitching!
After quilting, I trimmed everything down, and bound the quilt, adding pockets in the corner so I could easily add a rod for hanging.
If you’re interested in making your own, here is what you’ll need:
OH THE PLACES YOU’LL GO QUILT
(finished size 21″x26″)
Fat Quarter Dark Orange fabric, cut to 18″ square.
1/2 yard green fabric (for borders – cut two pieces each 2″x18″ and two pieces 4.5″x21″)
1 1/2 yards black fabric (binding, backing)
Black thread
Small pieces (I used Fat Quarters) of the following colors: Orange, Light Orange, Light Yellow, Medium Yellow, Green, Light Gray (for the child’s hands and face)
Applique pattern pieces printed onto Jenny Haskins Web Magic (printable fusable for applique) – found at quilt shops that cater to machine embroidery
Basting Spray
Batting
Mechanical Pencil
Here are the pattern pieces:
Green 1 Fusible
Green 2 Fusible
Medium Yellow Fusible
Orange 1 Fusible
Orange 2 Fusible
Seuss Light Yellow Fusible
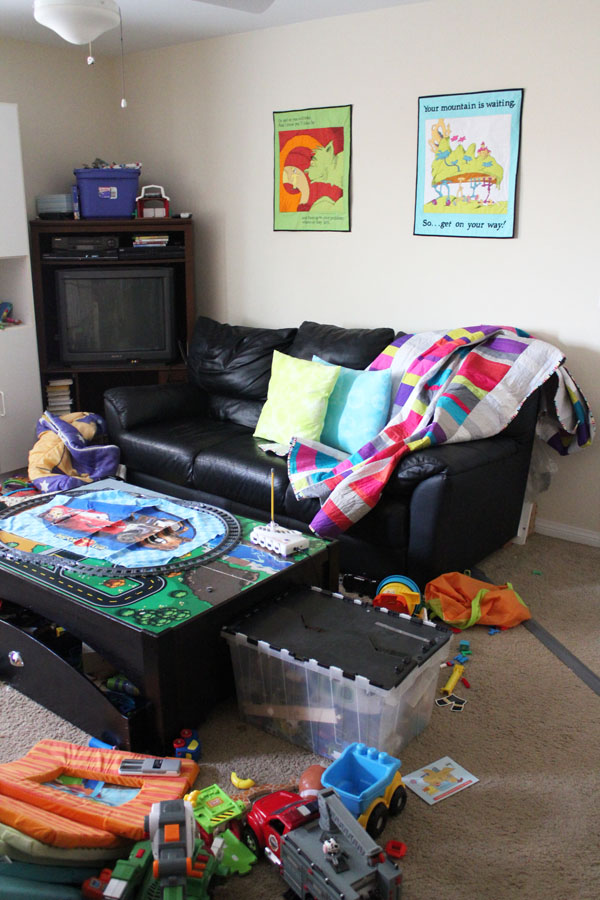
Even in my messy playroom, I love the way these look on my wall!
Please note: These instructions are for personal use only. The pattern and quilt are not for sale. The pattern is intended for personal use only. If you’re interested in purchasing Dr Seuss fabric, Robert Kaufman has awesome Seuss Fabrics.

Comments & Reviews
omg. I am SOOOO impressed!!!!
This turned out beautifully. The whole artistically messy thing is something I struggle with sometimes, but my projects always turn out better when I loosen up and go with it. <3
I LOVE this one! I didn’t see how to download it, though. (You probably won’t know which one I’m talking about – it’s the 2nd Dr. Suess pattern – “hiking far”.)
I moved to a new town a year before the pandemic. I haven’t been able to sew because there is too much stuff in the way. Some of it needs to be donated (I don’t have a car), some just needs a better resting place and some will be OK once I start sewing. A neighbour now has a pickup truck and might be willing to retrieve some dressers I’ve found on Facebook Marketplace for the price of gas. And help me carry them in.
I am designing a winter coat that turns into a sleeping bag for the homeless. There is a gathering place, Hope Heaven, for the homeless. I went there and talked to some to see what they needed – general consensus was “lots of pockets!” That’s not a problem – that’s exactly what I would want. I have donations of jeans that I will use as the outside fabric after I cut them into strips. Of course, I will try to make an attractive design/ I volunteer at a charity thrift store. They gave me a huge red canvas bag – at least a meter (yard) of fabric and a zipper. I will use that to add some red strips.
I have seen several examples of this type of design on the internet. The pattern for one of them, in Detroit, is being used in a mini factory that hires homeless workers to make more. I’m hoping that Hope Haven might be able to do something like that.
I just thought – maybe I will use this pattern of yours for one of the interior pockets!
Anyway, thanks for free patterns.
My pleasure!