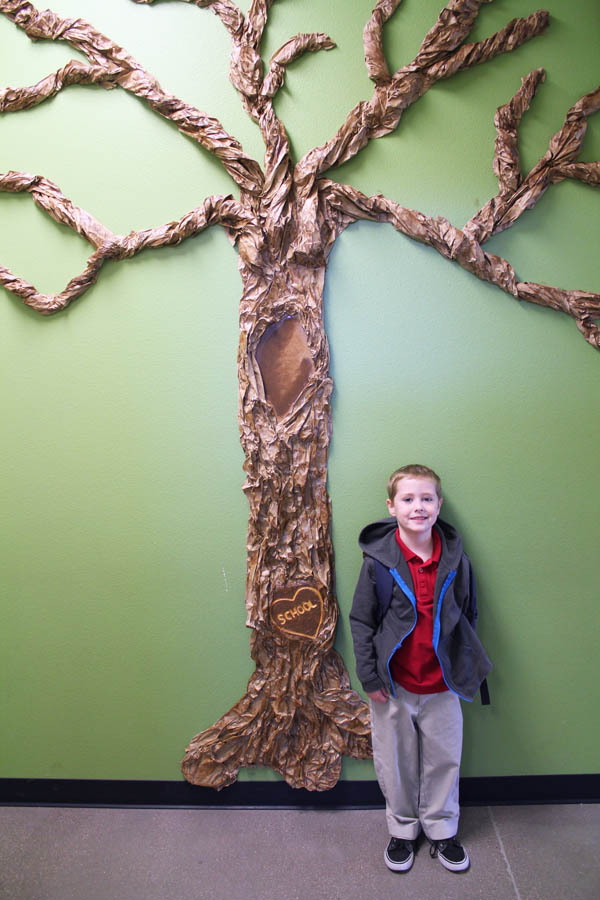
One of the best things about having a school-aged kid is the fun projects. Yes, I’m going to be coming back to this post in a couple years, after drowning in school projects, and laughing at my former self who got excited when teachers asked for help. But right now, in this moment, it is pretty awesome. I love helping out in my son’s classroom, and this is one of those fun projects.
Little Moore’s teacher is a self-described non-crafty man. I offered to help out with some crafty projects, as needed. He wanted a big tree in the hallway that could be changed out for the seasons. Basically, just the trunk and branches. I told him that not only would I make it, but it would be awesome. Because I’m a lot of things… but humble is not one of them (however, awesome is totally one of them – ha!).
I’m not giving you a step-by-step here because I’m pretty sure that the demand for giant tree tutorials isn’t worth the time it’ll take me to edit the photos… but I’ll give you the highlights.

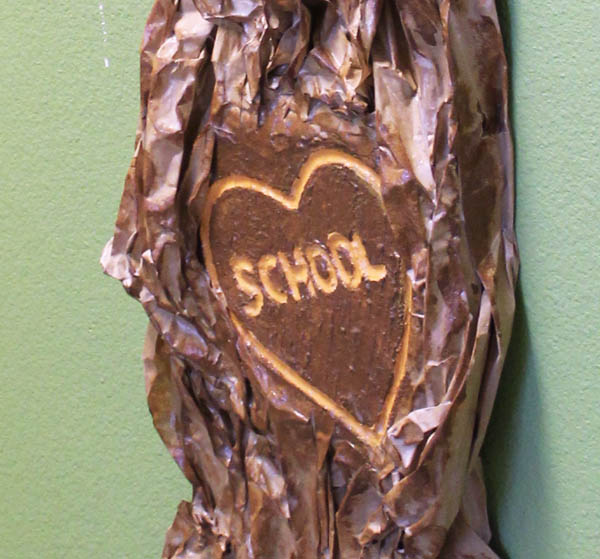
I prepped the trunk at home. I used Foamcore cut into the right shape. The “carving” on the tree is a piece of styrofoam. I carved the heart and the word “school” into the heart, then covered it in Smooth Finish. After the Smooth Finish hardened, I painted it brown, with the carving a lighter brown so it would really stand out.

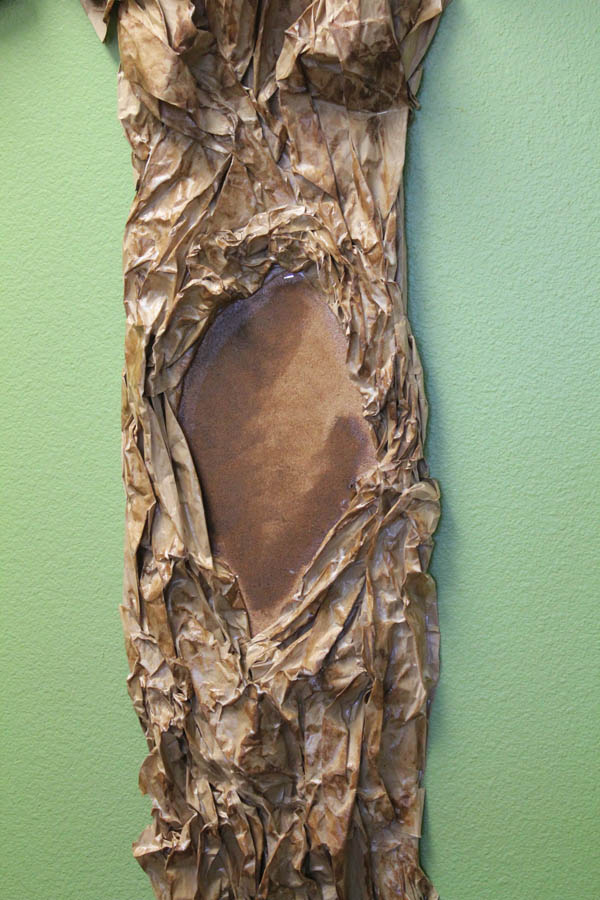
At the top of the trunk, I put a piece of cork. This way the teacher can easily switch out things in the hole in the tree.

I lined up my foam core, styrofoam, and cork pieces, and Duck Taped them together. I used some extra cardboard on the back to give some extra strength to the seams. Then I added on the bark.
The bark is crumpled up paper from a Fed Ex Box. It was already crumpled up, which was perfect. I just wrinkled it more, and used a TON of Mod Podge to secure it onto the tree trunk. Lots and lots of texture. Once that all dried, I used a sponge and some brown paint, lightly went over the whole trunk with the brown paint in spots (more texture!). Then gave the whole thing a thick coat of Mod Podge. So thick that it isn’t fully dry in these photos, and you can see some of the white!
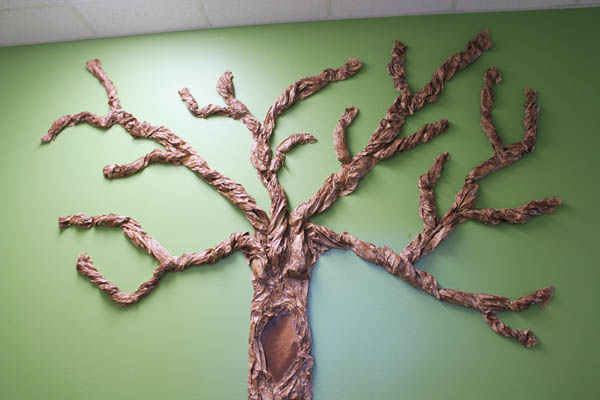
The branches were fun to do.

When I put the rest of the brown paper trunk on, I left 5 long pieces hanging off of the top, then took the trunk to school. I used a staple gun to secure the tree to the wall. Then I twisted the brown paper branches into place, using the staple gun to secure them. I tore off any extra, and added sub-branches off the 5 main branches. Once all the branches were up, they got a quick swipe of brown paint sponged on, and then a coat of Mod Podge.
It took about 5 hours at home, and about another 2-3 at the school… but this tree looks awesome.
Any volunteers to try to take it down at the end of the year?

Comments & Reviews
Would like to make this tree in a smaller version, if you could offer more direction. How was the main part of the tree made, what was used/type of material.
Thanks!
Patty
The base is foam core, with strips of torn brown paper, crinkled and Mod Podged over the top. The brown paper came out of a box, where it was used to protect something fragile mailed to me. You can find it in the postal section of big box stores, if you don’t have any lying around.
Hi!
I am a kindergarten teacher and I’ve just moved into a new (and very empty) classroom. I am hoping to make a tree for my reading corner, but my walls are painted cinderblock. Any suggestions on how to attach it to the wall? I am planning to use a large cardboard tube base and butcher paper so it shouldn’t be too heavy, I just don’t want it falling on any of my little readers!
Thanks!
~Maya
Yikes! I’m not sure… You could use 3M Command strips, and then use sewing pins sideways into the 3M strips (instead of the staple gun)…
Magic tape on Amazon
Or try hot glue with glue gun ( I haven’t tried but a coworker has)
I’m planning on making this tree as a project for my teacher’s classroom. Could you provide me a step by step instruction for this? It’s wonderful! You are very creative 🙂 I want mine to come out as amazing as yours did. Thanks!
Sorry, I didn’t make this one as a step-by-step… and I won’t be making another one, so no opportunity to do a step-by-step on it. 🙁
Good luck!
Hi could you give a description on what foam core is? Is it in a can, foam pieces, do you mix it?
I’m from NZ and we don’t have that particular product.
Foam-core is a sheet of foam (about 1/4″ thick) between two layers of cardstock.
Any sturdy cardboard or heavy-duty cardboard should work.
Hello! Could you pleasectell me what kind of mod podge…gloss, matte, satin, etc..!! Many thanks!!!
Regular Mod Podge – Gloss or Matte are both fine. It depends what kind of finish you want your tree to have.
I’m glad you love it as much as I do! Thanks for your lovely comment. <3
Where did you purchase the butcher paper? I want to make this for my classroom! It is awesome.
This was over a decade ago, so I don’t remember! Any shipping supply store online (like Paper Mart) would have it.
This is amazing! Any chance you have a picture of list of the supplies you used, and where you got it!! Thanks! I really want to commit to this for my Kinder class this year.
I did this when my son was in Kindergarten. He is now a Sophomore in High School. Any photos I have would already be included here.