
I’m not sure what to call this. I started with a UPrinting Rolled Canvas. I added some fabric, quilting, upholstery fabric, binding… and hung it on the wall. Though I’m not sure if it is a quilt, a tapestry, or a wall hanging, I do know that I LOVE it, and it was super simple to make!
Supplies:
UPrinting Rolled Canvas
Scrap Fabric
Upholstery Fabric
Spray Adhesive for Fabric (like 505 spray)
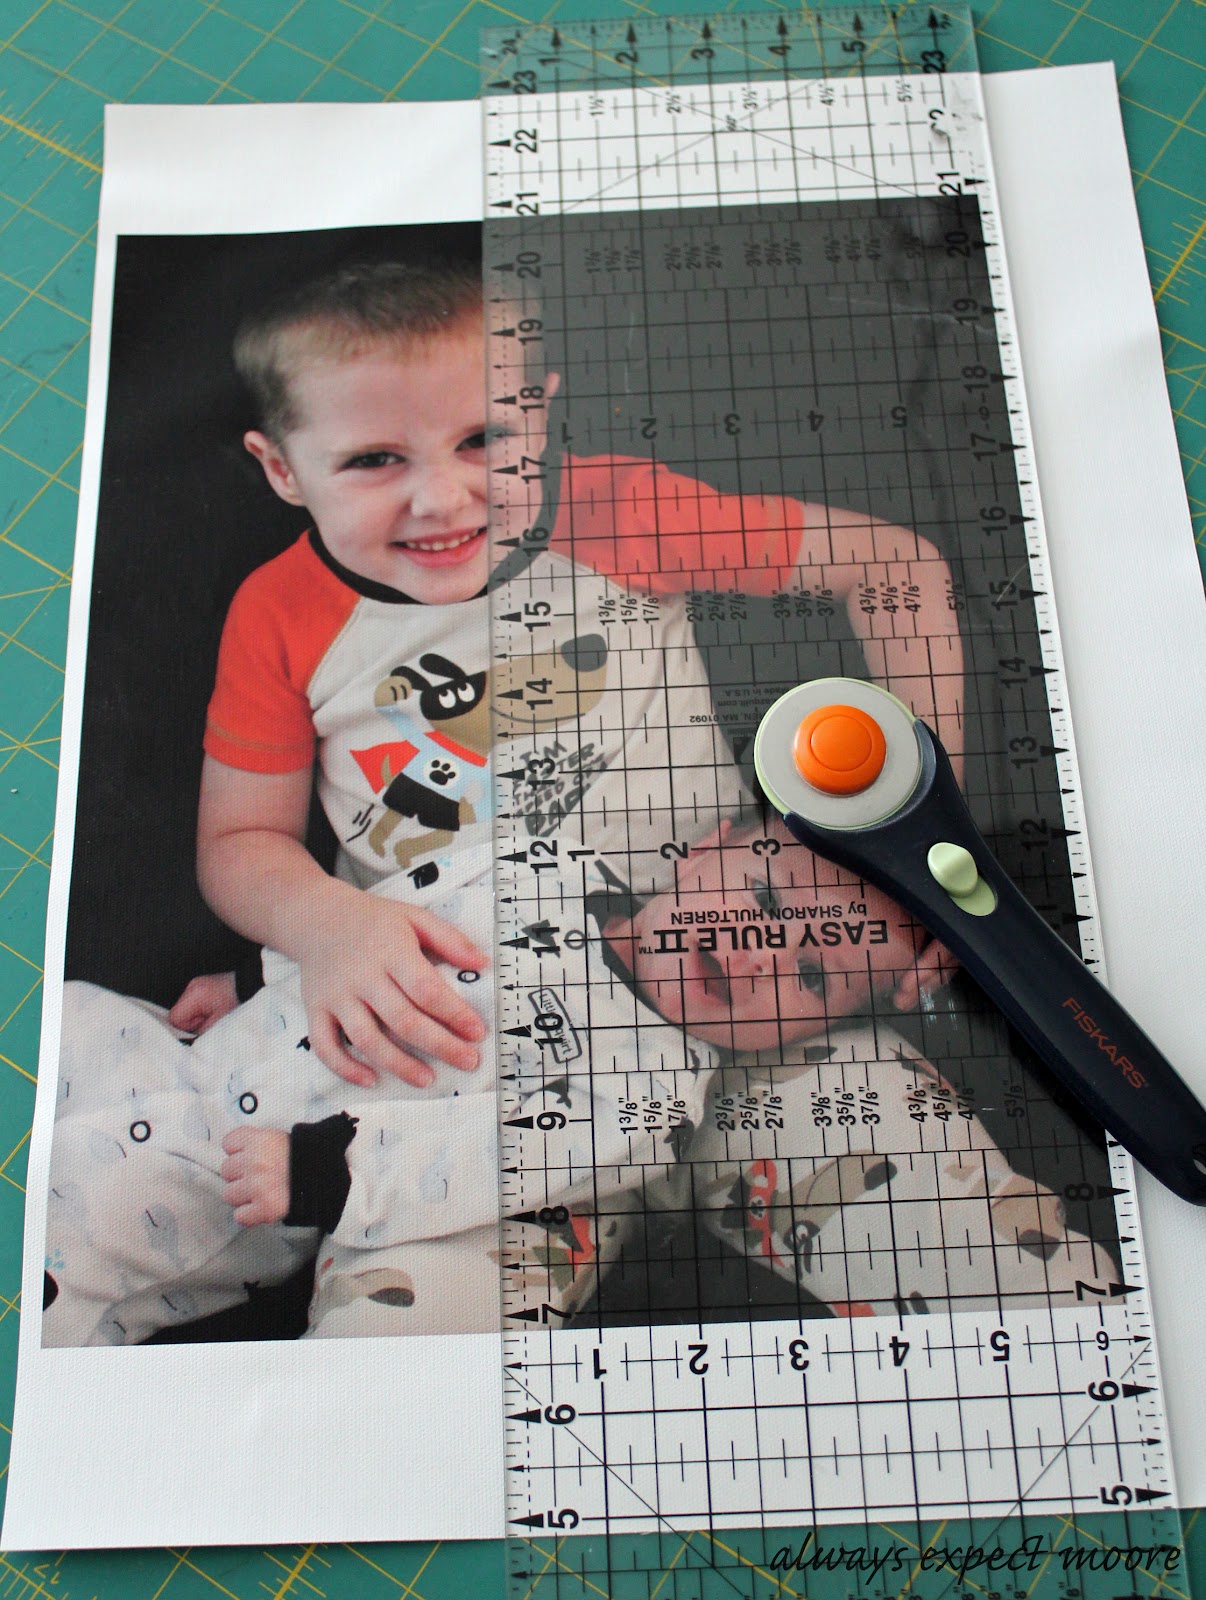
I ordered my rolled canvas from UPrinting. Super easy. All I had to do was upload my picture (I just LOVE this picture of my boys), select my size, and enter my information to have it delivered to me in just a few days. I ordered the canvas untrimmed, but they will trim it at no extra charge.

Since I ordered my canvas untrimmed, I had to trim it down. I trimmed it with a scant quarter inch of white, which will disappear into my seam allowance. I could also trim it to the size of the photo, and my finished piece would be about a half inch smaller.
I cut my fabric scraps into 2.5″ strips. I stitched one to the top and one to the bottom, and then finger-pressed open. I was worried about using a hot iron on the canvas.
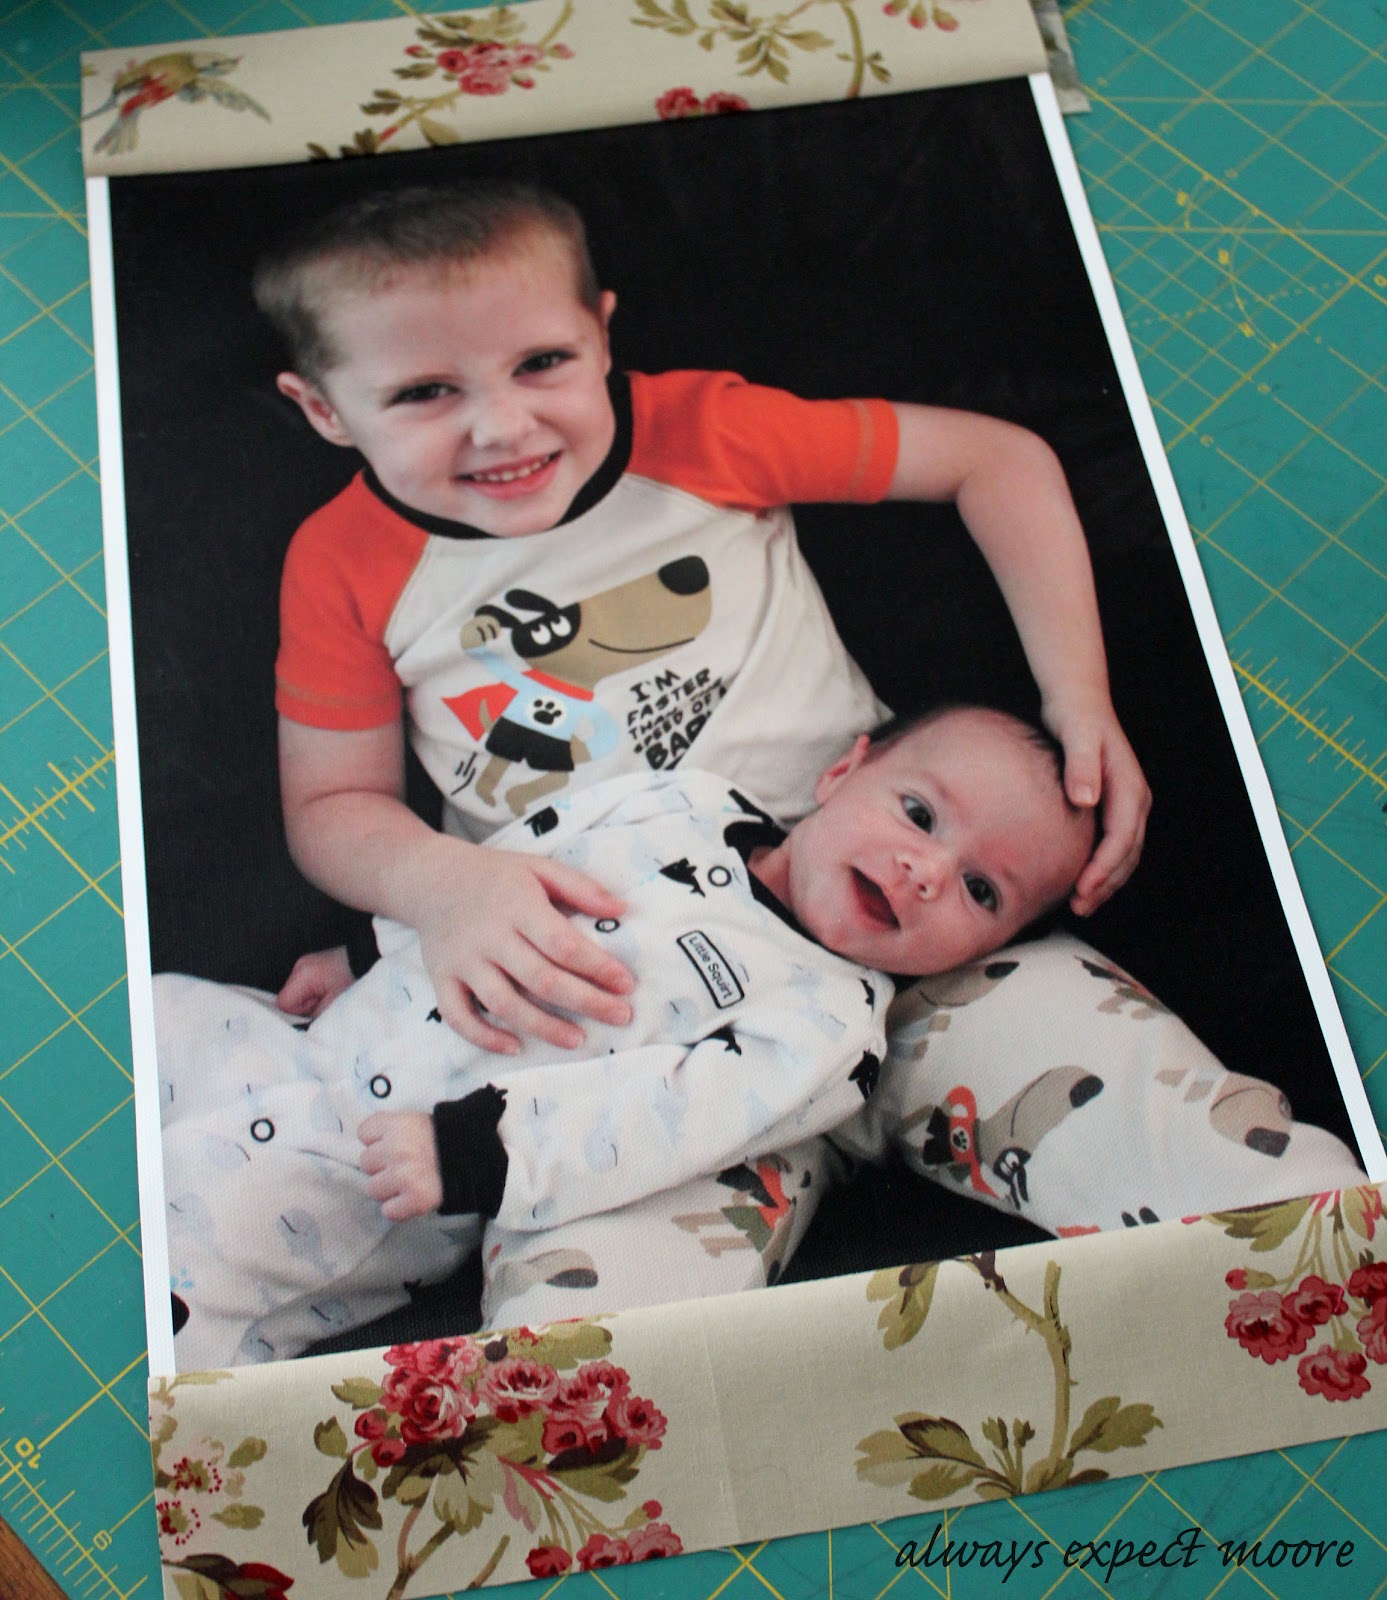
I stitched rows on the sides as well. To get a scrappy look, I cut up the rest of my fabric, and stitched the pieces into one long strip. I used this scrappy strip to add a second border. This one I pressed open with an iron, careful to avoid the printed picture.

I had some upholstery fabric left over from when we staged our house to sell. Six years ago. I swear I’m not a hoarder, despite much evidence to the contrary! I just plan really far ahead. For projects I haven’t even come up with yet. Like this one. Where the fabric was ideal. It matched my color scheme perfectly. I attached it to the back with spray adhesive designed for fabric – 505 spray. I considered adding some kind of batting – either regular batting or a fusible fleece – which would add a puffy, quilted look. In the end, I decided I wanted it to be more smooth and flat, and look less quilty.
I did a stitch-in-the-ditch to secure the layers together, and give it a more hand-made look. After sewing, I trimmed the backing to the size of the front.

To make it easy to hang, I added corner pockets to the back of the wall hanging. These are super simple, just squares of fabric folded into triangles and stitched into the corners when the binding is sewn on. Easier than adding a hanging sleeve, and for a small wall hanging, so simple. I just cut a dowel down to size and tucked it in the corner pockets to hang the piece when finished.

I bound the whole thing with a dark brown binding, and hung it on the wall.
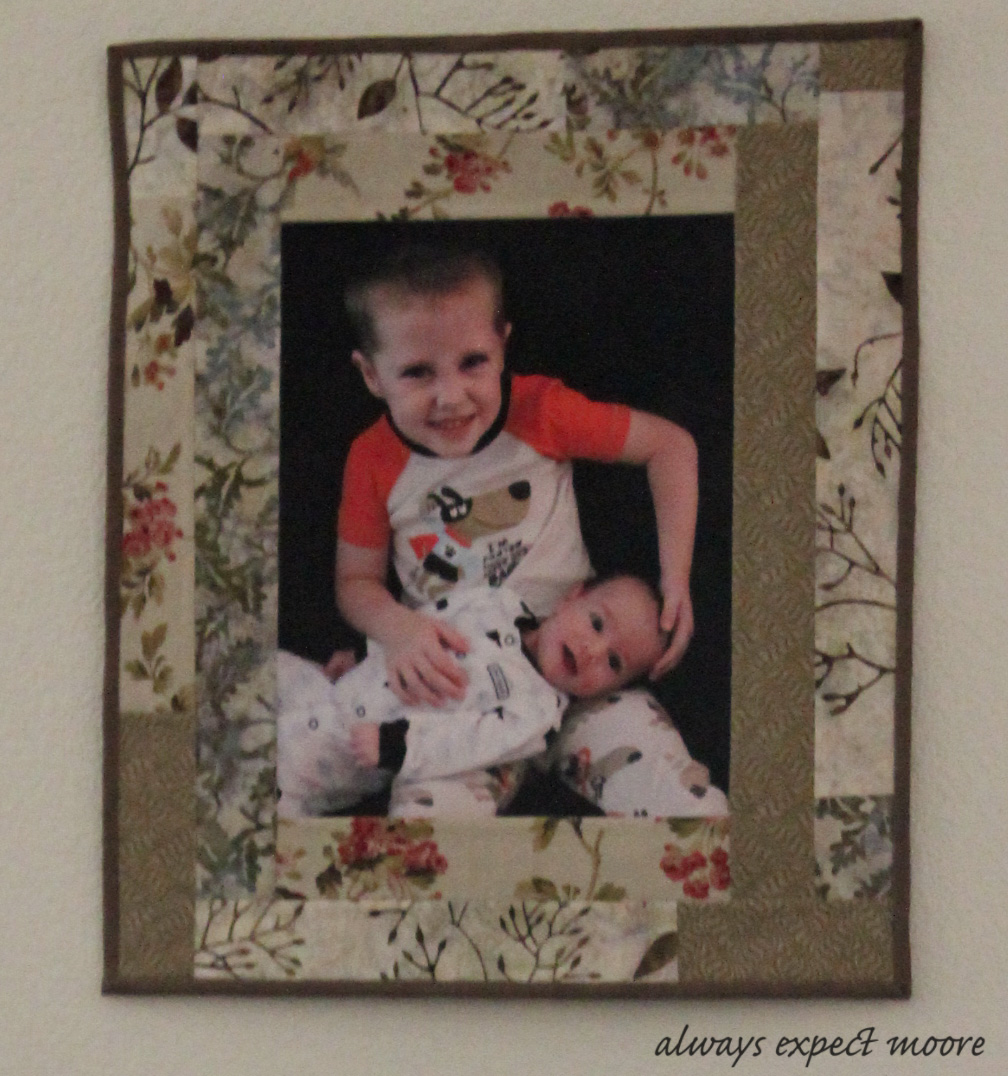
When Little Moore woke up from his nap he said “I LOVE it!” And Hubby noticed it immediately when he got home from work, and actually commented that he liked it as well. I’d say this project is a hit all the way around!
Always,

Disclosure: this is a sponsored post. Though I received compensation for this post, all opinions are mine.

Comments & Reviews
So clever, Momma Moore! I love any decor that shows off the adorable baby faces!
Awww, this is the first time I have ever seen your little ones and they are adorable! And can I just say again how creative you are?! Amazing!
Awww this is such a cute idea!! I love the picture of your two LOs 🙂 They are adorable 🙂 xoxoxo
http://lilmsadventures.blogspot.com/