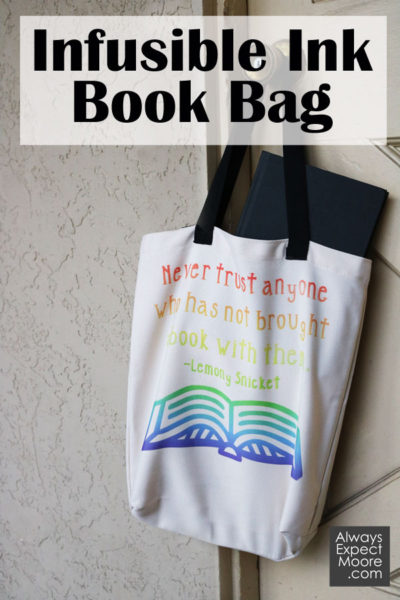
I’m super excited to share this project with you because it uses a brand new product, and I love playing with new craft supplies! This Infusible Ink Book Bag came together in about 30 minutes, and I just love how it turned out! I learned a few things about how to work with Infusible Ink, so keep reading for my tips!
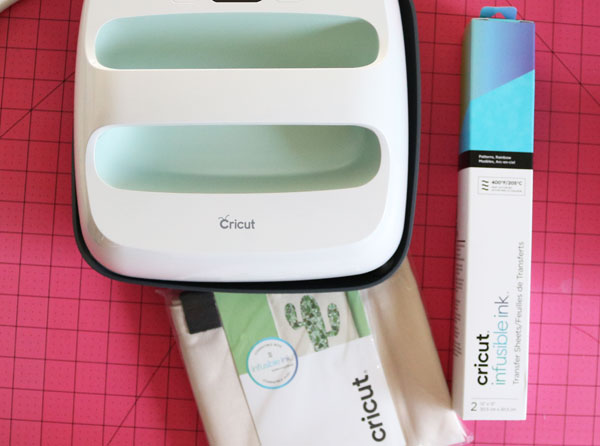
If you haven’t heard of the new Cricut Infusible Ink, it is the latest product that they have launched. You can use it with any Cricut Machine, or you can play with the products without a Cricut if you like! You will need the Cricut Easypress – if you don’t own one of those yet, get the EasyPress II (mint or raspberry colored), and you may even consider upgrading to the larger size (I’ll explain why below).
To make your Infusible Ink Book Bag, you’ll need:
Cricut Infusible Ink
Cricut Infusible Ink Compatible Tote (a cotton or canvas tote will NOT work, it needs to be certain fibers to accept the ink transfer)
Cricut EasyPress
Lint Roller
Cricut Machine
The process works a lot like making an iron-on transfer. Make your design (you can grab my design by clicking here), mirror it, and then cut it out on the Infusible Ink setting.
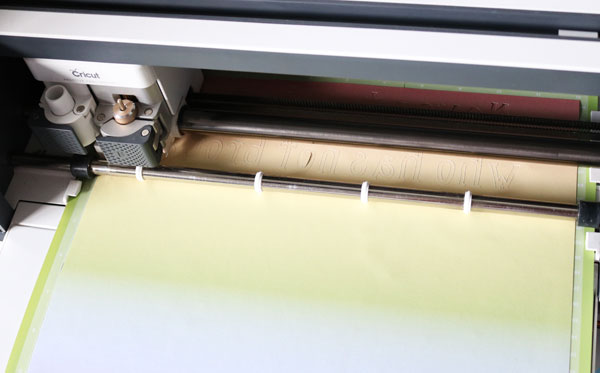
You’ll notice that the ink looks very muted on the sheet. That is okay. The colors will pop when you add the heat. I promise!
While the sheet is being cut, you can prep your tote. Place a piece of paper inside to protect it, along with your EasyPress mat. Use a lint roller to clean off any lint. Place butcher paper over the top and give it a good pressing to heat away any moisture. Then allow it to cool.
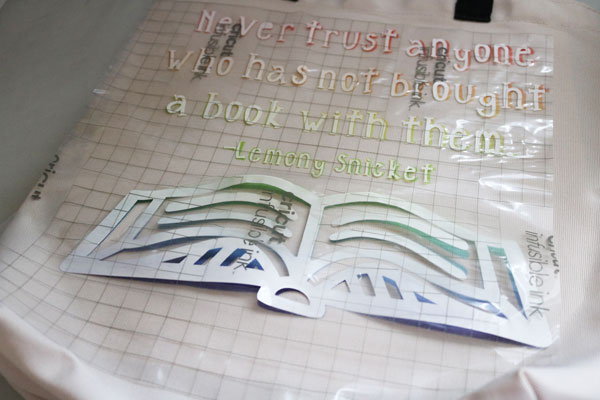
While the tote is cooling, carefully peel away the negative space. It is like peeling a card stock sticker off of a sticker sheet. Use your fingers, go carefully. You don’t want to use a tool that can mar the ink or leave ink behind. Just bend and peel.
Place your image on your tote.
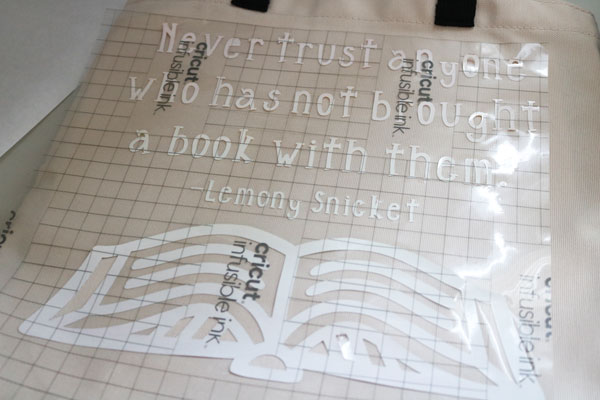
Cover the sheet with butcher paper, and then press. Here is where I noticed my first mistake. I should only have made the design as big as my EasyPress. Since this design is larger than the EasyPress, it would take multiple pressings. Each time you move the EasyPress, you slightly nudge the Infusible Ink sheet, and that leads to less crisp lines. Honestly, I think the finished result still looks fine (especially for a first try at using the product). But, if I were to do this again I would shrink the size of the design to the size of my EasyPress. Or, if I really wanted a large design, I would trim away some of the negative space so that I could use their heat resistant tape and really secure the design in place.
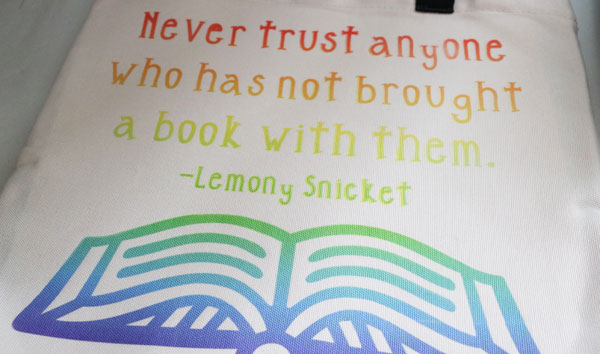
Once I was done with (multiple) heatings, and letting it cool as long as I could stand, I carefully lifted the butcher paper.
Once I lifted the Infusible Ink, I had a super professional looking tote! Yay!!
I’m very excited to play with the Infusible Ink some more … and to give you a chance to win some as well! Scroll down a little further to enter a chance to win an Infusible Ink Prize Pack of your own!
a Rafflecopter giveaway

Comments & Reviews
My brother suggested I might like this blog.
He was entirely right. This post truly made my day.
You can not imagine simply how much time I had spent for this information! Thanks!