• Skip to primary navigation
  • Skip to main content
  • Skip to primary sidebar
Home About Subscribe Summer Sew Camp Disclosures

Always Expect Moore

Quilts & Pattern Design

  • Cricut Maker BOTW
  • Quilty5k
  • Gallery Wall QAL
  • Trunk Show
  • Guild Resources
  • Pattern Shop
  • Free Patterns
Home About Subscribe Summer Sew Camp Disclosures
  • Cricut Maker BOTW
  • Quilty5k
  • Gallery Wall QAL
  • Trunk Show
  • Guild Resources
  • Pattern Shop
  • Free Patterns
Home » Blog » Uncategorized » Laptop Desk Using EnviroTex Lite

Laptop Desk Using EnviroTex Lite

Created On: June 5, 2011  |  Updated: June 5, 2011  |   4 Comments

Having a little one means that a lot of my computer-time is spent on my lap. So, it was time to make myself a comfy laptop desk so that I can now use my computer wherever I am in the house.

And… it was an opportunity to combine two of my favorite things – making a fun tutorial for y’all and free stuff! That’s right, EnviroTex sent me some of their amazing pour-on resin to try, and you’re just going to love this stuff (I did!)

AND – If I’m going to make myself a computer desk, I might as well make a pretty one, right? This would be just as easy to make with family photos, inspirational quotes, or even wallpaper that matches your decor, and using the EnviroTex Lite to seal it in means that it is going to be permanent.
I love the way this turned out – and it was actually a lot simpler than I thought it was going to be! I’ve got a step-by-step tutorial outlining the process for you, if you want to make your own.
Supplies that I used:

Package of EnviroTex Lite Pour-on High Gloss Finish – this box had all the supplies I needed to work with the solution – the two mixing compounds, smooth-sided containers for mixing (with handy measuring lines on the side), plenty of stir sticks, brushes for brushing the sides, and gloves to keep my hands protected. Oh, and amazing, well-written directions. Seriously – these directions were spot-on and easy to follow.

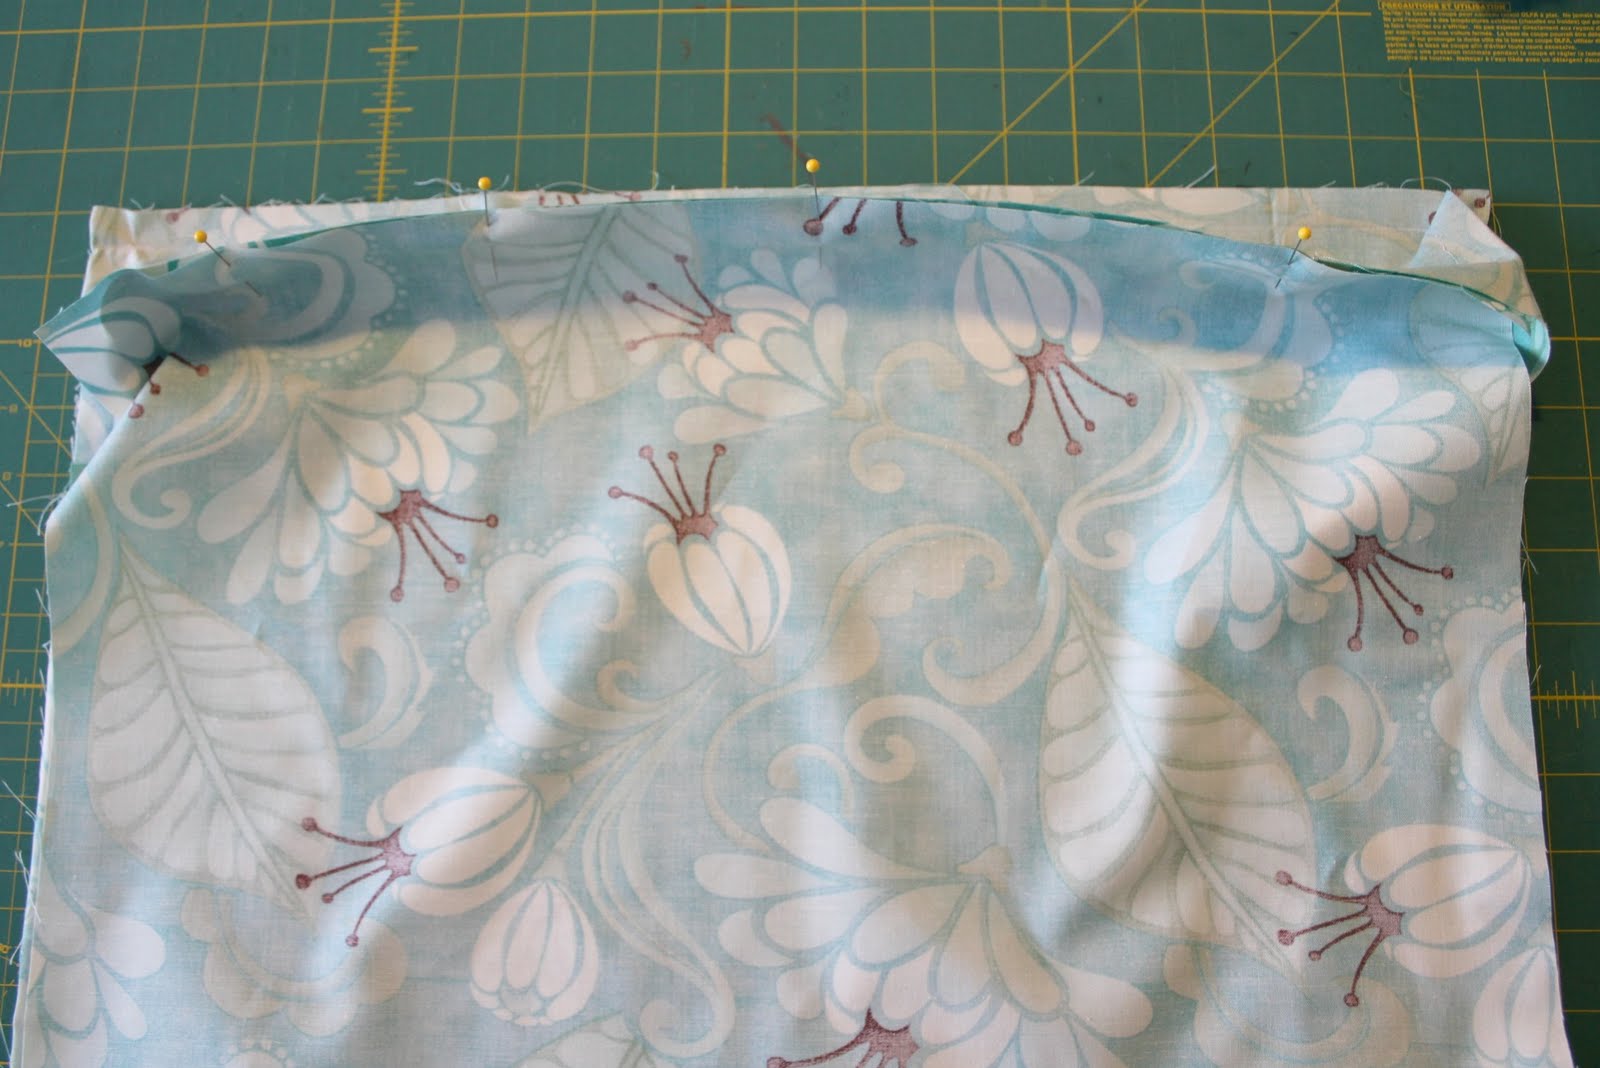
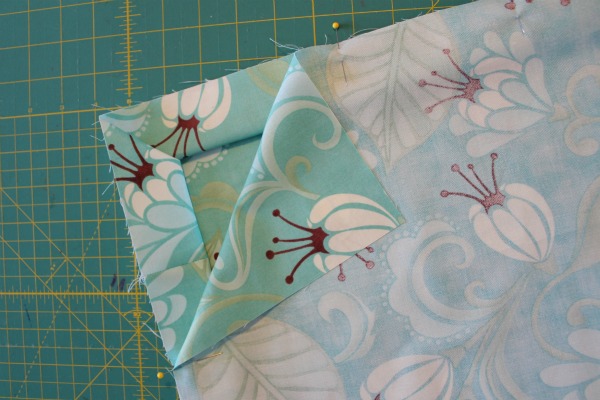
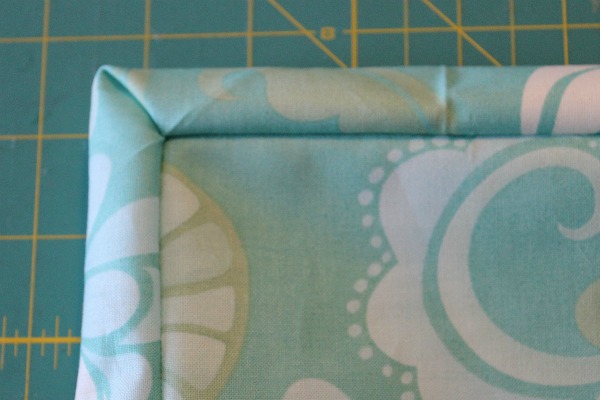
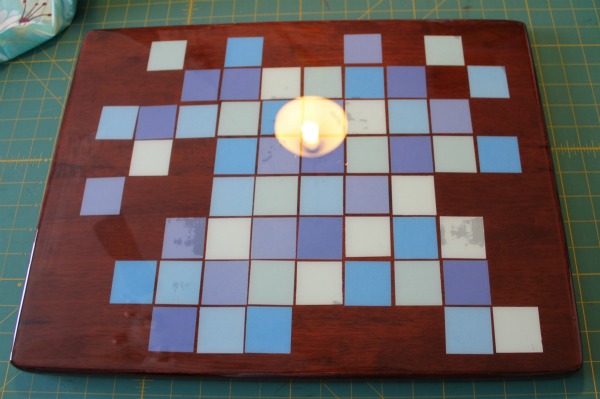
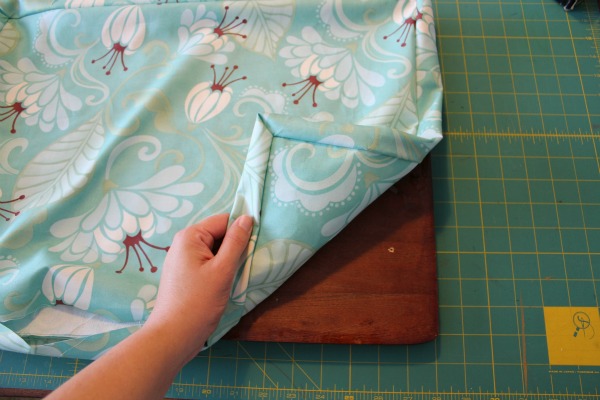
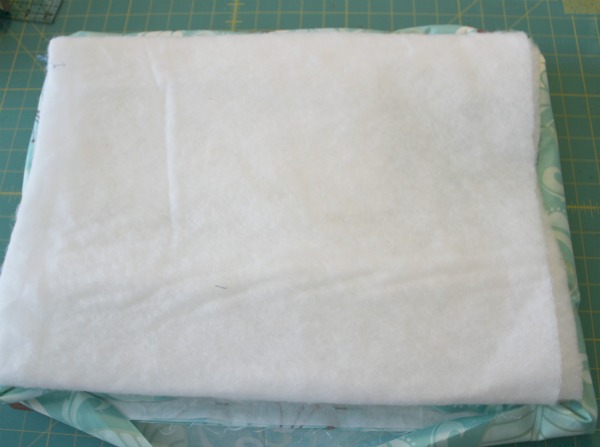
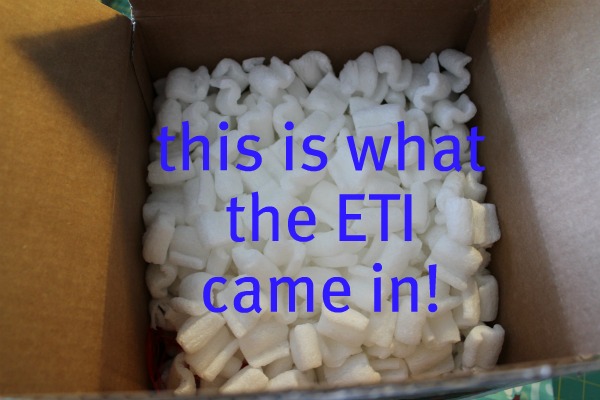
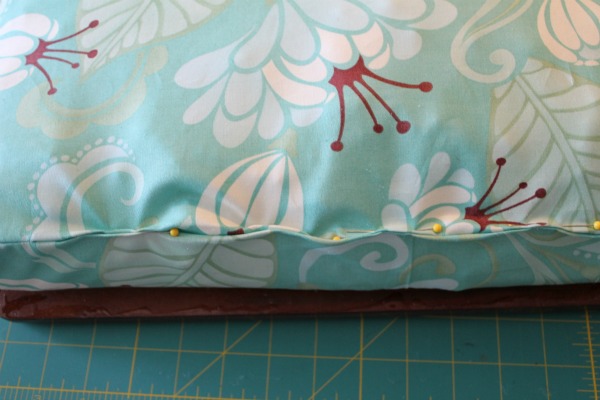
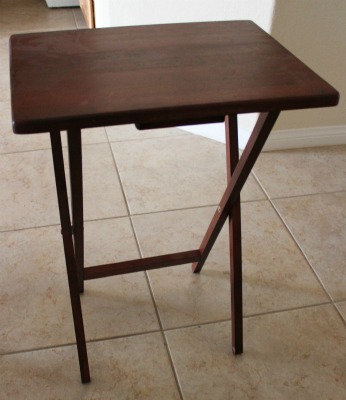
In addition to the EnviroTex Lite, I needed my desk supplies. For the top of the desk I grabbed an old folding TV tray that had been hanging out in a corner. Paper and ModPodge for the decoration on top, fabric (a yard is fine), heavyweight interfacing (half a yard is plenty), batting, sewing machine, and a needle and thread for the bottom cushion. A staple gun to put it all together, and the packing peanuts that the ETI came in (waste not, want not…right?)
I started by removing all the bottom parts to the folding table, so all I had left was the top. Then, I prepared the area I was going to work in. It is important to pick a spot that can stay undisturbed for 24-48 hours. I put down a couple layers of  plastic dropcloth, and then some old baby-food containers, upside down. It is important for the surface to be level and elevated a couple inches off the ground, and I used something that I would be okay with tossing if they got some of the resin on them (they did, and it was fine).
I created a pattern to decorate the top of the desk using squares of paper. I actually used a textured paper. You can’t see the texture in the pictures, but you can still see it on the finished product, and I think it gives it a nice little something extra. Next time I’ll use photos and quotes – what an awesome personalized gift this would make!
I put all the pieces in place using a generous amount of ModPodge, and then put a generous amount of ModPodge on top, sealing in the paper. The EnviroTex instructions said that paper needs to be sealed with glue so that the resin doesn’t discolor it. I let it sit overnight to dry.
I then brushed on a thin layer of the resin on, as per the instructions, and allowed to sit for 24 hours. I ended up getting a little bit of discoloration on some of my pages. I think this was in the spots where I either poured on the resin directly, or was a little overzealous with my brushing-on.
After the thin layer dried, I added the full top coat. YAY! This takes some patience. Pouring on the top coat is easy, but I had to sit with it for a while to brush the sides, and scrape the bottom.
What the EnviroTex Lite does is “flood” the top of the piece, creating an awesome, perfectly smooth top. To do this, the excess drips off the sides. In order to have nice-looking sides and a bottom without hardened drips, you have to brush the sides and scrape off the bottom until the resin starts to set. Figure about 30-45 minutes.
After I poured the top coat, I had some bubbles. This is to be expected. The instructions said to use a torch to “heat away” the bubbles. I didn’t have a torch handy, and didn’t want bubbles, so I found a different solution. I tied back my hair (so it wouldn’t fall into the still wet resin), then blew on the surface like I was fogging a mirror. Stubborn bubbles took 2-3 “huffs,” and I was able to get all the bubbles out!
Once I had the sides brushed, the bottom scraped, the bubbles out… I needed to leave it alone. I let it set up for 48 hours (though when I checked on it at 24 hours, it looked fine).
While I was waiting, I started on sewing the bottom cushion. First, I cut my fabric. The top is 19×14″, so I cut 2 rectangles an inch larger (20×15″), and 2 strips 3″xWOF (Width of Fabric).
I ironed my heavyweight interfacing to the wrong side of one of the large rectangles.
I stitched together my two 3″ strips, cutting off the selvedge ends and pressing open.
Now for the fun part… I laid the strip down along one edge of the large rectangle, and started pinning. When I got to the corner, I folded the strip down, away from the rectangle…
 Then back up, leaving a folded triangle inside.
I then flipped up the triangle, and kept pinning all the way around, doing this at each corner.
Once I got all the way around, it looked like this:
I folded the two sides of the strip over where they met, marked my 1/4″ seam allowance, and stitched together at the folds, cutting off the excess.
I stitched the strip all the way around, using a 1/2″ seam allowance, being careful at the corners. At each corner I would (1) Stitch just up to the fold, then stitch back and forth to secure. Then (2) lift up my presser foot (with the needle UP), and turn the fabric 90 degrees counter-clockwise, and flip the flap over, so that it didn’t get stitched down. Then I would start stitching again, at a point slightly BEFORE the fold, securing by going back and forward a few times. I did this all the way around all four sides (click on the photo to enlarge).
To stitch on the bottom of the cushion, I folded up the strip so that it was even with the top. I laid the second rectangle down, and pinned JUST to the strip (so 2 layers were pinned together, not all 4).
When pinned, it looked like this:
I folded the corners so that they looked “mitered” (see the picture), and carefully pinned so that I was only pinning 2 layers of fabric each time.
I pinned all the way around, leaving nearly the entire bottom open for turning and attaching.
Then, I stitched all the way around (leaving my opening, using a 1/2″ seam allowance again), being careful at my corners, and following my 1, 2, 3 steps above. Once I had it sewn, I clipped my corners like this, being careful not to clip any of my seams.
I turned it right side out, and had awesome little corners like these:
It was time to grab my finished top. What a beauty! So shiny you can see my Ikea light fixture in the reflection!
I put the cushion, interfacing panel down, onto the back of the tabletop, lining up the corners.
Using the big opening I’d left, I used my staple gun to tack the cushion to the wood in just a few places along the back seam, an inch or so out from the edge.
I folded up some batting the size of the cushion, then tucked it inside, and used the staple gun through all the layers – batting and interfacing/fabric – to tack it all to the wood.
I started along the back seam, as close to the seam and the corners as I could get. Then I moved towards me, on the sides, finishing up with the corners closest to me, and the seam by the opening.
If I’d started close to me, the opening might not have been big enough to allow the staple gun the freedom of movement I needed.
Time to fill the cushion! I had all kinds of options, but decided to use the packing peanuts that came in the box!
Just a word of caution here – these are not Styrofoam, they are water-soluble pellets. So, if my cushion gets wet, the packing peanuts can turn to mush.
Last step – pin closed the opening, and stitch it shut!
YAY! Finished laptop desk!

I did have some Envirotex left over… so I created a quick and easy second project! Yup, there is MOORE to come! : )
Check out my post on making Bust ’em Blocks out of my leftover EnviroTex Lite!
ETI sent me this product to try out. You won’t believe all that you can do with this product. Envirotex Lite was created by Environmental Technologies Inc. (ETI), which is the home for many resin and mold making products.

The use of resin in jewelry making, mixed media and paper arts continues to grow in popularity. Today, artists are using ETI’s products in many crafty ways and they will be showcasing these works of art on their new blog “Resin Crafts”.


Check them out on:
Resin Crafts Blog
ETI on Facebook
ETI on Twitter

Always,
 

Check out these other tutorials using Envirotex Lite:

posted in: Uncategorized

Previous
Custom Doh Printable
Next
Bust ’em Blocks using EnviroTex Lite

Reader Interactions

    Leave A Reply! Cancel reply

    Share your thoughts!
    Your email address will not be published. Required fields are marked with *

    This site uses Akismet to reduce spam. Learn how your comment data is processed.

    Comments & Reviews

  1. Jenniffier says

    June 6, 2011

    Wow that is a very long/time consuming project, but it looks wonderful!

    Reply
  2. Mod Podge Amy says

    June 13, 2011

    Great idea! I LOVE laptop desks, since I’m always on mine. Great color choices!

    Reply
  3. brow5204 says

    December 16, 2011

    DO you think that Masking or painter’s tape around the edge of the desk would make the final coat lower maintenance? Or would it not even work?

    Reply

Primary Sidebar

Hi, I'm Carolina!

I’m a Quilt Pattern Designer, Award Winning Quilter, and fan of all things quilting. I live in San Diego with my husband, our two boys and our pets. I love keeping both my hands and mind busy, so I’m always working on lots of projects. You’ll find lots of them shared here!

More About Me

Let's Keep In Touch!

I'll let you know about what's new in quilting, freebies you'll want to snag, and brighten your inbox about once a week!

Thank you for subscribing!
subscribe
90% Faster Than Rotary Cutters

Fat Quarter Shop Quilting Fabrics and Supplies

Projects With Pre-Cuts - 7 Colorful Designs

Featured Projects

  • Everything you want to know about Pre Cut Fabrics!
  • Scrappy Placemat - easy to make scrap project
    Scrappy Placemat using Strips and Scrap Tape
  • Sewing Kaleidoscope SVG File
  • Drawstring Backpack
  • Carolina holding fabric marking pens
    Choosing Fabric Marking Pens

Let's Keep In Touch!

Brighten your inbox about once a week!

Always Expect Moore Submark Shop Patterns

Browse

  • Ruler of the Month
  • Quilty5k
  • QuiltMath
  • Cricut Maker BOTW

Shop

  • Digital Download Patterns
  • Quilting Notions
  • Quilt Stickers
  • Quilt Tees

Connect

  • YouTube
  • Instagram
  • Facebook Group
  • TikTok
©2023, Always Expect Moore. All Rights Reserved. About Disclosures
Back To Top
Design by Pixel Me Designs
×

Let's Keep In Touch!

I'll let you know about what's new in quilting, freebies you'll want to snag, and brighten your inbox about once a week!

Thank you for subscribing!