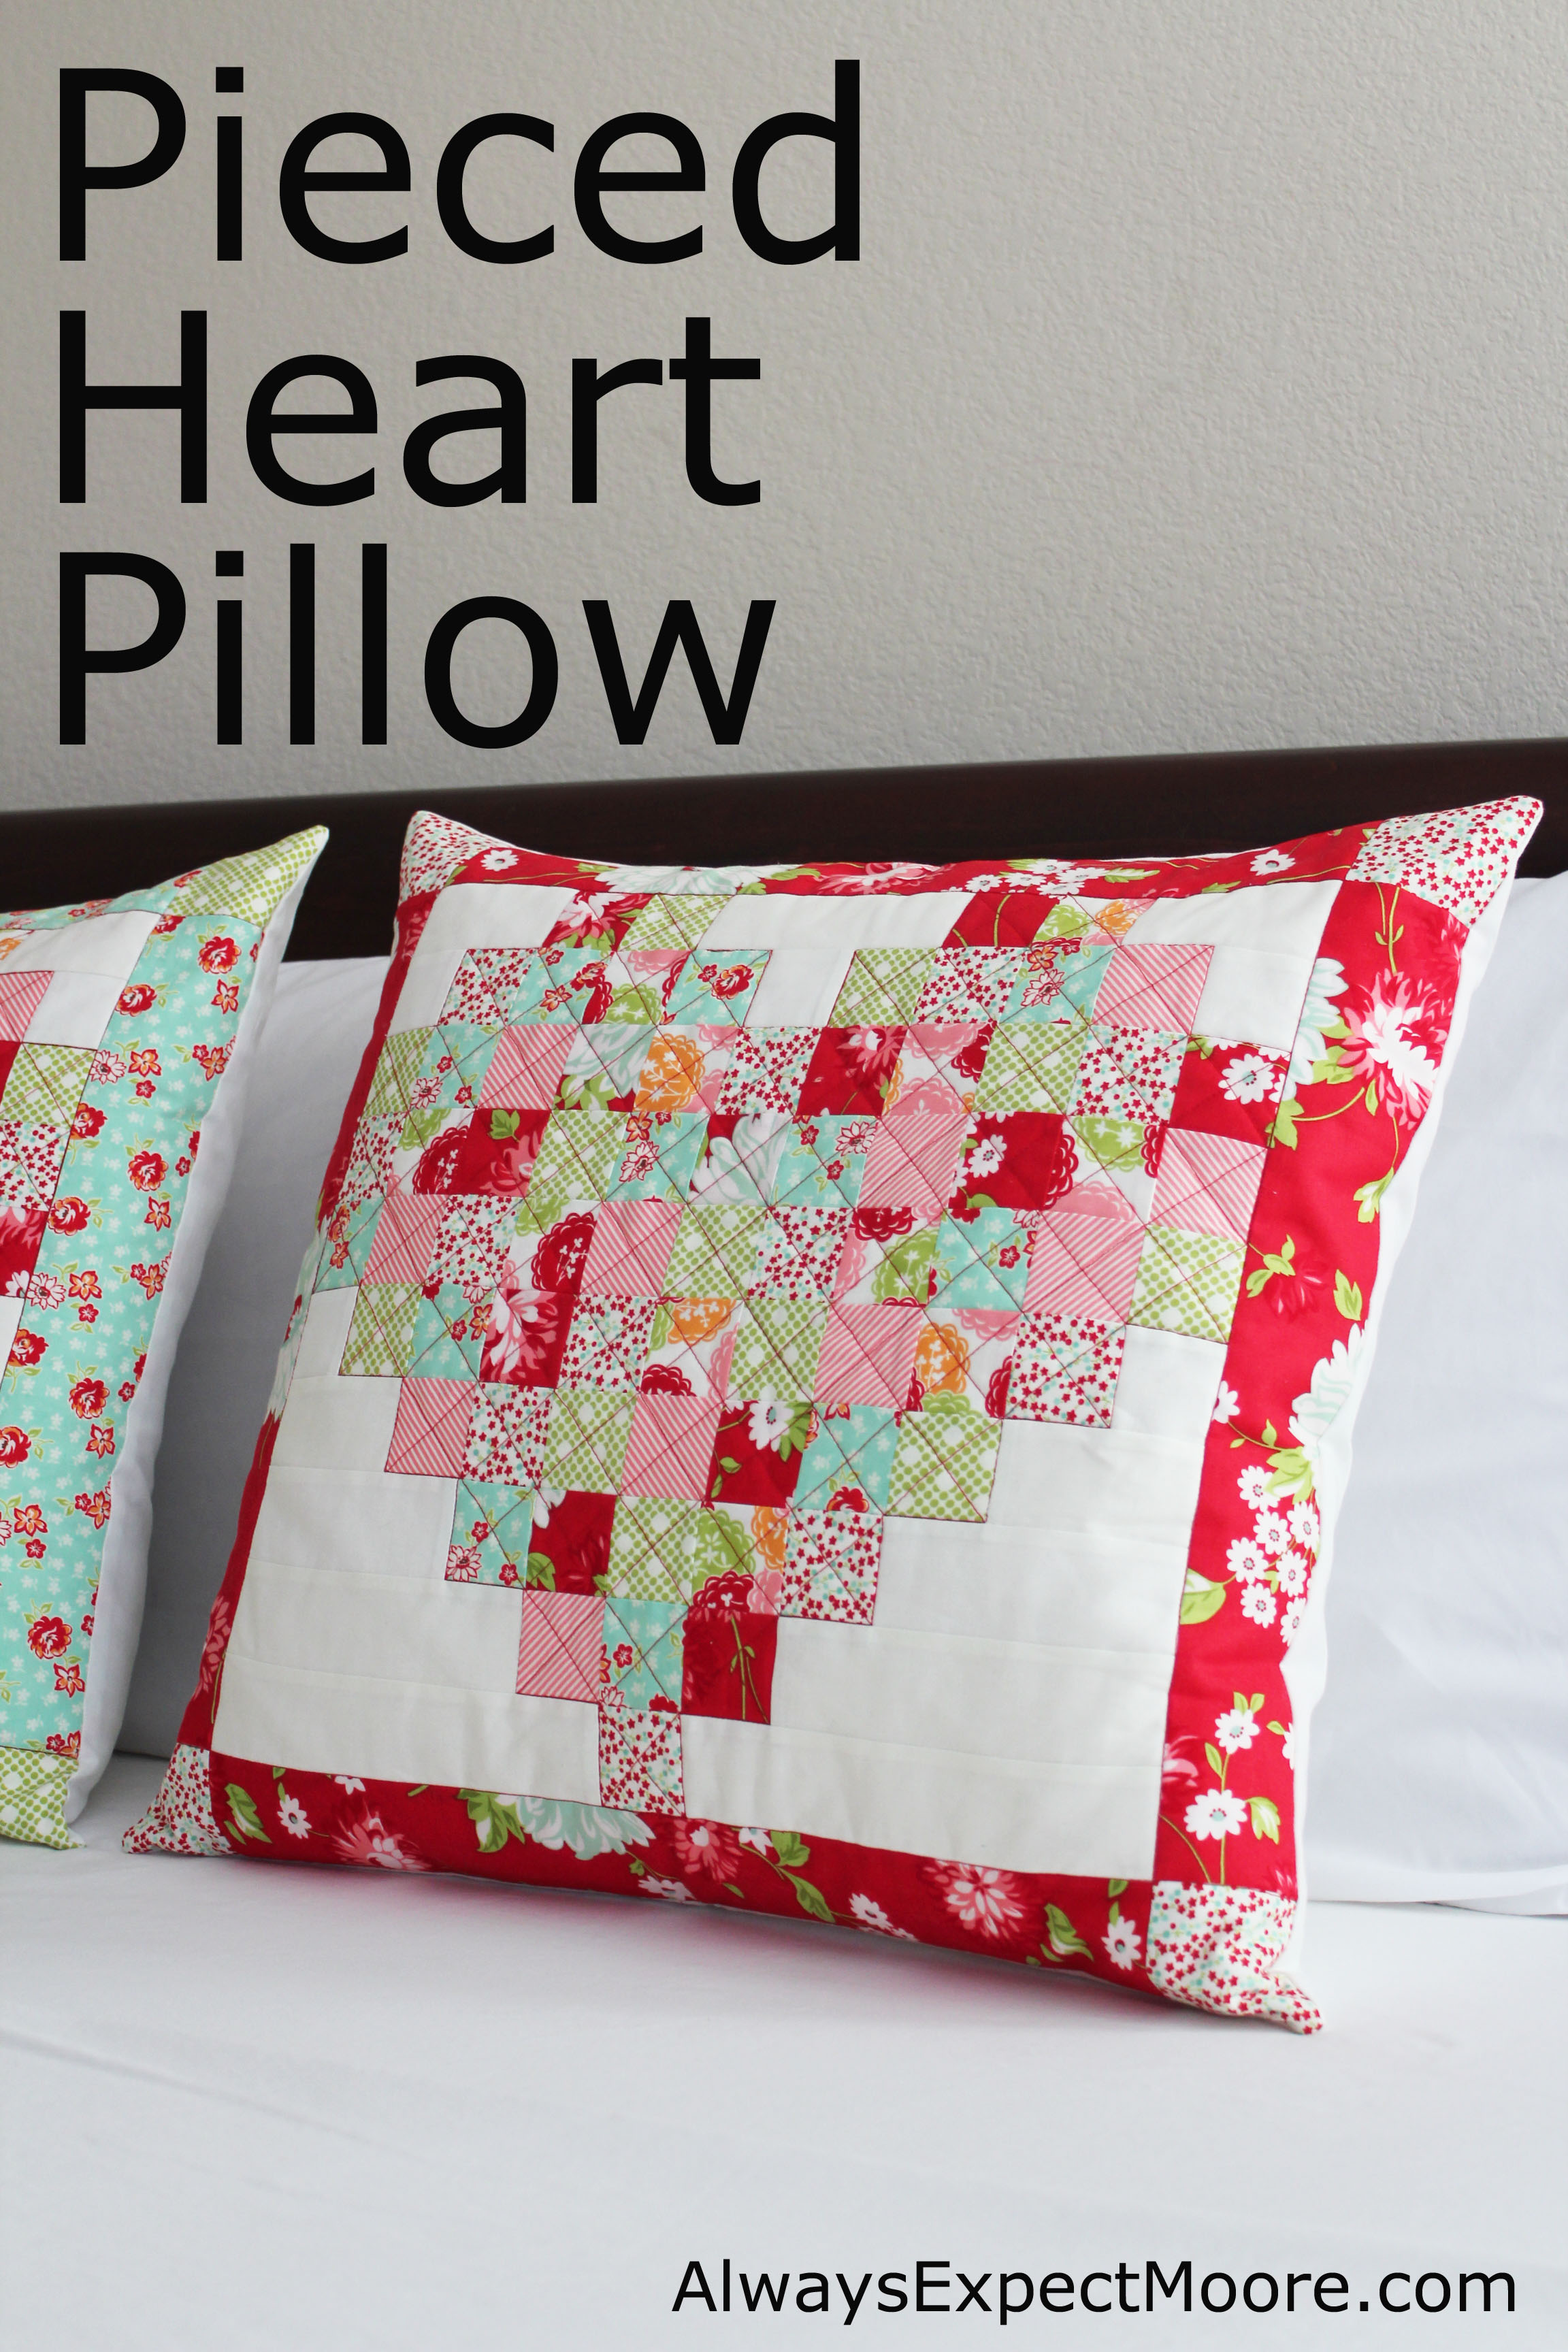
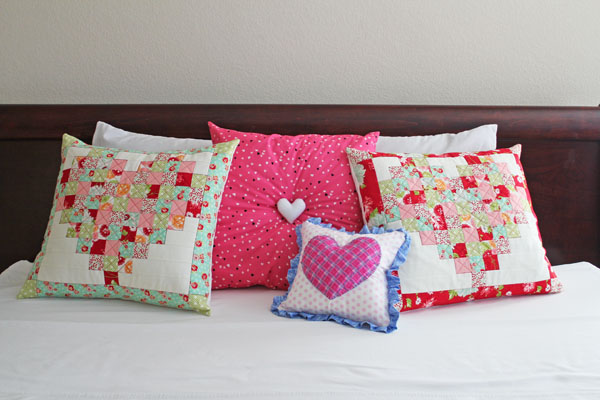
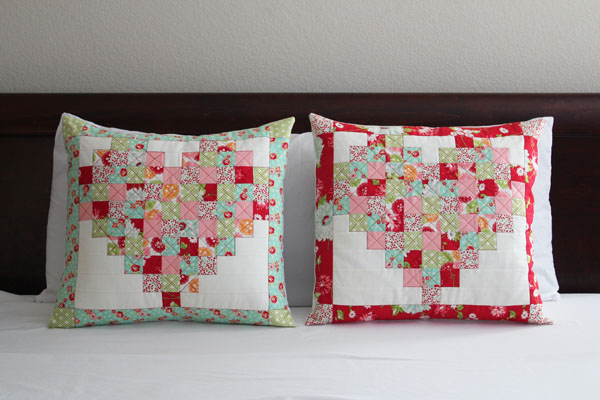
I love decorating for Valentine’s Day. After taking down the Christmas decor, the house feels a little stark. It feels good for a little while – everything has been cleaned up and put away. But after a couple weeks I start to get antsy for some cheery colors and fun decor. Which makes these Valentine’s Day pillows perfect.
I actually made three different kinds of pillows. I’ll be sharing the others with you later in February.
To make the pieced heart pillow fronts, you need (enough for both pillows):
6 fat quarters of patterned fabric (my fabrics are all from “Scrumptious” by Bonnie and Camille for Moda)
1 fat quarter of background fabric (I used Kona Snow)
If you want to finish the pillows you need 1.5 yards backing fabric (that’s enough for both pillows), and about 4″ of velcro. You’ll also need a 20×20″ pillow form for each pillow.
I started by cutting my fabric. For each pillow you need:
From the patterned fabric:
70 – 2″ squares (assorted)
4 – 3″ squares of the same fabric (for cornerstones)
From the background fabric:
4 – 2 x 2″ squares
4 – 3.5 x 2″ strips
3 – 5 x 2″ strips
2 – 6.5 x 2″ strips
2 – 8 x 2″ strips
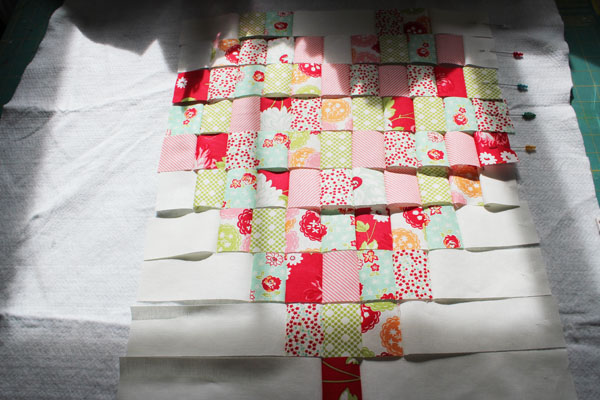
Lay out all the pieces. I like to lay them out on a piece of batting. The batting helps keep them in place a little bit, so a toddler running by is less likely to destroy my work. I put the pieces in a random order to get a very scrappy look.
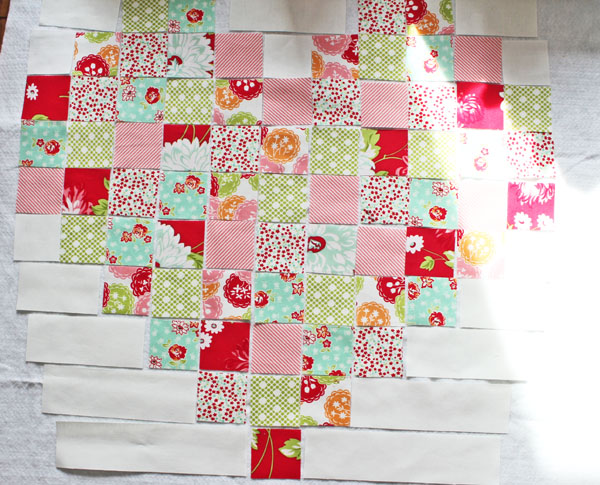
R1: 3.5″ background, 2 squares, 5″ background, 2 squares, 3.5″ background
R2: background square, 4 squares, background square, 4 squares, background square
R3: 11 squares
R4: 11 squares
R5: 11 squares
R6: background square, 9 squares, background square
R7: 3.5″ background, 7 squares, 3.5″ background
R8: 5″ background, 5 squares, 5″ background
R9: 6.5″ background, 3 squares, 6.5″ background
R10: 8″ background, 1 squares, 8″ background
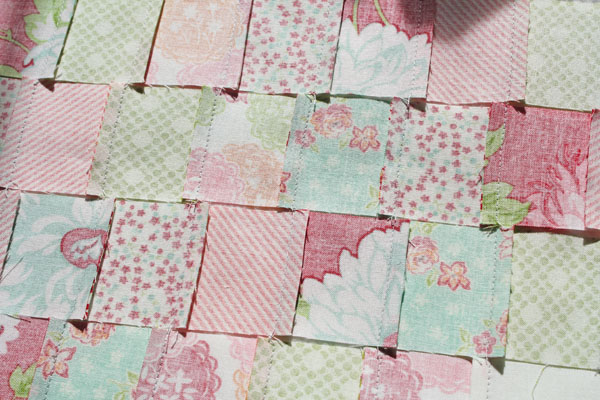
I like to strip piece, so to mark my rows as I’m piecing, I use different colored pins.
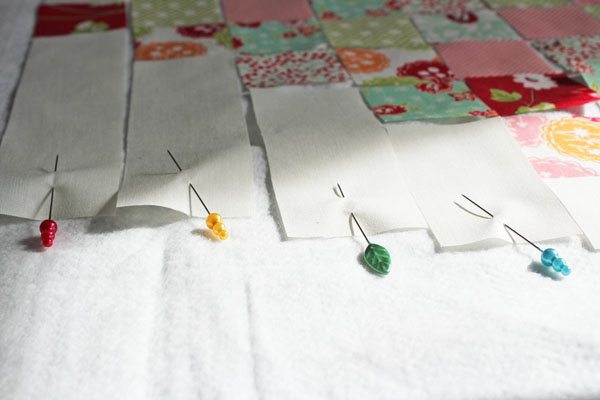
Here are all the rows pieced:
I press the seams in alternate directions on the back. One row to the left, the next to the right, the next to the left… this reduces the bulk and also makes the points match up easier.
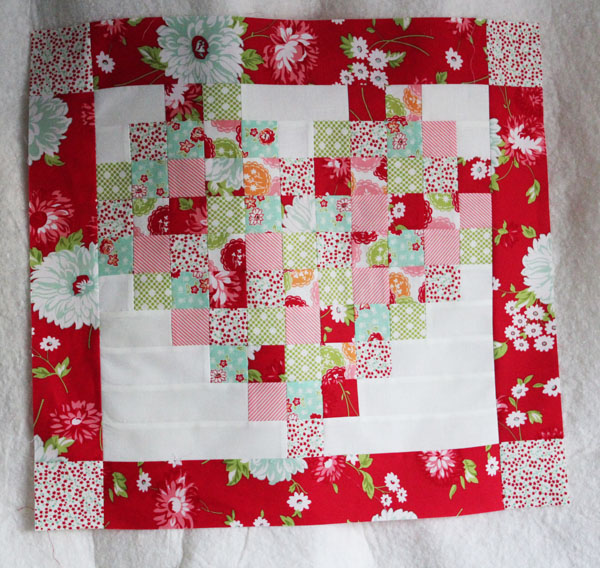
To finish the top, I measured the top and bottom, took the average of the two, and cut 3″ wide border pieces this length. I then measured the sides, took the average, cut 3″ wide border pieces this length. I added the 3″ squares to the side pieces, added the top and bottom borders, pressed, and then added the side borders. Top complete.
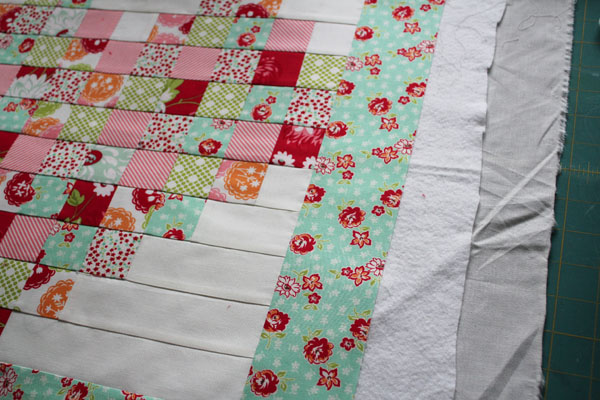
Quilting the pillow gives it more depth, and helps keep all that stitching in place. I layered a piece of muslin, batting, and my pillow top, and spray basted (we can have the discussion of pin basting vs. thread basting vs spray basting, but spray basting is just so much faster, so I often go with just spray basting things).
You can quilt your pillow however you like. I did stitch-in-the-ditch around the border, and around the heart. Then I did a cross-hatch in the heart.
To finish the back of the pillow, I measured my finished pillow, and cut 2 backing pieces. Each piece was the height of the pillow by 1/2 the width + 4″.
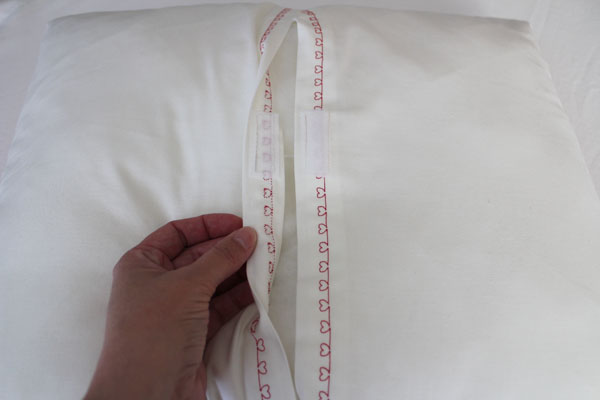
I folded the long end over 1″, then folded it over again and pressed. I selected a fun decorative stitch (no particular reason… just why not?), and stitched it down. I did the same with the other side. I added velcro to the center of each. Then I connected them using the velcro, put the whole thing right-sides-together with my pillow top, stitched all the way around, clipped, and turned right side out. There are lots of ways you can finish a pillow. This is called the “envelope” method, and I find it is one of the easiest.
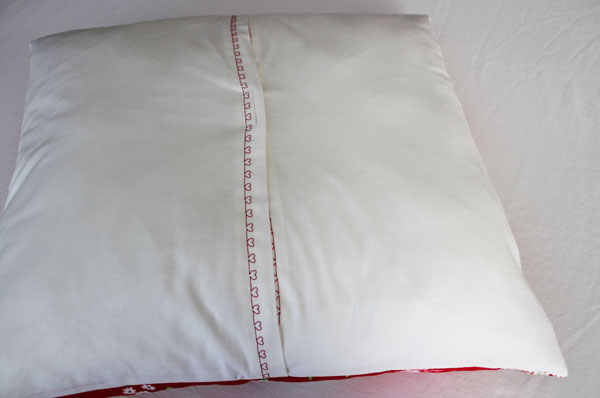
I do like adding about 2″ of velcro to the center. Otherwise the middle tends to balloon out. Much prettier with everything all tucked in.

Comments & Reviews
These are so cute!!
I always think that pattern is soòo confusing but you made it much easier. Thank you I have some scraps that will work very nicely.
Yay! I’m glad that I made it easier.
Love and Quilts,
Carolina