Today’s Pocket Week sponsor is Sweet Grass Stamps. If you like to stamp – cards, scrapbooking, or the backs of your little one’s hands (Little Moore loves that)… you need to check out her Etsy Shop. She’s giving away the cute pocket watch stamp (featured in her button over there on the right), either mounted or unmounted, to one lucky follower of this blog – announced at Midnight Tonight. Make sure you’re a follower so you have a chance to win!
While you’re at it, upload your pocket projects to the Pocket Week Linky for a second chance to win on Sunday!
For this afternoon’s post, I made a little paper pocket book. Perhaps I still had some lingering book-making desires left over from the No-Sew Pocket Sized Fabric Book, or maybe it was because I’m now on a constant hunt for projects to put in Little Moore’s Pocket Quiet Book. That might be in part because my friend Mandi asked me to make a couple of these Pocket Quiet Books for her sons – and I’d love to have some fun things tucked into the pockets when I send them!
These books are simple, and don’t use a lot of materials – 2 pieces of scrapbook paper are enough to make at least 2 books (3 if you’re stingy with the cover paper). Then you need additional scraps to make things to fill the pockets.
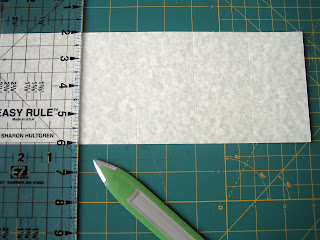
Start by cutting your main piece – a 4×12″ strip of paper – it should be double-sided, or you’ll end up with either white pockets or white behind the pocket.
With a bone folder (or snag the handy folding tool from your Cricket pouch), score 1 1/2 inches from the bottom.
Score the other way, every 2 inches.
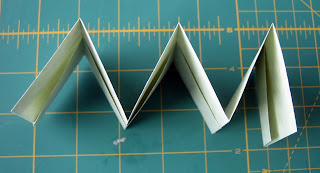
Fold up the bottom.
Fold the other way, accordion-style.
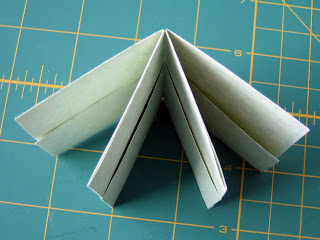
Grab a glue stick, and put glue on the four middle rectangles.
Squish these together, and press under a book (if you pick Harry Potter, go with the last one… it is the thickest and therefore the heaviest).
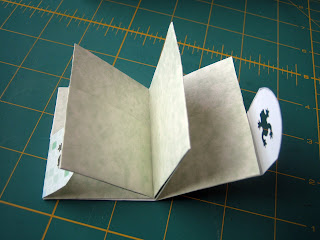
You should now have something that looks like this:
Cut a strip of your cover paper 6″x2.5″. Put glue on the back two flaps of your book, and press onto the cover paper.
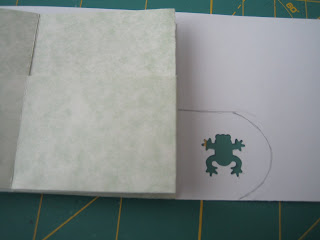
Here comes the creative part… you can use a paper punch like I did to punch either side, then trace a shape around your punch. This shape is going to be the flap that folds towards the inside, which will hold the front and back pockets closed.
Cut around your traced shape, and cut away any other excess paper (cutting around the shape of the book).
Glue this flaps down onto the front and back pockets. Your book is now done… except that you’ve now got 6 empty pockets!
I cut 6 strips 1.5×2″, punched frogs out of different colored paper, and glued them on the top of each strip. I then labeled the pockets “red, orange, yellow, green, blue, purple.”
Other ways to use this book:
How do I love thee… let me count the ways: Put a note in each pocket with a reason you love your honey.
Favorite Quotes: Tuck a different quote into each pocket
Tell me… what ideas do you have for this book?
Expect Moore… soon!








Comments & Reviews
Hi dear,I was in wonder of this type of tutorial,i am a student(Creativity is just a hobby) and for saving my assignments in different portions this is perfect one.Thank you for sharing its tutorial;..I will try a big one for my paper work
This is about the cutest project for learning colors I’ve seen in awhile. I’m linking up this week over at my literacy blog. http://www.onthelap.org Stop by sometime…I’m going to check our your Pocket Week projects. Thanks for sharing.