• Skip to primary navigation
  • Skip to main content
  • Skip to primary sidebar
Home About Subscribe Summer Sew Camp Disclosures

Always Expect Moore

Quilts & Pattern Design

  • Cricut Maker BOTW
  • Quilty5k
  • Gallery Wall QAL
  • Trunk Show
  • Guild Resources
  • Pattern Shop
  • Free Patterns
Home About Subscribe Summer Sew Camp Disclosures
  • Cricut Maker BOTW
  • Quilty5k
  • Gallery Wall QAL
  • Trunk Show
  • Guild Resources
  • Pattern Shop
  • Free Patterns
Home » Blog » Uncategorized » Rosette Ribbon from an Old Pin-Back Button

Rosette Ribbon from an Old Pin-Back Button

Created On: June 16, 2011  |  Updated: June 16, 2011  |   12 Comments

 We’ve started using pin-back buttons at the shop for promotions. I make about half a dozen buttons for an upcoming event, and the staff wears the buttons on their aprons. Once the event is over… well, the buttons have no use. But, being the “true crafter” that I am, I couldn’t just let these buttons fall by the wayside (or end up in the – gasp – trash!), so I came up with this fun no-sew project!

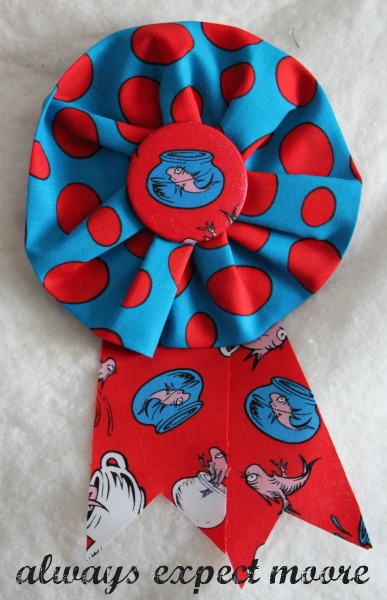
These would be great to decorate a party (or a gift for a party) if you use fabric in a certain theme. They’d also make great awards for any kind of youth activity (or hey, even an adult activity… I love me some awards!), you can find a ton of excuses to pull out these easy-to-make ribbons!

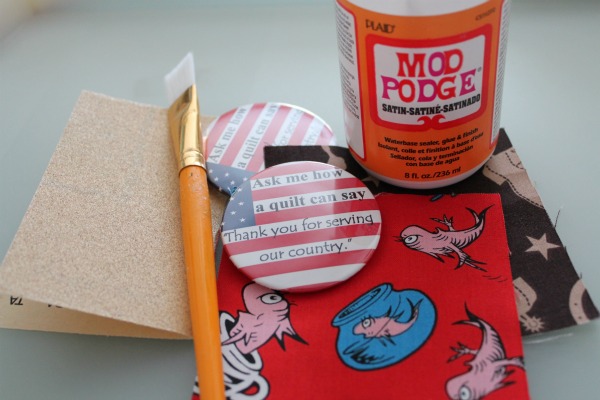
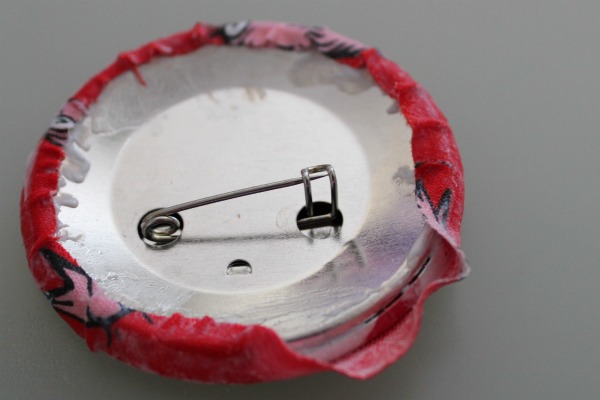
Materials Needed: Focus fabric and accent fabric, old pin-back button, sandpaper, ModPodge, Hot glue gun. Scissors/Rotary cutter to cut the fabric, and a paint brush for the ModPodge.

Start by collecting your supplies. You can see that the buttons I used were ones to promote our Quilts of Valor event.

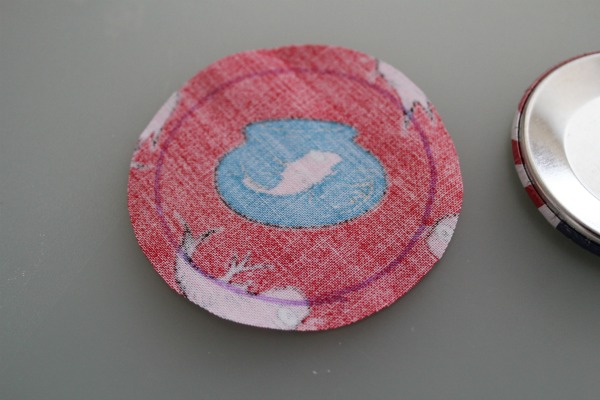
Turn over the button, and trace an outline on the back of the fabric using a fabric pen. I centered an image I wanted to have on the front of the finished rosette.

Cut about 1/4 inch out from the line, to give yourself some overlap for the back of the button.
I lightly sanded the front and edges of my button to help the fabric and ModPodge adhere better.
Start Podging! Using a paintbrush, I applied ModPodge to the front, then put on the fabric. I added more ModPodge on top (which is scary because it is white… but it dries clear. I then added ModPodge along the back rim, and folded over the fabric, tucking it down and adding more Podge as needed.
After the button has dried, you can start adding the rosette part. I used a 6″ wide by Width of Fabric strip of a coordinating print, folded in half. I left the first 1/2″ un-glued, then glued down the raw edge to the back of the button, folding and pleating so that the outside edge was fairly smooth. My “glue work” here is really bad… but, at least it is on the back – no one will ever know! ; )
After gluing all the way around, I hid the raw edges by folding them into eachother, making sure to line up the outer edge. This fold will just look like one of the pleats on the finished rosette.
Tails were added by taking a 2 1/2″ strip of fabric, cutting a notch at one end of each, and then hot gluing to the back. This fabric does have raw edges, which I could seal with some fray-check if I wanted. Next time I might consider using a wide ribbon instead, so I don’t have to worry about fraying at all. But, for now, I like it just the way it is. : )

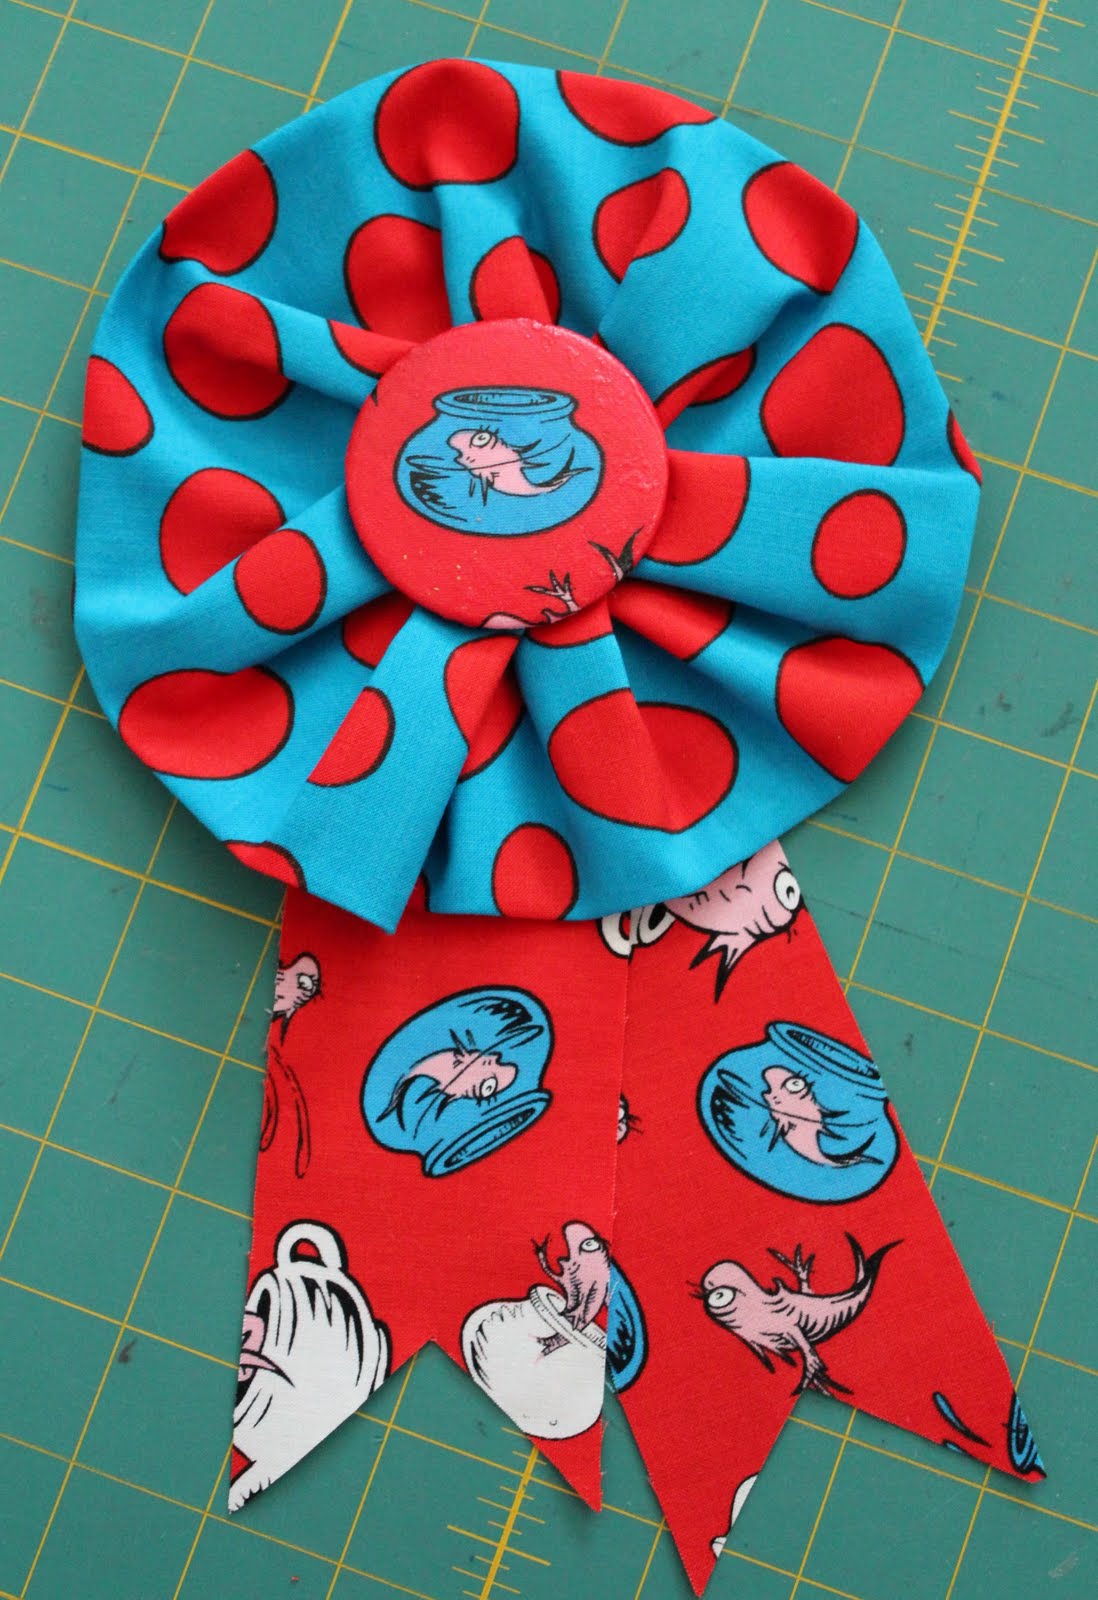
This project was super-easy, and took only about 45 minutes to make! Score!

Always,

Shared on the Weekend Wrap-up on Tatertots & Jello

posted in: Uncategorized

Previous
Moore Love Mondays – a New Series!
Next
Moore Love Monday – Linky Parties

Reader Interactions

    Leave A Reply! Cancel reply

    Share your thoughts!
    Your email address will not be published. Required fields are marked with *

    This site uses Akismet to reduce spam. Learn how your comment data is processed.

    Comments & Reviews

  1. Wendys Hat says

    June 16, 2011

    This is really cute!

    Reply
  2. SharleneT. says

    June 16, 2011

    Fantastic idea! You could hit the Flea Markets and get some really great old pins and refresh them, this way. I did it with letter openers and used them for my own advertising. It takes time but still waaaaay cheaper than commercially-made for a young business.

    Reply
  3. pinkundine says

    June 16, 2011

    That’s so cute – I love the fabrics you used 🙂

    Reply
  4. Zany Quilter says

    June 16, 2011

    Well isn’t that a crafty use of a button?? Great idea….cute for birthday boys/girls!

    Reply
  5. Alexis of NorthOnHarper says

    June 17, 2011

    very cute project!

    Reply
  6. Ms Bibi says

    June 17, 2011

    The button looks adorable and bet with your great instructions even I can do it.

    Stopping by from Catacombs…

    Reply
  7. Marie Noelle says

    June 17, 2011

    That’s really cute!!! Great idea!!!

    Reply
  8. Alia Dalwai says

    June 17, 2011

    Hi!

    I am your follower!
    I really liked this Bow! Its too cute!
    I love your Blog.
    Keep up the good work!

    Do visit my blog too and follow it if you like it!

    God Bless!

    Alia
    http://aliascreativelife.blogspot.com/

    Reply
  9. Christine says

    June 18, 2011

    So cute! And I love the Seuss pattern.

    Reply
  10. Steph says

    June 20, 2011

    Really cute! That was my favorite Seuss growing up!

    Reply
  11. Niki says

    June 21, 2011

    Cute! love the Dr. Seuss theme!!!

    Reply
  12. Kassandra @ Coffee and their Kisses says

    July 30, 2011

    Hello! I’m Kassandra @ Coffee and their Kisses. I featured this here at my blog. I hope you’ll stop by and grab a featured button. Thank you for sharing this with us!

    Reply

Primary Sidebar

Hi, I'm Carolina!

I’m a Quilt Pattern Designer, Award Winning Quilter, and fan of all things quilting. I live in San Diego with my husband, our two boys and our pets. I love keeping both my hands and mind busy, so I’m always working on lots of projects. You’ll find lots of them shared here!

More About Me

Let's Keep In Touch!

I'll let you know about what's new in quilting, freebies you'll want to snag, and brighten your inbox about once a week!

subscribe
90% Faster Than Rotary Cutters

Fat Quarter Shop Quilting Fabrics and Supplies

Instagram Facebook Pinterest YouTube

Recent Posts

  • Flying Pig Quilt Block
  • Bunny and Carrot Quilt Block
  • Free Fancy Drink Quilt Block
  • Dutch Row Houses Quilt Block
  • Quilted Sports Jersey Numbers

Archives

Featured Projects

  • Everything you want to know about Pre Cut Fabrics!
  • Scrappy Placemat - easy to make scrap project
    Scrappy Placemat using Strips and Scrap Tape
  • Sewing Kaleidoscope SVG File
  • Drawstring Backpack
  • Carolina holding fabric marking pens
    Choosing Fabric Marking Pens

Let's Keep In Touch!

Brighten your inbox about once a week!

Always Expect Moore Submark Shop Patterns

Browse

  • Ruler of the Month
  • Quilty5k
  • QuiltMath
  • Cricut Maker BOTW

Shop

  • Digital Download Patterns
  • Quilting Notions
  • Quilt Stickers
  • Quilt Tees

Connect

  • YouTube
  • Instagram
  • Facebook Group
  • TikTok
©2025, Always Expect Moore. All Rights Reserved. About Disclosures
Back To Top
Design by Pixel Me Designs
×

Let's Keep In Touch!

I'll let you know about what's new in quilting, freebies you'll want to snag, and brighten your inbox about once a week!