 I’m super-excited to show you this fun Halloween decoration! It is quick and simple to make, and (extra bonus) will store flat with my other Halloween decorations! Sometimes, the toughest part about seasonal decorations is finding ways to store them! Just to be clear – I’m only showing a tutorial for the frame. The spiders are not my own design. I made the spiders using the My Garden Zips pattern from Indygo Junction for a class I’m going to be teaching the Saturday before Halloween. They’re fun spider pins made with zipper trim. So, I can take them off the frame and wear them! I wanted something fun to display them on in the shop, in order to promote the class, so I came up with this simple frame. Then, several customers started asking how to make it… so I put together this little tutorial.
 If you want to make a frame with some spiders, the zipper spiders are lots of fun to make, but you could also consider these Heirloom Jem Spiders from Design Sponge or any of these wire and bead spider tutorials on Beading Gem.
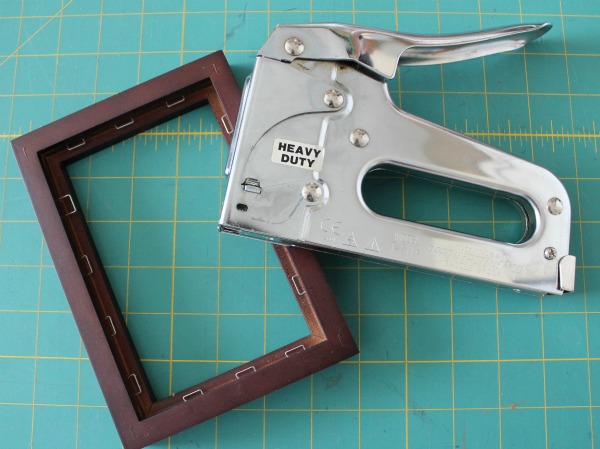
Making the frame is simple. Start out with a frame. I chose a nice, deep one that will stand up on its own without needing to lean up against anything. Since I’m working with wire, I needed wire cutters and pliers, some beads to look like “dew drops,” two gauges of wire (a fine one and a thicker one), and a staple gun.

I started by removing the glass and back from the frame. I have no idea what I’ll do with them… hopefully another project will come along? I then used the staple-gun to staple around the backside of the frame. I made sure to use long staples that stuck up from the wood. I put 3 staples on each of the short sides, and 4 on the long sides. You can do more, it is just important that each long side has the same number, and each short side has the same number.
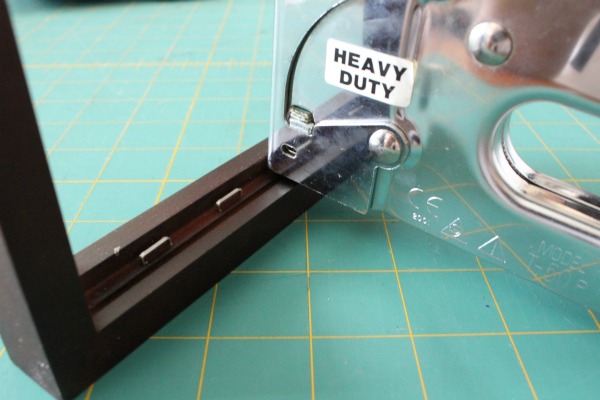
Here you can see all the staples all the way around. Though the staples stick up, they don’t stick up beyond the frame, so they won’t be seen from the front.
Then, I started stringing the wire. Using the thicker wire, I anchored one end to a staple, then went diagonally across and anchored it down to another staple. I made it as tight as I could, but didn’t worry too much about a little bit of slack.
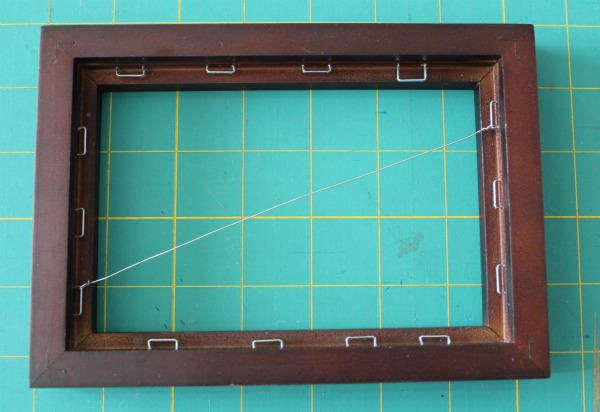
I kept stringing the two short sides. The wires didn’t all meet up exactly in the middle. I wasn’t worried. This will all get fixed later.
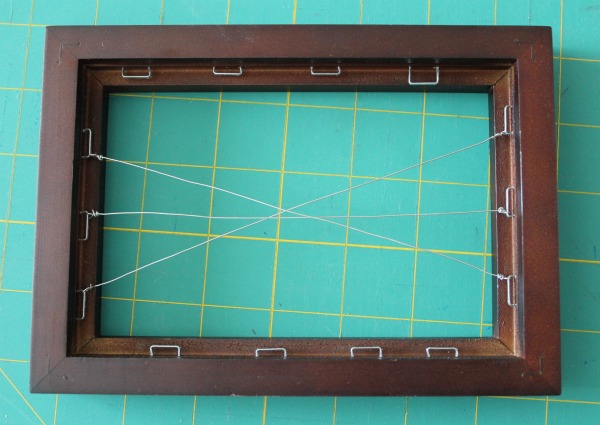
I then strung the long sides the same way, making a big star shape. Again, everything didn’t meet exactly in the middle, but it’ll get fixed in the next step.
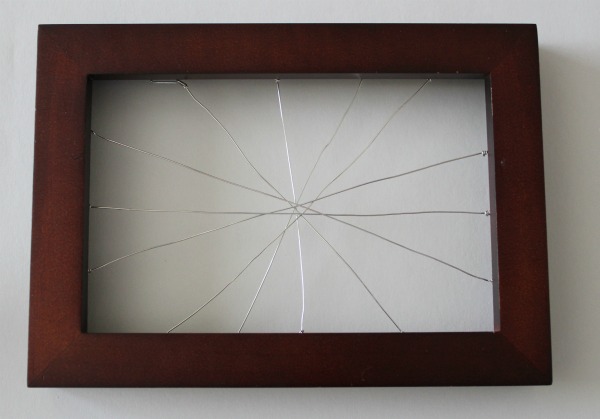
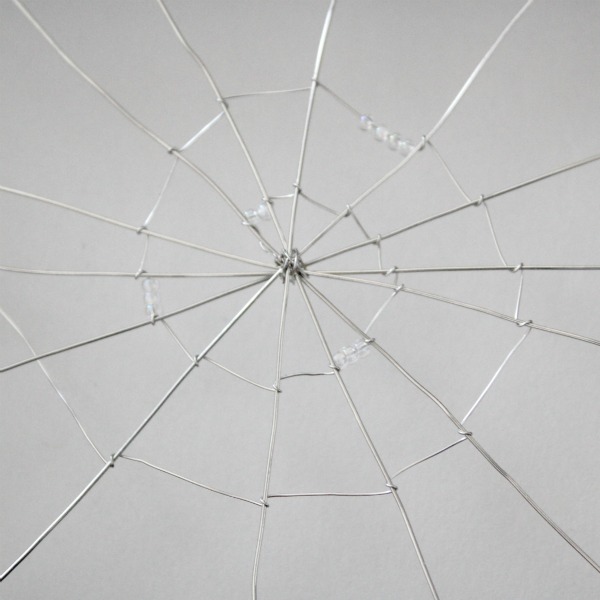
Switching to the small wire, I tied up the middle. Here, a little bit of slack on the big wires comes in handy. This pulls together any of the wires that didn’t meet up perfectly in the middle.

I spiraled around, wrapping once around each of the “spoke” wires. Every now and then, I added a couple beads for some sparkle and interest, and to look like “dewdrops.”
After spiraling all the way out, I anchored the wire on one of the staples.

Then all that is left is to hang on your spiders, and have a wonderful Halloween!
Always,

linking here:


Comments & Reviews
Wow, what a great way to use an old frame. How genius to use a staple gun to hang the webbing. And those spiders look super cute. I’m going to check them out right now.
super cool project!
Simply Fabulous!! Miss seeing you!!
Wow this is really neat! I really like how it transformed that frame!
This is so cute!!!!
That is very cool…..it is so nice to have you back!
What a super idea !
Great idea! My youngest especially will enjoy helping out with this one 🙂
That is super cute! Thanks for sharing.
This is such a brilliant idea – so clever to make the web from silvery wire and the zipper spiders look great on it. I just wanted to say I came over to visit after reading the perfecto comment you wrote on CrafterMinds about advertising. Am now following and look forward to reading all your posts.
Awesome!! 🙂
This is such a brilliant idea – so clever to make the web from silvery wire and the zipper spiders look great on it. I just wanted to say I came over to visit after reading the perfecto comment you wrote on CrafterMinds about advertising. Am now following and look forward to reading all your posts.