• Skip to primary navigation
  • Skip to main content
  • Skip to primary sidebar
Home About Subscribe Summer Sew Camp Disclosures

Always Expect Moore

Quilts & Pattern Design

  • Cricut Maker BOTW
  • Quilty5k
  • Gallery Wall QAL
  • Trunk Show
  • Guild Resources
  • Pattern Shop
  • Free Patterns
Home About Subscribe Summer Sew Camp Disclosures
  • Cricut Maker BOTW
  • Quilty5k
  • Gallery Wall QAL
  • Trunk Show
  • Guild Resources
  • Pattern Shop
  • Free Patterns
Home » Blog » Quilt » Cricut Maker Block of the Week Quilt: Week 10 – Adding Sashing

Cricut Maker Block of the Week Quilt: Week 10 – Adding Sashing

Created On: November 24, 2017  |  Updated: August 22, 2022  |   2 Comments

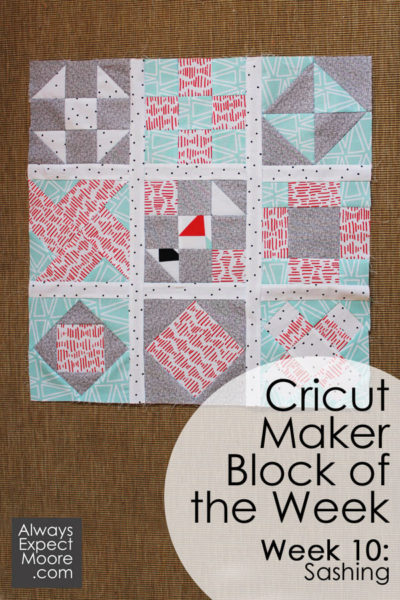
We’re up to week TEN of our Cricut Maker Block of the Week! I’m so excited!! This week we get to put all those quilt blocks together into a quilt top, using the sashing that we cut in Week 1: Intro. So, we will have no actual cutting today! Just sewing and pressing as we add the sashing pieces and make our mini quilt top for our Cricut Maker Block of the Week quilt! It is so fun to make a quilt with the Cricut Maker!

If you’re just finding this series, start by going to the Cricut Maker Block of the Week Reference Page. That has all the links and videos to get you started from the very beginning.

Cricut Maker Block of the Week - Week 10 - Adding Sashing to your quilt

Let’s get started on adding the sashing! No cut file this week, since we cut the sashing at the very beginning. The reason we cut the sashing first, even though we didn’t need it until now, was because there are such large sashing pieces. We want to cut these larger pieces first, and then our smaller pieces after. If we cut the smaller pieces first, there might not be enough room on our fabric to cut the larger pieces later.

If you’d like to watch the video, you can watch it here. Or you can follow along in the step-by-step photos below.

Note: In the video, I show you how to square up blocks. Ideally, your quilt blocks are all exactly the right size. When I stitched the version seen in the photos below, they were very accurate. The blocks I stitched for the video were less accurate (not surprising since I had my head off to an angle to keep it out of the camera frame, and my mind was focused on talking and filming instead of just sewing).

Make a quilt with the Cricut Maker

Grab those sashing pieces that we set aside. Leave the border pieces. We’ll be using the border pieces next week.

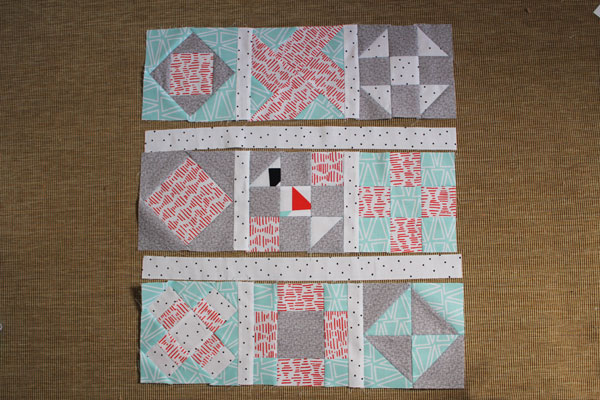
Lay out all nine blocks, and the sashing pieces. You don’t have to use the same layout I did. Depending on the fabrics you chose, your quilt might look better with a different layout. And even if you chose the exact same fabrics, you might like a different layout than mine. There are no wrong choices here.

lay out quilt top

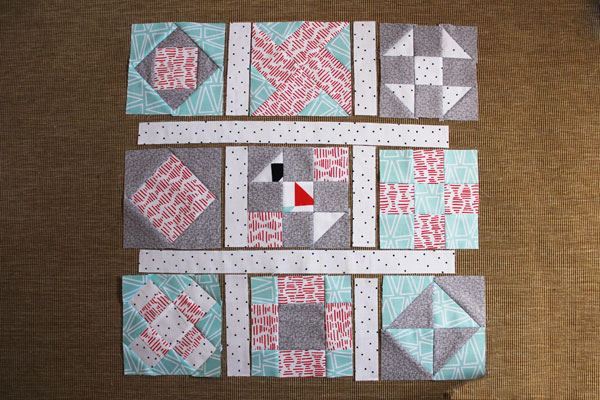
If you’ve been following along, you know that each step builds on the previous steps. This step builds on past steps. Because this part of the quilt looks remarkably like something else we have done before…

lay out the block

That’s right! The nine patch! Putting together this quilt top is just like a nine patch… but with adding the sashing pieces between the blocks. Which is easy.

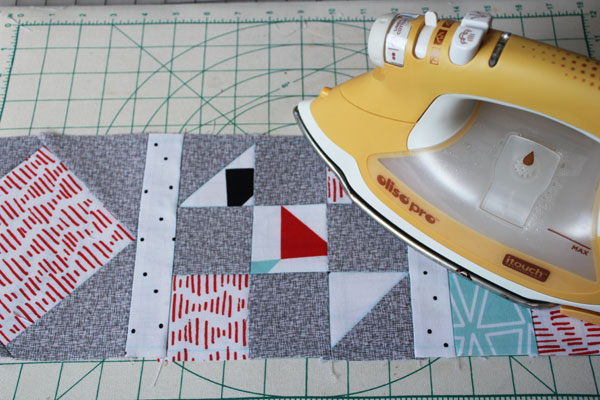
Start by stitching your sashing and blocks into rows. Press the seams towards the sashing strips.

press rows

Lay the quilt back out.

finished rows

Now stitch the sashing to the top and middle rows. It helps to pin the sashing on each end, and then in the middle. This ensures that the sashing is even along the length of the whole row. Press the seam allowance towards the sashing.

sashing on rows

I don’t have photos of this step, but you can watch in the video. What we want to do here is line up each vertical sashing strip with the sashing strip above/below it. That would be easy to do with seam allowances. But the horizontal sashing doesn’t have seam allowances. Use a ruler (or any straight edge – the edge of your mat will do) and your blue water-soluble marking pen from the Cricut machine to extend the seam allowance lines down across the back of your sashing pieces. Then match up the rows, pinning where the seam allowance from the bottom row matches up with the line that you’ve drawn. Then stitch the rows together.

finished sashings

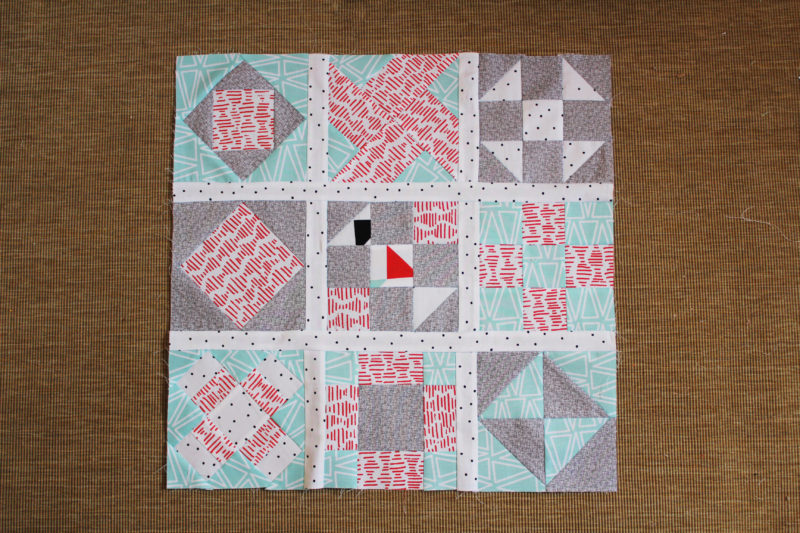
Press all the seam allowances towards the sashing, and you’re all done!

Next week we’ll add the borders. And the week after we’ll get to my favorite part… quilting!

posted in: Cricut Maker Block of the Week, Cricut Maker BOTW, Quilt, Quilt Pattern, Sewing, Sewing Tutorials, Video

Previous
Cricut Maker Block of the Week Quilt: Block 9 – Mother’s Dream
Next
Cricut Maker Block of the Week Quilt: Week 11 – Adding Borders

Reader Interactions

    Leave A Reply! Cancel reply

    Share your thoughts!
    Your email address will not be published. Required fields are marked with *

    This site uses Akismet to reduce spam. Learn how your comment data is processed.

    Comments & Reviews

  1. Barbara Walser says

    January 26, 2019

    I just purchased the materials to make the block of the week quilt with my new Cricut Maker. Unfortunately , your directions show cutting the sashing and borders first, but when I go to Design Space, it starts out cutting blocks. What should I do???

    Reply
    • Carolina says

      February 4, 2019

      The sashing is its own file, from the first video – the intro video. It only has sashing and border cuts in that file, so it will not cut out blocks.
      Perhaps you are cutting from the wrong file?

      Reply

Primary Sidebar

Hi, I'm Carolina!

I’m a Quilt Pattern Designer, Award Winning Quilter, and fan of all things quilting. I live in San Diego with my husband, our two boys and our pets. I love keeping both my hands and mind busy, so I’m always working on lots of projects. You’ll find lots of them shared here!

More About Me

Let's Keep In Touch!

I'll let you know about what's new in quilting, freebies you'll want to snag, and brighten your inbox about once a week!

subscribe
90% Faster Than Rotary Cutters

Fat Quarter Shop Quilting Fabrics and Supplies

Instagram Facebook Pinterest YouTube

Recent Posts

  • Flying Pig Quilt Block
  • Bunny and Carrot Quilt Block
  • Free Fancy Drink Quilt Block
  • Dutch Row Houses Quilt Block
  • Quilted Sports Jersey Numbers

Archives

Featured Projects

  • Everything you want to know about Pre Cut Fabrics!
  • Scrappy Placemat - easy to make scrap project
    Scrappy Placemat using Strips and Scrap Tape
  • Sewing Kaleidoscope SVG File
  • Drawstring Backpack
  • Carolina holding fabric marking pens
    Choosing Fabric Marking Pens

Let's Keep In Touch!

Brighten your inbox about once a week!

Always Expect Moore Submark Shop Patterns

Browse

  • Ruler of the Month
  • Quilty5k
  • QuiltMath
  • Cricut Maker BOTW

Shop

  • Digital Download Patterns
  • Quilting Notions
  • Quilt Stickers
  • Quilt Tees

Connect

  • YouTube
  • Instagram
  • Facebook Group
  • TikTok
©2025, Always Expect Moore. All Rights Reserved. About Disclosures
Back To Top
Design by Pixel Me Designs
×

Let's Keep In Touch!

I'll let you know about what's new in quilting, freebies you'll want to snag, and brighten your inbox about once a week!