I made a quilt coat from orphan blocks, and have gotten many questions about which pattern I used, the process I used for making it, and other construction details. I’m going to detail all my quilt coat making details here so that I can use them for reference if I want to make another Quilt Coat in the future, and so you can consider them in the making of a quilt coat of your own if you like!
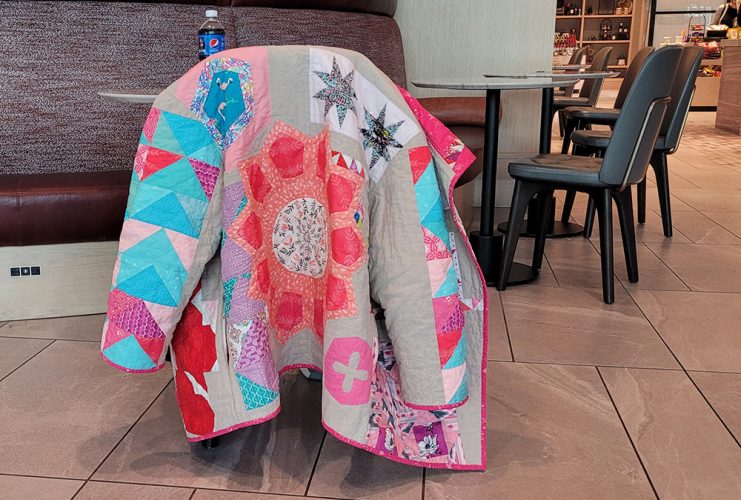
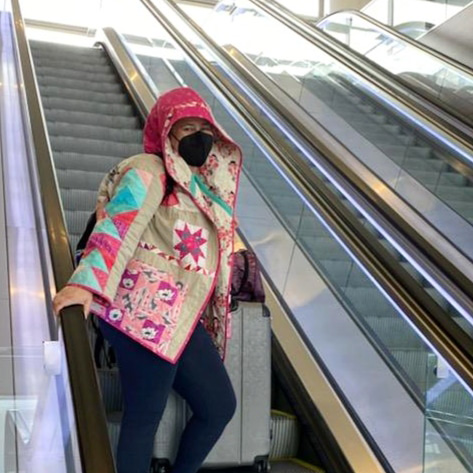
Here is a quick 360 view of my finished quilt coat. It was made using “orphan blocks” which is a quilter term meaning “leftover quilt blocks from past projects.” I used Art Gallery Fabrics Denim in “oatmeal” (which is a linen blend) for the background – it has some body to it, but is still a great neutral to go with the bright pinks and teals. You can watch the 360 video of the quilt coat here.
What is the best pattern for a quilt coat?
There are lots of amazing patterns for coats and quilt coats out there. The best pattern will depend on what your goals are for your quilt coat. Here is a checklist of items to consider:
- What shape coat suits your body type?
- Do you want a coat that is oversized, or more fitted?
- Are you comfortable adjusting a pattern not designed for quilted fabric?
- Are you able to print the pattern at home, and tape the pieces together?
- What features do you want your coat to have (pockets, hood, lapel, pleats, darts, etc)?
For my quilt coat, I knew that I wanted a coat with a large hood. I’m not an expert garment sewist, but I’m comfortable sewing clothing and knew I could make adjustments “on the fly” as needed. And I really didn’t want to have to print and tape pattern pieces together. Both my printers were acting up, and the last time I printed a pattern I had to re-print it because I didn’t print it properly to scale the first time.
I went to my local JoAnn and browsed through their pattern catalogs. I wrote down the pattern numbers for multiple different coat patterns that had hoods, and then went to the pattern drawers to see which they had in stock. I ended up going with Burda 7700. This is a pattern that was designed for a knit fabric rather than a woven fabric. The biggest differences between knit and woven when sewing is that you don’t need to worry about knit fabric fraying, and that knit fabric will stretch so is much more forgiving in garments than woven fabric. Because I was using quilted woven fabrics, I made the jacket 2 sizes larger than my normal fit, and I purchased bias tape to finish off all the seams inside the quilt coat.
What quilt blocks to use in a quilt coat?
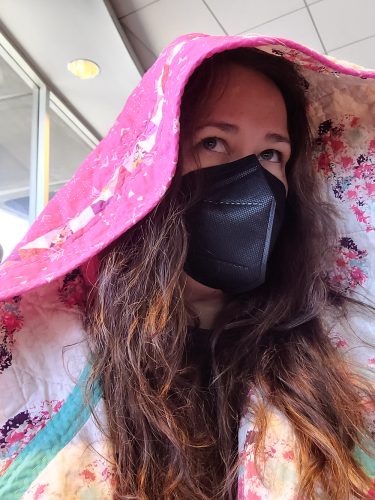
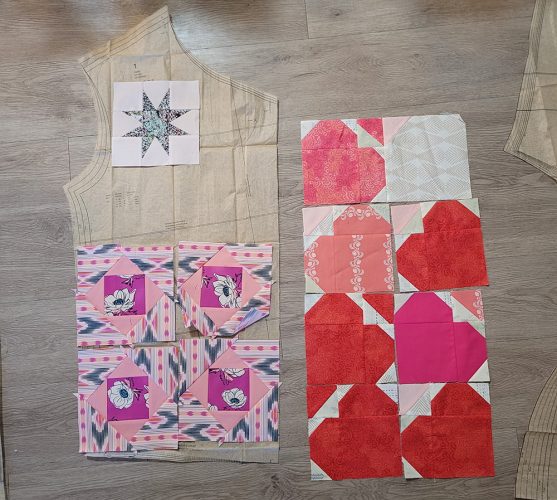
I took the pattern home, cut out the pieces I needed, and then put them on the floor. I went through my box of orphan blocks and selected blocks that had a similar color story. I picked blocks that had pink/teal/aqua in them, which made the coat feel more cohesive while still being scrappy. I put the blocks on top of the cut pattern pieces to get a general idea of how the coat would look, and to see if I had enough blocks.
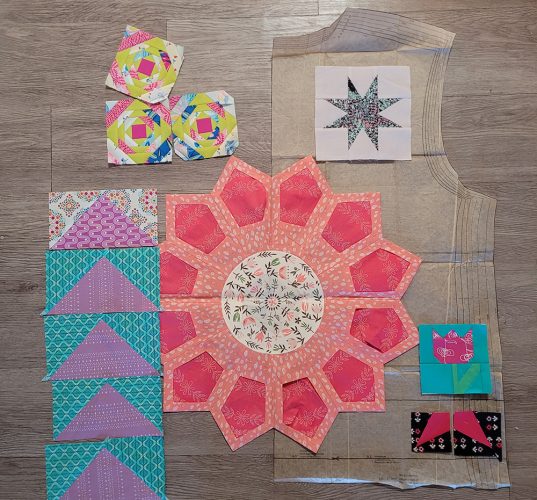
I knew I wanted a “statement” block on the back, and I had a large dresden-style block that was perfect for a statement piece on the back of the coat. I also had quite a few flying geese blocks. I decided these were perfect for the sleeves. A flying geese block looks like a chevron, which is a common motif on the sleeves of military uniforms. If you’ve read “The DaVinci Code” you know that the chevron makes both a “blade” and “chalice” shape, so I knew I’d piece the flying geese randomly to reflect both blade/chevron as well as chalice motifs on my sleeves.
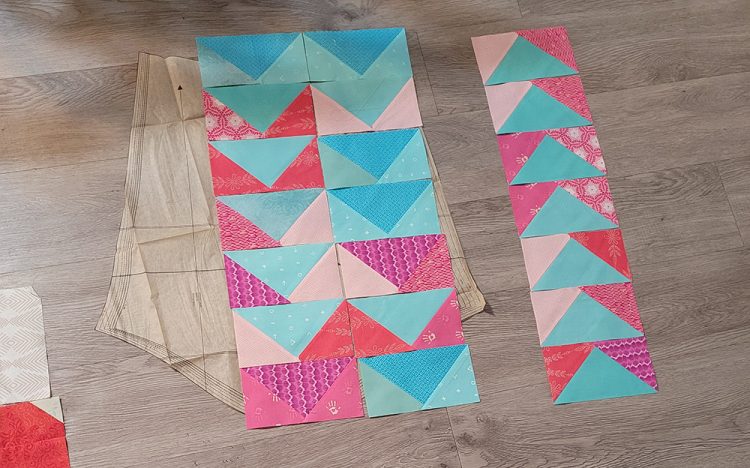
The rest of the blocks were used for the front of the coat and the hood. You’ll see that in the finished coat design I put all the star blocks on one side of the hood, and pieced scrappy 1″ half-square-triangles to use on the other side of the hood with a different background fabric. This all still matches the color story of the coat, but adds to the scrappy flavor of the quilt coat.
Improv piecing a quilt coat
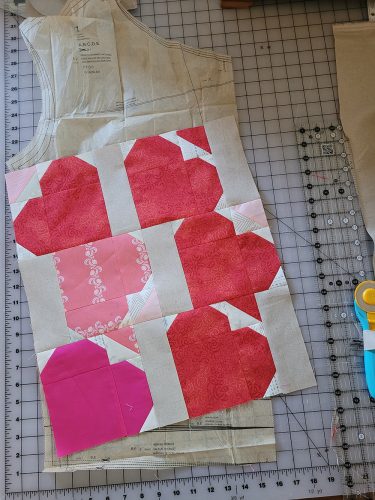
Once I had an idea of which blocks I wanted to use in which section, it was a matter of improv piecing the sections. I added background fabric to the quilt blocks, piecing the blocks and background fabric together until they were larger than the pattern piece for that section of the quilt coat. It is important to remember that quilting the fabric will shrink the finished size a bit – and more quilting can shrink it more significantly – so I wanted to make sure I gave myself at least an extra inch on all sides.
It is also important to remember that the front of the quilt coat has a right and left side – so one side was pieced to fit the pattern piece, then I flipped the pattern piece over to make the opposite side.
Quilting the Quilt Coat
After all the sections were pieced, I cut backing and batting pieces, basted them, and then quilted it all together. For the backing pieces, which would become the lining of the quilt coat, I used another Art Gallery Fabrics print. It had the same color story, and was just perfect. It was a directional print (with hearts), so I was careful to make sure that I paid attention to the direction of the print. I didn’t want any upside-down hearts on the inside of my quilt coat.
I used my Baby Lock Shashiko machine to do all the quilting. This gives a hand-quilted look on the outside of the quilt coat, without needing to take the time to hand quilt any of the pieces. I may add hand-accented quilting to the quilt coat at a later date as well. I followed some of the lines on the pieced blocks to determine my lines of stitching. But it wasn’t incredibly planned out – just lines of stitching to secure the layers together and add to the overall look. If you want to learn more about the Baby Lock Sashiko machine, you can see my Baby Lock Sashiko unboxing post, or use this affiliate link to head to the Baby Lock Website.
After all the sections were quilted, I pinned the pattern pieces onto the quilted sections and cut them out. The pocket pieces were cut from leftover sections, I hadn’t planned those out.
Putting the Quilt Coat together
I read through the instructions twice before starting to piece the quilt coat. After sewing each seam, I trimmed down the seam, then stitched on the bias tape to finish the seam. I was a little frustrated with the seam that connected the hood to the coat. It is such a visible seam, and to have it covered with bias tape that would stick out wasn’t going to work for me. Instead of trying to hide it, which I didn’t have the skills to do, I decided to make it a feature.
I bought larger bias tape in a teal color (all the rest of the bias tape was pink). I trimmed down the seam allowance, then pressed it open. I then used school glue to carefully baste the bias tape over the seam allowance in a large, flat band. To secure it, I used the sashiko machine to make two rows of stitches on each side. This hid the seam while creating an accent stripe at the neckline – turning what would have been an ugly part of the coat into a fun bit of flair.
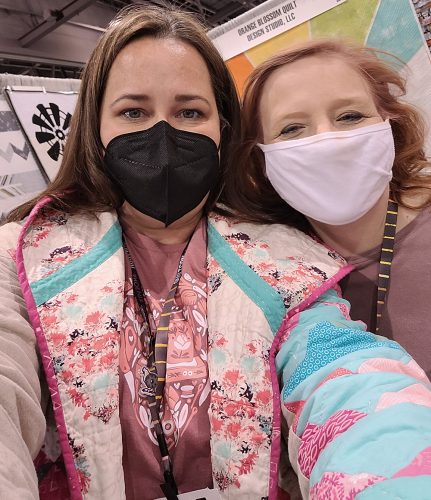
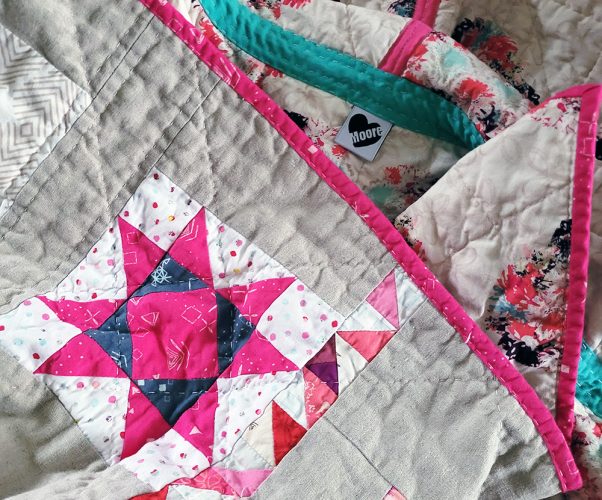
Once all the pieces were put together, and the seams finished with bias tape (including the seams around the pockets), I cut bias binding from the same accent fabric I had used for the accent side of the hood, and I machine bound the coat. The final machine stitches were also done with the Sashiko machine, which kept that faux-hand-stitched-look throughout the garment.
The final thing that I added was securing the pockets to the inside of the coat. The pockets were designed to float freely in the coat, but by securing them to the inside of the coat along the bottom and sides (leaving the top open) I created inside pockets. Extra pockets are always a good thing, in my book!
Oh – and I washed my quilt coat. I’d used glue and basting spray in putting it together, and I wanted to wash out as much of it as possible before wearing it for the weekend. I also knew that washing and drying it would give it a more “worn” look, and that went right along with the scrappy, hand-quilted look I had going on with my quilt coat.
Final Quilt Coat Thoughts
That is how I put my quilt coat together. I absolutely loved making it, and while it wasn’t perfect, I’m thrilled with how it came out. I had originally planned to make it in a single weekend, but it took two weekends to make – even having all the quilt blocks made beforehand! I would love to make another quilt coat in the future, if I can find the time, and decide what kinds of quilt blocks I would want to use for the quilt coat. And while I loved the final shape this pattern gave the quilt coat, I would plan to use a different pattern for my next quilt coat, just to have a completely different look. It is a lot of work, so I’d want the next one to be just as unique as this one is, but in its own way.

Comments & Reviews
Your coat is awesome! What a great way to use orphan blocks.
Thanks! <3