• Skip to primary navigation
  • Skip to main content
  • Skip to primary sidebar
Home About Subscribe Summer Sew Camp Disclosures

Always Expect Moore

Quilts & Pattern Design

  • Cricut Maker BOTW
  • Quilty5k
  • Gallery Wall QAL
  • Trunk Show
  • Guild Resources
  • Pattern Shop
  • Free Patterns
Home About Subscribe Summer Sew Camp Disclosures
  • Cricut Maker BOTW
  • Quilty5k
  • Gallery Wall QAL
  • Trunk Show
  • Guild Resources
  • Pattern Shop
  • Free Patterns
Home » Blog » Uncategorized » Cricut Maker Block of the Week: Week 13 – Binding the Mini Quilt

Cricut Maker Block of the Week: Week 13 – Binding the Mini Quilt

Created On: December 18, 2017  |  Updated: August 22, 2022  |   Leave a comment

Today I’m sharing with you the very last step in the Cricut Maker Block of the Week – adding binding to a Cricut Quilt. While I do machine-stitch on my bindings on occasion, I was taught the “right” way to bind a quilt is to hand bind it.

Cricut Maker Block of the Week - Week 13 - Binding the Quilt

If you’ve followed along on this whole series, you know that I temper convention with practicality in my quilting. I have deep respect for our quilting traditions… but at the same time I believe that modern technology exists to make things easier. But there are times when I bow to tradition just because it is tradition. Binding is one of those instances.

If a quilt’s destiny is to hang out around the house, lay on floors, go through the wash many times, and generally be a utility quilt, then I absolutely machine bind it. Machine binding is more secure. It holds the binding in place very well. It is slightly less attractive because the stitching is visible on both sides of the quilt – but I give up that minor bit of beauty for the practicality of being finished quickly, and having a very strong binding.

For a “show quilt,” (a quilt that is going to hang at a quilt show), I always hand bind. A show quilt is my best work. It is me showing off my skills. I don’t want the stitching that secures the binding in place to be visible at all. Show quilts are meant to honor quilting traditions (even when pushing boundaries with color or composition). To show my deference for all the quilters who came before me, I like to have a well-bound quilt.

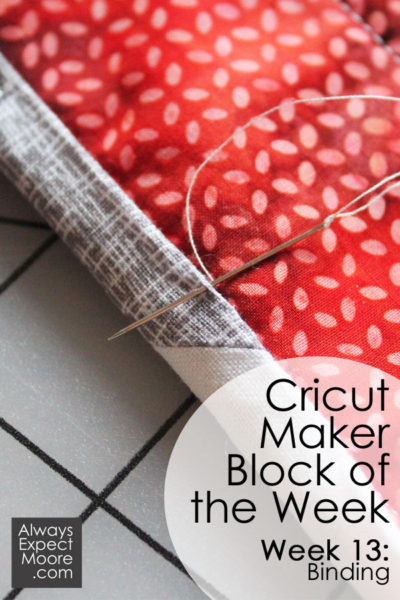
So today I’m showing you how to hand-bind your quilt. The binding is put on by machine, but the final stitching is done by hand. While it isn’t always my favorite part of the quilting process, I absolutely love the look.

Adding binding to a Cricut Quilt

Here is the step-by-step of getting the binding on your quilt!

This post contains affiliate links which help support this site at no extra cost to you.

Again, I have for you the Design Space files you’ll need to finish your quilt. You can use the scrappy binding cut file. Or the large binding strips cut file. Use the first link if you are using the scraps left over from cutting out the blocks, sashing, and borders. If you don’t have enough fabric left to get 110” of binding from your scraps, buy ⅓ yard of a coordinating fabric to use for your binding, and then use the large binding strips cut file. You’ll see that adding binding to a Cricut Quilt is actually quite easy!

If you want to learn even more about binding, there is a great Binding series on Craftsy. You can check it out here.

Here are links to supplies mentioned in the video.

Cricut Maker Machine
Bundled Fabric
Cricut Fabric mat
Fabric pen

posted in: Uncategorized

Previous
Cricut Maker Block of the Week Quilt: Week 12 – Quilting the Mini Quilt
Next
No Sew Mini Quilt with Cricut Patterned Iron-On

Reader Interactions

Leave A Reply! Cancel reply

Share your thoughts!
Your email address will not be published. Required fields are marked with *

This site uses Akismet to reduce spam. Learn how your comment data is processed.

Primary Sidebar

Hi, I'm Carolina!

I’m a Quilt Pattern Designer, Award Winning Quilter, and fan of all things quilting. I live in San Diego with my husband, our two boys and our pets. I love keeping both my hands and mind busy, so I’m always working on lots of projects. You’ll find lots of them shared here!

More About Me

Let's Keep In Touch!

I'll let you know about what's new in quilting, freebies you'll want to snag, and brighten your inbox about once a week!

subscribe
90% Faster Than Rotary Cutters

Fat Quarter Shop Quilting Fabrics and Supplies

Instagram Facebook Pinterest YouTube

Recent Posts

  • Flying Pig Quilt Block
  • Bunny and Carrot Quilt Block
  • Free Fancy Drink Quilt Block
  • Dutch Row Houses Quilt Block
  • Quilted Sports Jersey Numbers

Archives

Featured Projects

  • Everything you want to know about Pre Cut Fabrics!
  • Scrappy Placemat - easy to make scrap project
    Scrappy Placemat using Strips and Scrap Tape
  • Sewing Kaleidoscope SVG File
  • Drawstring Backpack
  • Carolina holding fabric marking pens
    Choosing Fabric Marking Pens

Let's Keep In Touch!

Brighten your inbox about once a week!

Always Expect Moore Submark Shop Patterns

Browse

  • Ruler of the Month
  • Quilty5k
  • QuiltMath
  • Cricut Maker BOTW

Shop

  • Digital Download Patterns
  • Quilting Notions
  • Quilt Stickers
  • Quilt Tees

Connect

  • YouTube
  • Instagram
  • Facebook Group
  • TikTok
©2025, Always Expect Moore. All Rights Reserved. About Disclosures
Back To Top
Design by Pixel Me Designs
×

Let's Keep In Touch!

I'll let you know about what's new in quilting, freebies you'll want to snag, and brighten your inbox about once a week!