• Skip to primary navigation
  • Skip to main content
  • Skip to primary sidebar
Home About Subscribe Summer Sew Camp Disclosures

Always Expect Moore

Quilts & Pattern Design

  • Cricut Maker BOTW
  • Quilty5k
  • Gallery Wall QAL
  • Trunk Show
  • Guild Resources
  • Pattern Shop
  • Free Patterns
Home About Subscribe Summer Sew Camp Disclosures
  • Cricut Maker BOTW
  • Quilty5k
  • Gallery Wall QAL
  • Trunk Show
  • Guild Resources
  • Pattern Shop
  • Free Patterns
Home » Blog » Uncategorized » Framed Quilt Wall with Krylon Dual Paint

Framed Quilt Wall with Krylon Dual Paint

Created On: July 7, 2011  |  Updated: July 7, 2011  |   5 Comments

I was thrilled when Krylon Paints offered to send me some of their Krylon Dual Paint and Primer spray paint! I haven’t done a whole lot with spray paint in the past, and was looking forward to playing with the paint. Plus, I figured this would provide me with the perfect opportunity to work on the quilt wall I’ve been wanting to make.

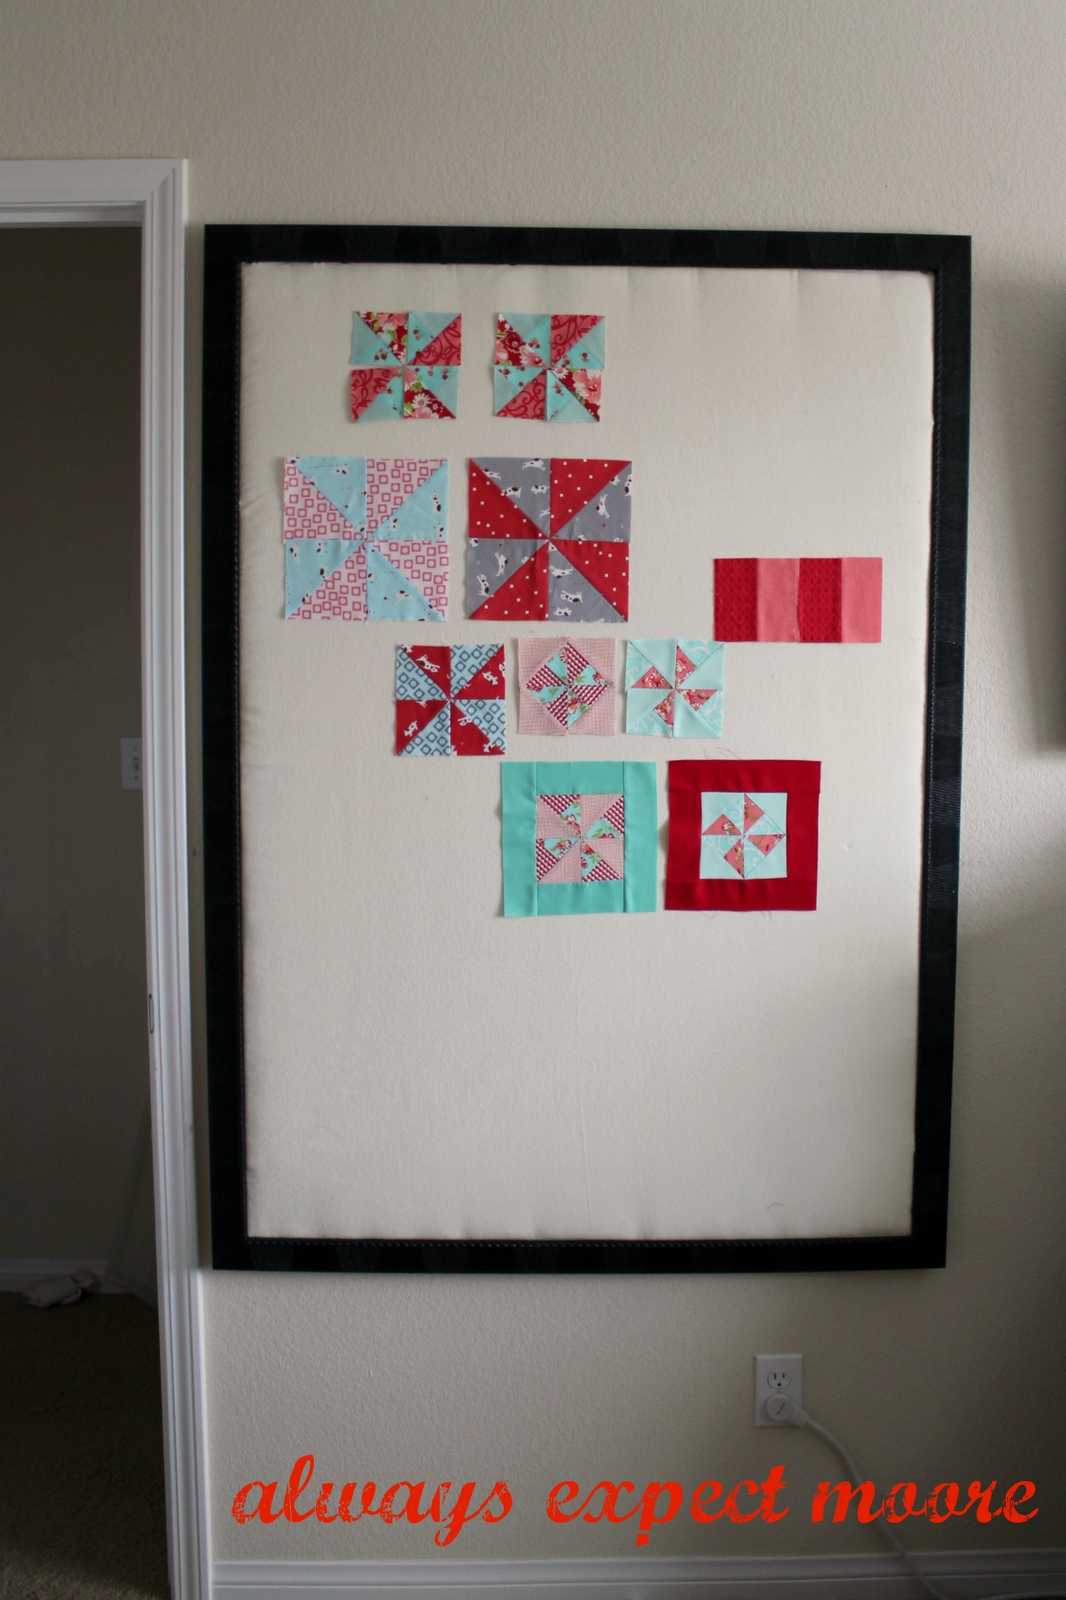
For those of you who aren’t quilters, or are beginning quilters, a quilt wall is a large surface, often a wall, covered in batting, flannel, or maybe fleece. When a quilter is trying to figure out the layout of a quilt, they can lightly place fabrics or quilt blocks against the quilt wall, and they stick! No pinning or adhesive, and they are easy to move around as the quilter works on getting the layout of the quilt just right. As you can see here, a quilt wall is also a great place to store stray blocks that haven’t made it into a project yet.

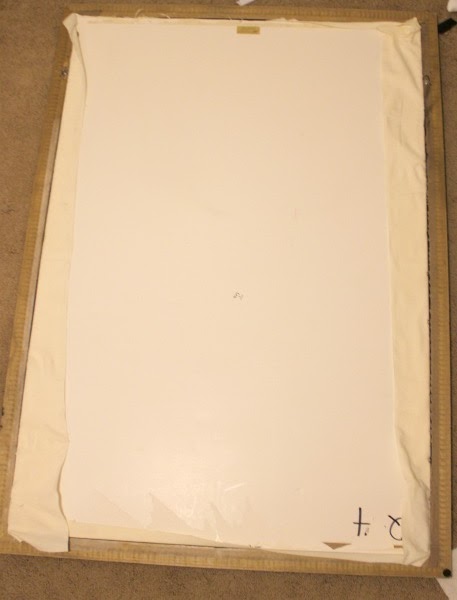
For my quilt wall, I knew that I didn’t just want to tack a large piece of flannel to the wall of my room. I wanted to give my quilt wall a finished look, and framing up a piece of flannel seemed like the most logical way to do this.

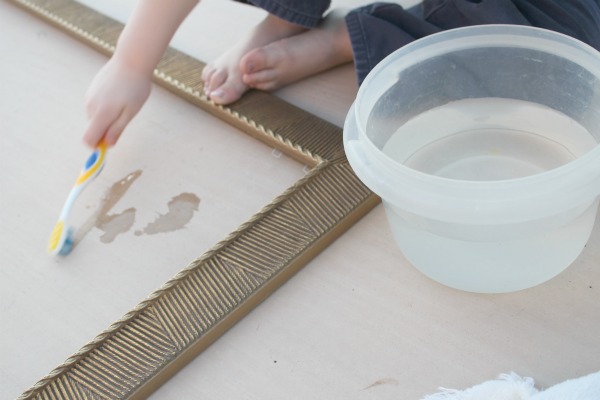
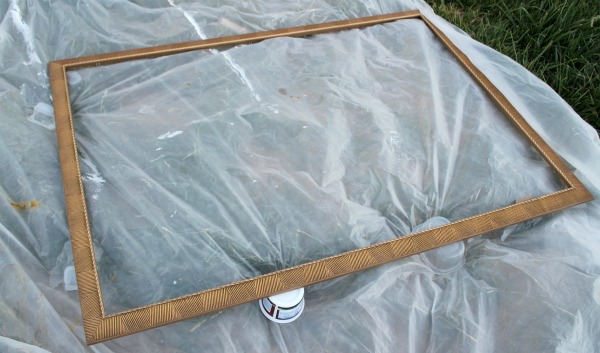
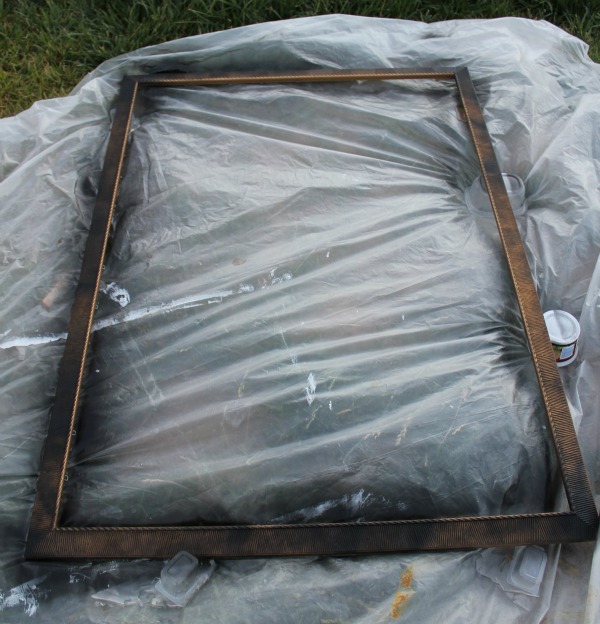
To make your own quilt wall you’ll need a large poster-sized picture frame (or larger), enough flannel to generously cover the frame (a yard and a half was just enough for mine), batting (optional), a staple gun, and of course Krylon Spray paint in your chosen color. I chose Black Satin.

I started out with this garage sale find. It is a 3 x 4.5′ framed print that had a garage-sale sticker price of $30. It was after noon when my friend Christy and I stumbled across it, so I was ready to offer $20. Lucky for me Christy is a garage sale pro, and talked the seller down to $10! Score! The frame was too big to fit in my tiny little car, so the seller drove it two blocks down to my house for free! I should also add that Christy actually paid for the frame, and wouldn’t let me pay her back, so technically the frame cost me nothing at all! Thanks Christy!
I took the frame apart and started cleaning the frame with some plain water and a toothbrush to get out all the grime and dirt that had accumulated in the crevices. No need to paint all the dirt into the frame. 
I got some help from Little Moore with the process.
And some help from Mo, our dog. Okay, maybe neither of them was particularly helpful, but they enjoyed hanging out.
Once the frame was clean and dry, I set it out on the grass, on a painter’s drop cloth, propped up on some old plastic storage containers.
I then stopped to read the instructions thoroughly. I should also add that I made sure to wear clothes that are not fit to be seen in public. My oldest, rattiest clothes that I didn’t mind getting spray paint on. Shockingly, I got very little paint on my clothes, and they will survive to participate in a future messy craft project!
 
After giving the paint a good long shake, I sprayed on a light coat. I’ve found that the best way to apply spray paint is to keep moving. This avoids drips. Also, whenever I stop spraying, I keep my hand moving, continuing to shake the container.
I continued, spraying several light mists over and over until the entire frame was black. I was thrilled with the full coverage that the Krylon Dual Paint and Primer spray paint provided.
While the paint was drying outside, I went back inside. I put the plexiglass aside, and used the print that had been in the frame. It was printed on sturdy cardboard that was just perfect for this project.
I covered the frame with two layers of batting, to give it a cushy feel. This is an optional step, as there is no reason a quilt wall needs to be padded, but I wanted to have the option to pin papers (like pattern instructions) to the quilt wall if I need to, and the padding will make this easier. I cut the batting the same size as the cardboard.
For this size frame, I bought 1 1/2 yards of off-white flannel, and it was just enough to cover the cardboard. I covered the trimmed batting and cardboard with the flannel, and smoothed out any wrinkles.
I flipped the cardboard-batting-fabric “sandwich” over, and placed it in the now dry frame. I then used my staple gun to staple through all the layers, into the lip of the frame. I had to make sure I stapled very close to the edge of the cardboard to get the staple securely into the frame.
After trimming off the excess fabric, it was ready to hang – the hardware was already on the frame!
I love my new framed quilt wall!

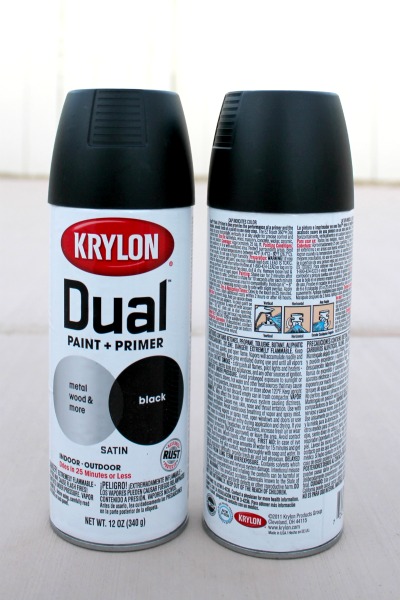
Krylon provided me with several cans of spray paint for free, however all opinions are my own.

Krylon sent me the new Dual Paint to try out. Check out their latest promotion, The Dual Duel, where Krylon is looking to find The Ultimate Restorer. To win this title, enter your spray paint restoration project and encourage friends and family to vote for your project as their favorite for their chance to win too.
Dual Duel Button

Always,

posted in: Uncategorized

Previous
Bloggy Friends – Moore Love Monday
Next
Little Red Sewing Chair with Krylon Dual

Reader Interactions

    Leave A Reply! Cancel reply

    Share your thoughts!
    Your email address will not be published. Required fields are marked with *

    This site uses Akismet to reduce spam. Learn how your comment data is processed.

    Comments & Reviews

  1. About Myself - Debra says

    July 7, 2011

    Toooo much work for me (niggly bits) although, I would love to have a bash at quilting!

    Reply
  2. Trianna says

    July 7, 2011

    I love spray painting stuff! My mom always finds things to refinish (as she calls it) but we are always the ones that end up doing the actual work! This is a great idea though. I’m not a quilter, but I can see myself using this for a picture board…just add some strategically placed ribbons.

    Reply
  3. Ms Bibi says

    July 8, 2011

    It looks fantastic!

    I have an old quilt my MIL made and she’s no longer with us so I should frame piece of it before boys destroy it.

    Reply
  4. Carla Royal says

    July 8, 2011

    This is a great idea. Seems like one could use the idea for other things, as well! Meanwhile, you have created a great piece of art that is functional. Ver cool.

    Reply
  5. Alexis of NorthOnHarper says

    July 8, 2011

    This is really a gorgeous form of art! Love love love this idea!

    Reply

Primary Sidebar

Hi, I'm Carolina!

I’m a Quilt Pattern Designer, Award Winning Quilter, and fan of all things quilting. I live in San Diego with my husband, our two boys and our pets. I love keeping both my hands and mind busy, so I’m always working on lots of projects. You’ll find lots of them shared here!

More About Me

Let's Keep In Touch!

I'll let you know about what's new in quilting, freebies you'll want to snag, and brighten your inbox about once a week!

Thank you for subscribing!
subscribe
90% Faster Than Rotary Cutters

Fat Quarter Shop Quilting Fabrics and Supplies

Projects With Pre-Cuts - 7 Colorful Designs

Featured Projects

  • Everything you want to know about Pre Cut Fabrics!
  • Scrappy Placemat - easy to make scrap project
    Scrappy Placemat using Strips and Scrap Tape
  • Sewing Kaleidoscope SVG File
  • Drawstring Backpack
  • Carolina holding fabric marking pens
    Choosing Fabric Marking Pens

Let's Keep In Touch!

Brighten your inbox about once a week!

Always Expect Moore Submark Shop Patterns

Browse

  • Ruler of the Month
  • Quilty5k
  • QuiltMath
  • Cricut Maker BOTW

Shop

  • Digital Download Patterns
  • Quilting Notions
  • Quilt Stickers
  • Quilt Tees

Connect

  • YouTube
  • Instagram
  • Facebook Group
  • TikTok
©2023, Always Expect Moore. All Rights Reserved. About Disclosures
Back To Top
Design by Pixel Me Designs
×

Let's Keep In Touch!

I'll let you know about what's new in quilting, freebies you'll want to snag, and brighten your inbox about once a week!

Thank you for subscribing!