• Skip to primary navigation
  • Skip to main content
  • Skip to primary sidebar
Home About Subscribe Summer Sew Camp Disclosures

Always Expect Moore

Quilts & Pattern Design

  • Cricut Maker BOTW
  • Quilty5k
  • Gallery Wall QAL
  • Trunk Show
  • Guild Resources
  • Pattern Shop
  • Free Patterns
Home About Subscribe Summer Sew Camp Disclosures
  • Cricut Maker BOTW
  • Quilty5k
  • Gallery Wall QAL
  • Trunk Show
  • Guild Resources
  • Pattern Shop
  • Free Patterns
Home » Blog » Uncategorized » Leftover Quilt Square Bags

Leftover Quilt Square Bags

Created On: August 21, 2010  |  Updated: August 21, 2010  |   6 Comments

If you don’t have leftover quilt squares, you can create the same look with a panel of fabric, or you can just use any piece of fabric.

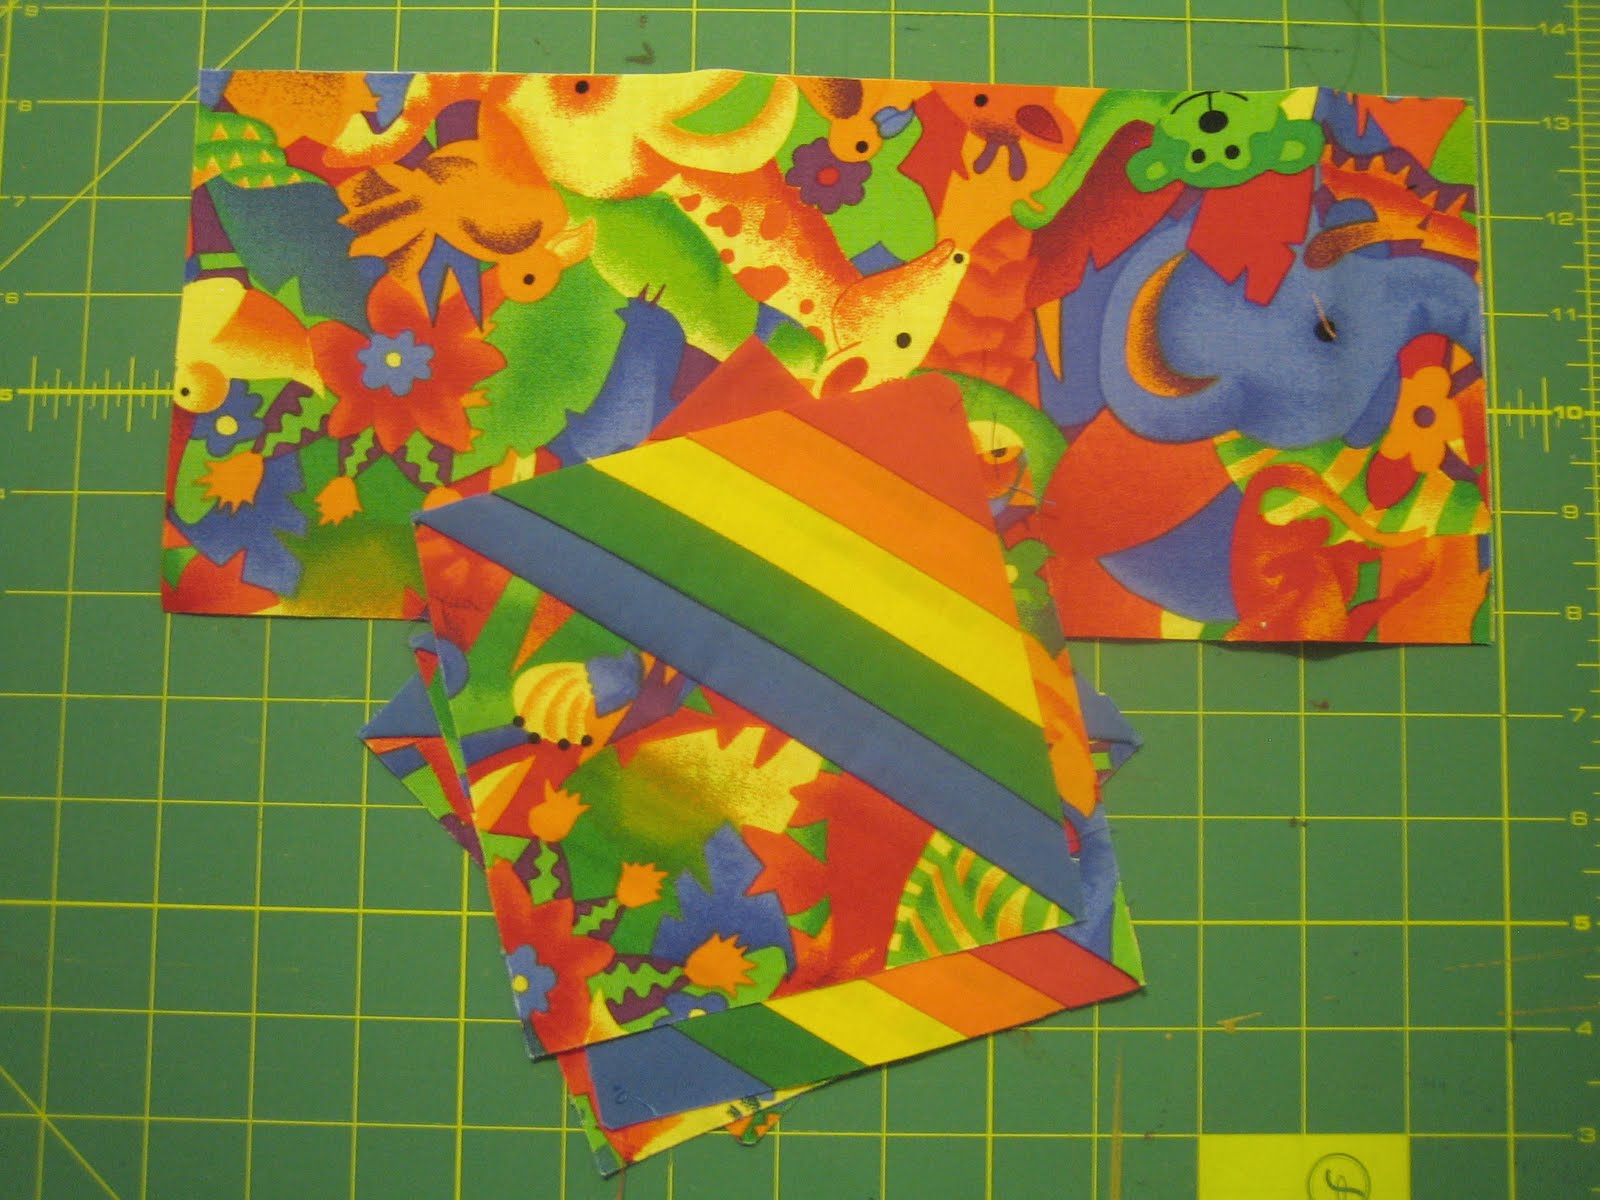
When I quilt, I always have leftover squares. Sometimes squares are from a new technique that I tried, but never made enough squares to add up to something. Some squares are extras I made while making a quilt (I like strip quilting which makes creating a couple extra squares easy, and it is always nice to have a couple extra on hand just in case). In any case, I end up with a stack of ziploc baggies that have random quilt squares in them.

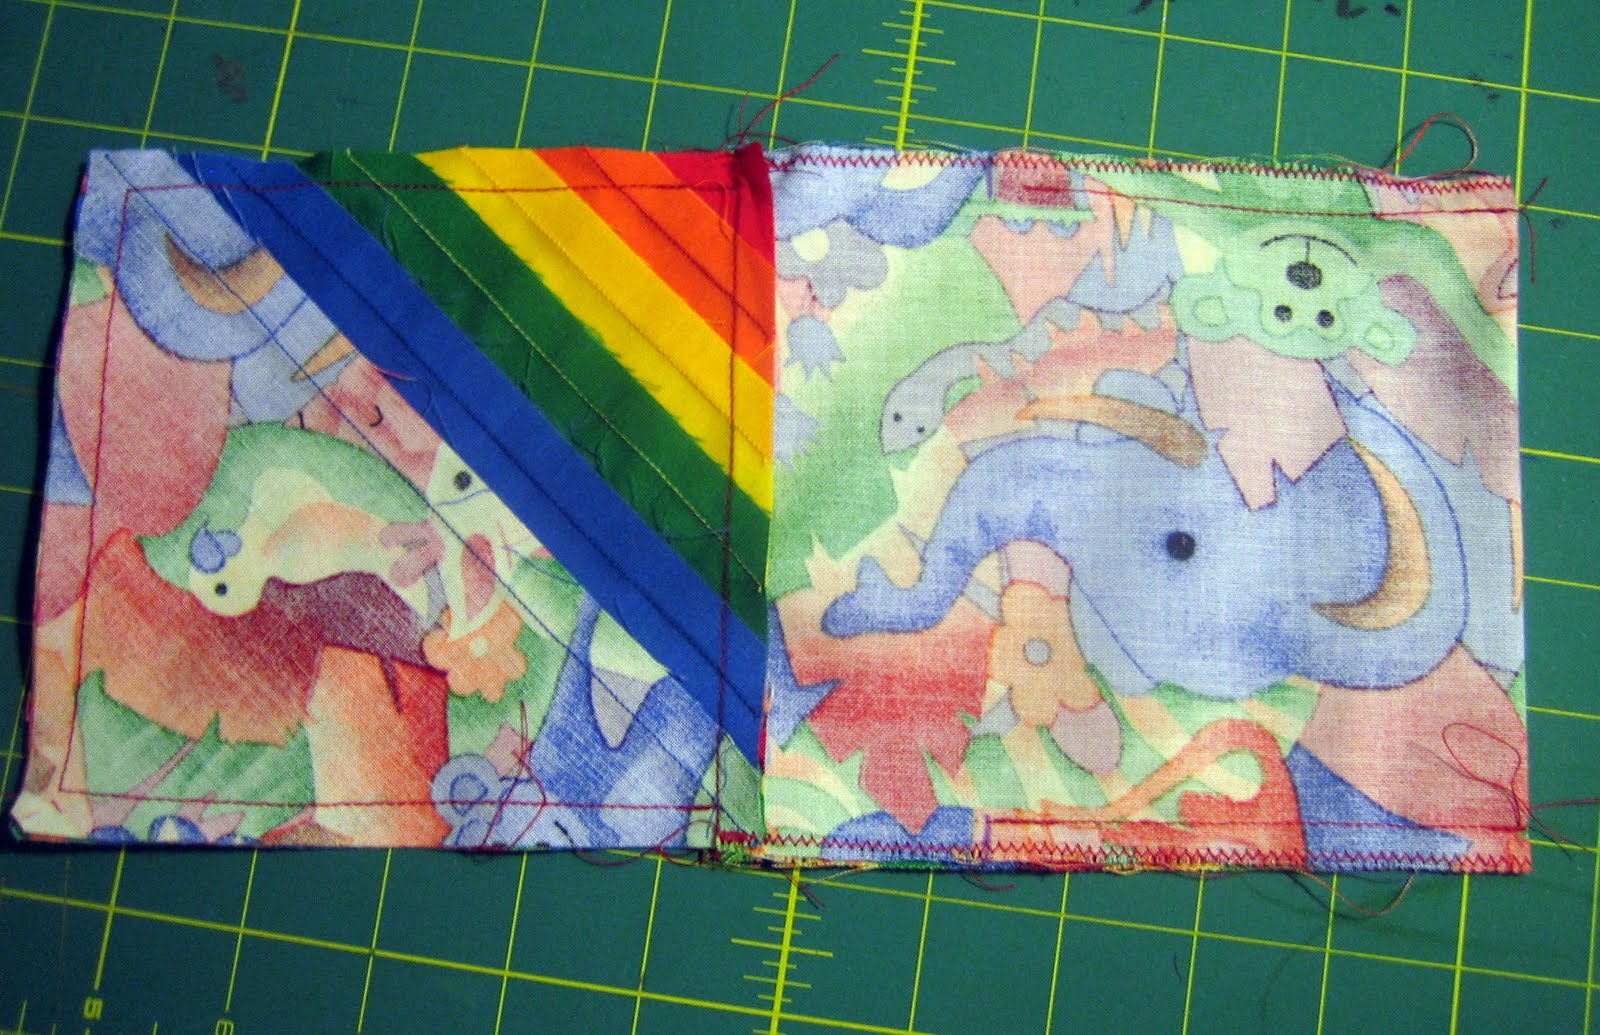
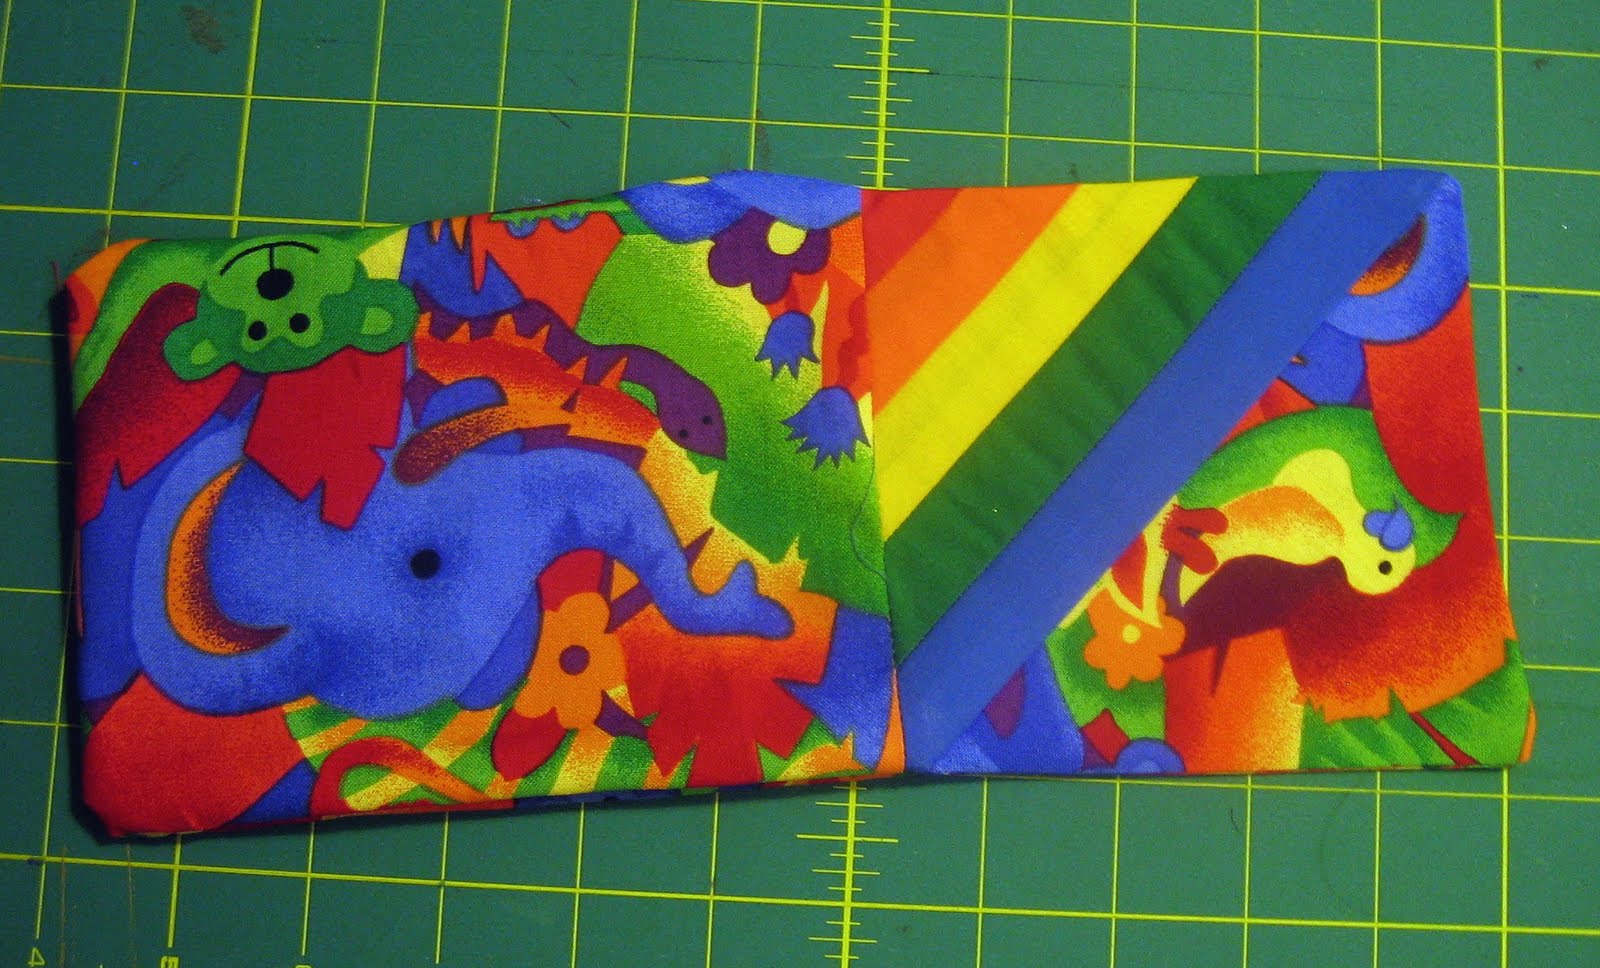
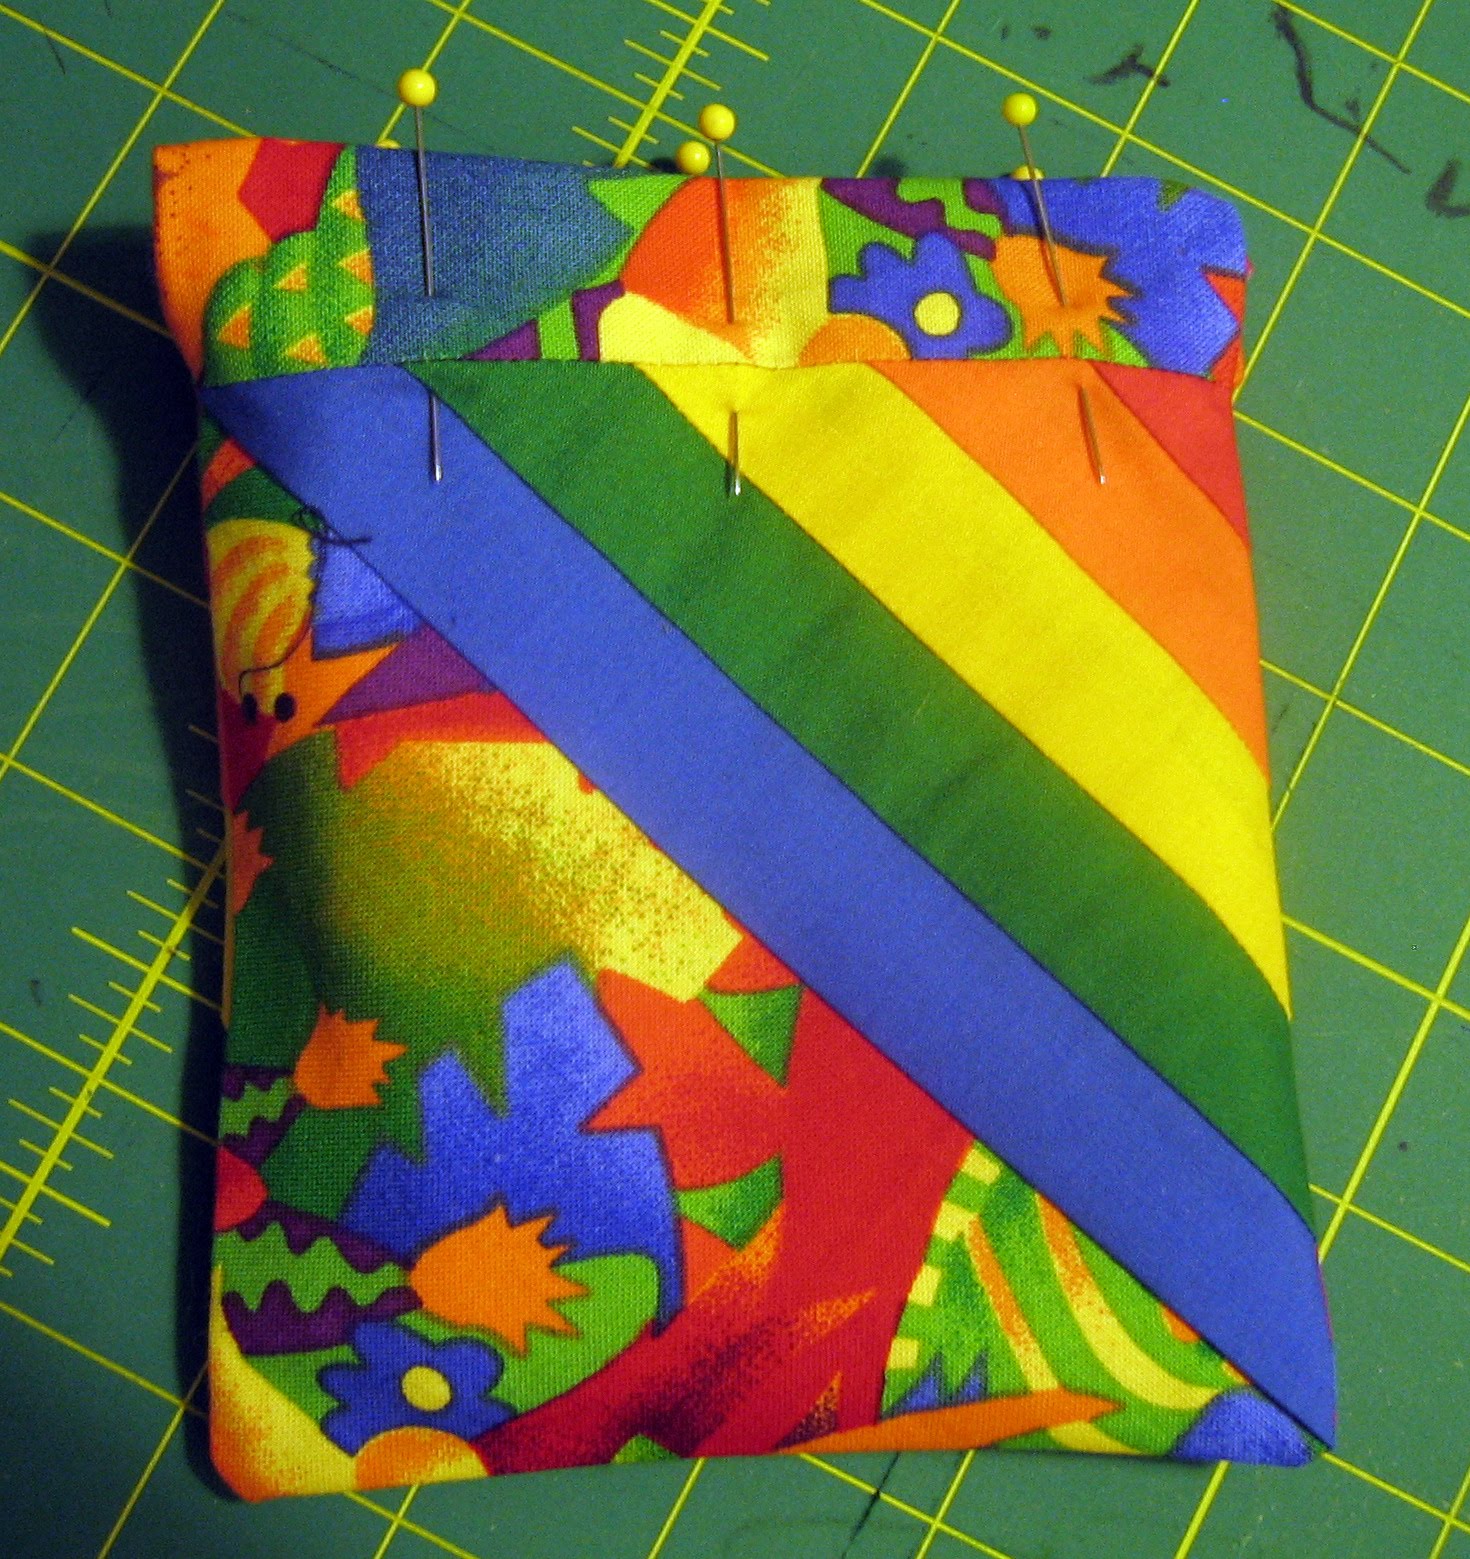
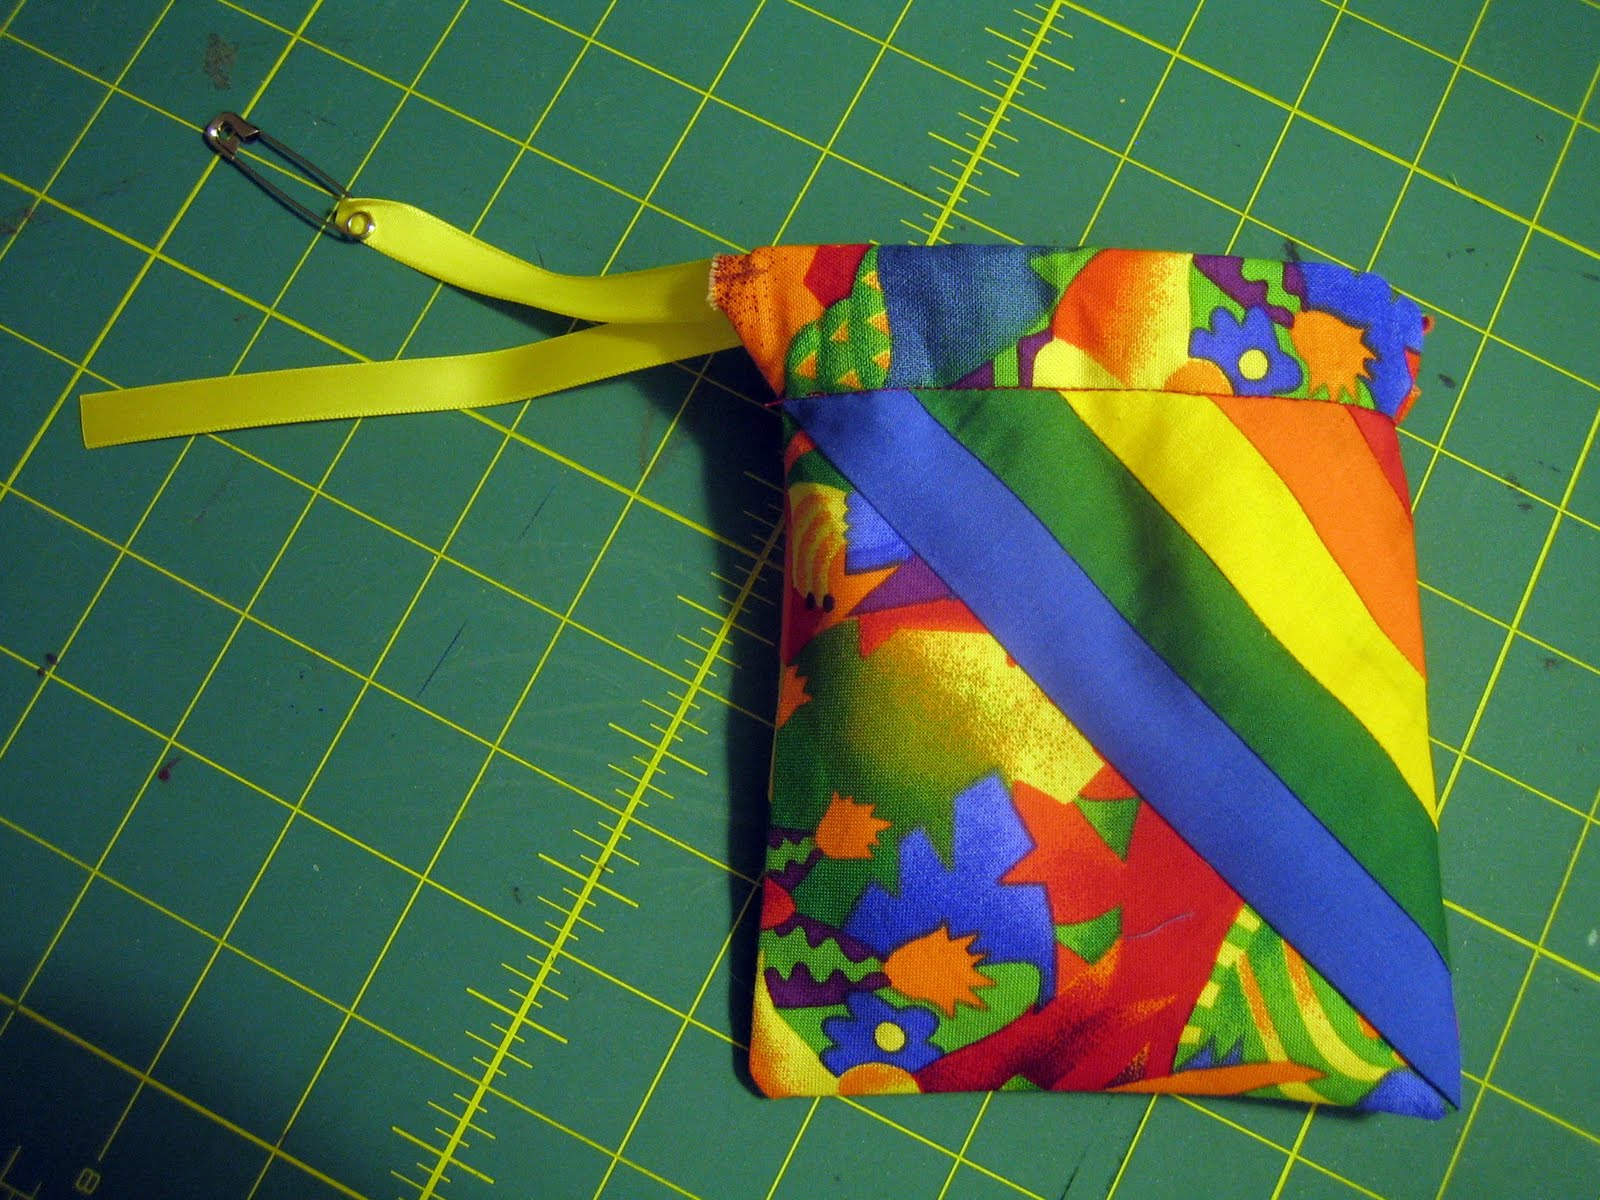
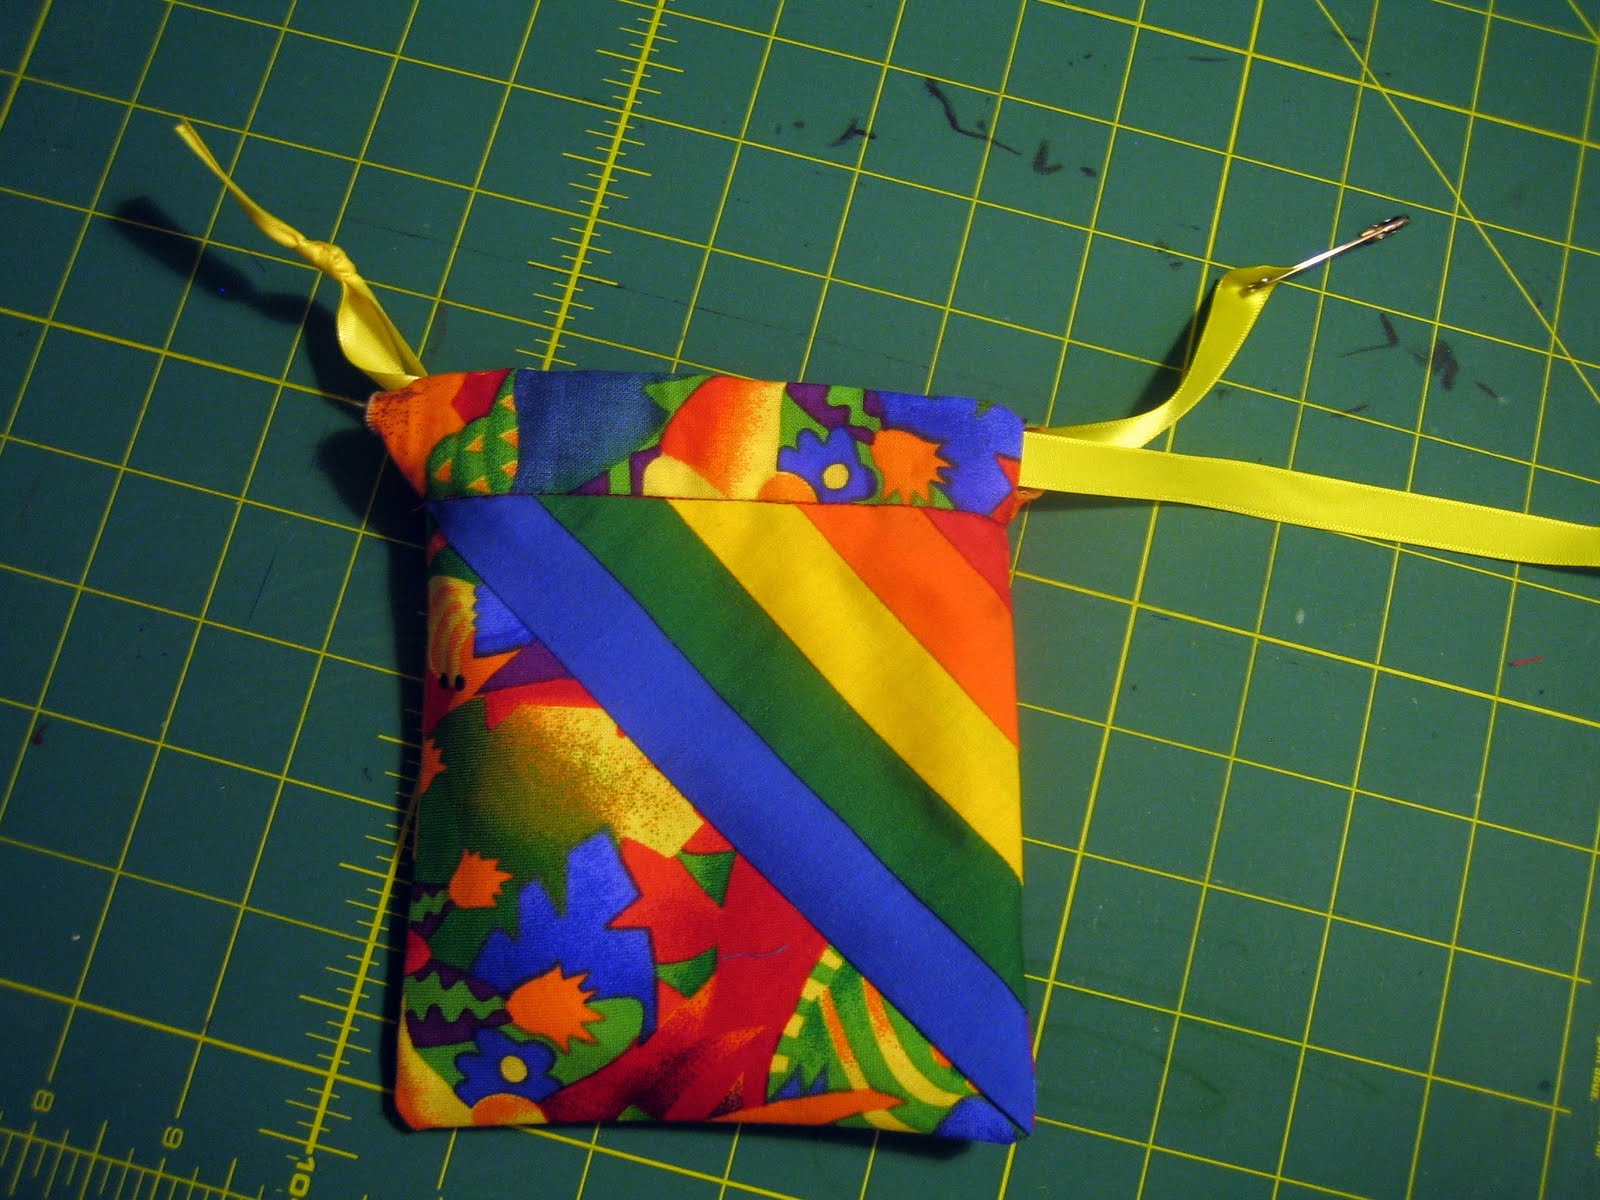
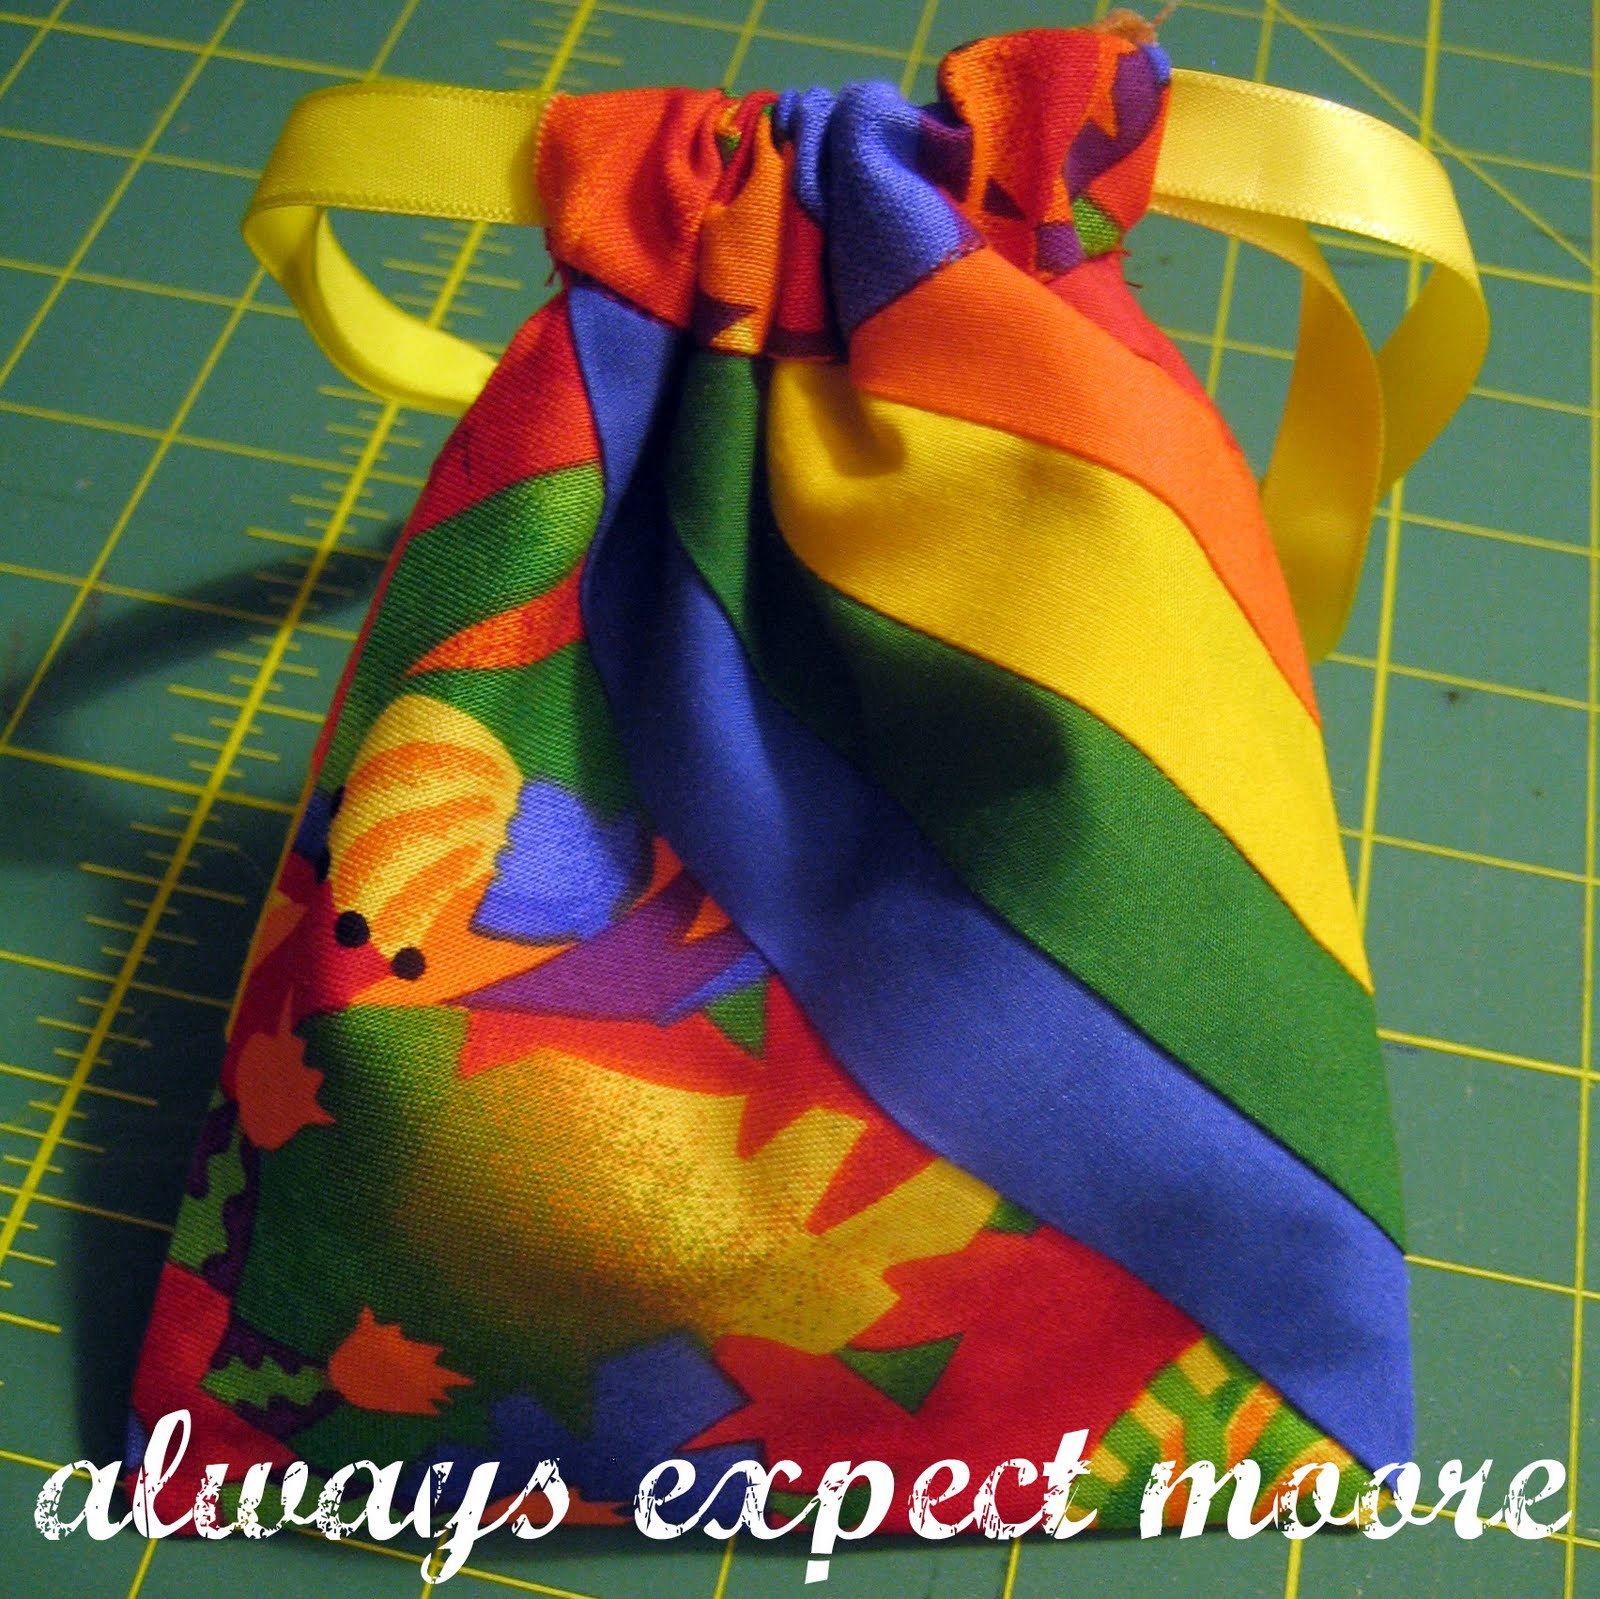
I decided to make little draw-string bags with the squares. These bags will make great gift bags! I wanted the bags to be lined (so that all the raw seams from the gift bag wouldn’t show), but I still wanted them to be super-easy (and super-quick) to make. I think I succeeded on all fronts… here is the tutorial.

Start by grabbing your quilt squares. I’m using 2 squares for each, but you can easily use 1 square and more of the lining fabric (or another complimentary/contrasting fabric).
Grab some lining fabric. I had extra fabric left over from making the quilts, so I just used that. Cut this fabric the width of your square, and the length of your square x 2 plus two inches (mine was a 5.5″ square, so I had a piece of fabric 5.5″ by 5.5+5.5+2 = 13″)
Sew your squares on either end of the strip of fabric. 
Note: this seam is going to be the top of your bag, so if your square has an “up” and a “down,” make sure that you’re sewing along the top of the square. 
Then, zig-zag the long sides of the lining fabric, and press everything flat. 
Second Note: You don’t really need to zig zag the entire length of the lining, just about 2.5″ in from each of the seams you just made. My fabric was small enough that it was easier to just go the whole length rather than start and stop. If you’re making a big bag, you might just want to zig zag in the 2.5″. Up to you. 🙂
Now, fold your piece in half, right sides together, and mark 2″ in from the seam on the lining fabric, on both sides.
Now sew along the three open sides. Leave open the area between the seams and the 2″ marks you made in the previous step. If your bag is a whole lot bigger than mine, you might need more than a 2″ gap on one of the sides, you’ll see why in the next step.
Clip the corners to reduce bulk, then turn the whole thing right side out, pulling it through one of your 2″ holes. This is why you’d want a bigger hole if you’ve got a bigger bag.
Tuck the lining into the bag. The lining should reach the bottom of the bag, and still stick out about 1″ on top. Press everything down. Pin down the top. If the zig-zagged edges stick out, tuck them back in.
Stitch along the seam (stitch in the ditch) to hold the lining and the top together. This will also make the casing for the drawstring.
Before we insert the drawstring, if your zig zagged edges are still poking out, go ahead and tack them down with a couple hand stitches if you like. Then, cut a length of ribbon, and thread through the top.
Tie a knot in the end of the ribbon, then thread through another piece starting and ending on the other side.
Tie a knot in this end, tuck in something cute, and enjoy (or give as a gift)!

Always,

posted in: Uncategorized

Previous
We interrupt this irregularly scheduled craft blog to bring you…
Next
Awesome: The Versatile Blogger Award

Reader Interactions

    Leave A Reply! Cancel reply

    Share your thoughts!
    Your email address will not be published. Required fields are marked with *

    This site uses Akismet to reduce spam. Learn how your comment data is processed.

    Comments & Reviews

  1. craftystaci says

    August 21, 2010

    These are so cute!

    Reply
  2. myfingerscrossed says

    August 22, 2010

    how creative!

    Reply
  3. Kimberlee says

    August 24, 2010

    Those are cute bags. I always seem to end up with a couple extra squares or scraps I could use to make these up with.
    ~Kimberlee
    http://www.TheSpunkyDiva.blogspot.com

    Reply
  4. www.SisterOfTheMoon.com says

    September 17, 2010

    Fabulousity!

    Reply

Primary Sidebar

Hi, I'm Carolina!

I’m a Quilt Pattern Designer, Award Winning Quilter, and fan of all things quilting. I live in San Diego with my husband, our two boys and our pets. I love keeping both my hands and mind busy, so I’m always working on lots of projects. You’ll find lots of them shared here!

More About Me

Let's Keep In Touch!

I'll let you know about what's new in quilting, freebies you'll want to snag, and brighten your inbox about once a week!

subscribe
90% Faster Than Rotary Cutters

Fat Quarter Shop Quilting Fabrics and Supplies

Instagram Facebook Pinterest YouTube

Recent Posts

  • Flying Pig Quilt Block
  • Bunny and Carrot Quilt Block
  • Free Fancy Drink Quilt Block
  • Dutch Row Houses Quilt Block
  • Quilted Sports Jersey Numbers

Archives

Featured Projects

  • Everything you want to know about Pre Cut Fabrics!
  • Scrappy Placemat - easy to make scrap project
    Scrappy Placemat using Strips and Scrap Tape
  • Sewing Kaleidoscope SVG File
  • Drawstring Backpack
  • Carolina holding fabric marking pens
    Choosing Fabric Marking Pens

Let's Keep In Touch!

Brighten your inbox about once a week!

Always Expect Moore Submark Shop Patterns

Browse

  • Ruler of the Month
  • Quilty5k
  • QuiltMath
  • Cricut Maker BOTW

Shop

  • Digital Download Patterns
  • Quilting Notions
  • Quilt Stickers
  • Quilt Tees

Connect

  • YouTube
  • Instagram
  • Facebook Group
  • TikTok
©2025, Always Expect Moore. All Rights Reserved. About Disclosures
Back To Top
Design by Pixel Me Designs
×

Let's Keep In Touch!

I'll let you know about what's new in quilting, freebies you'll want to snag, and brighten your inbox about once a week!