Last month, I got to meet the wonderful and talented Paula Nadelstern. She is a quilter known for stunning quilts and fabrics using symmetry. She has an entire series inspired by kaleidoscopes. If you ever get the chance to see her work in person, or take a class from her, you absolutely should! She has amazing ways of looking at fabric!
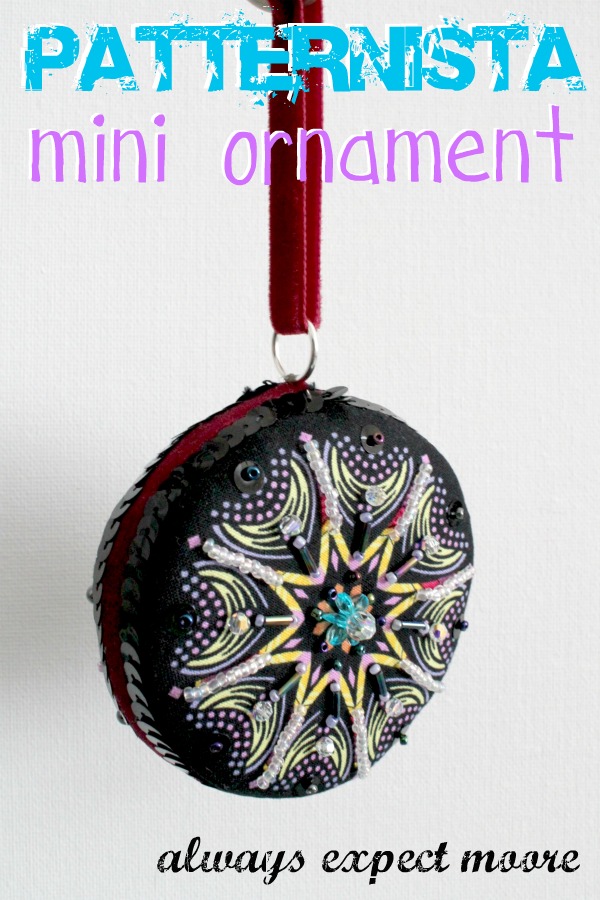
Her most recent fabric line, Patternista, includes a really fun panel. She created a pattern to make a Patternista ornament using pieces of this panel. Basically, it is the panel cut up, strategically placed over a foam ball, and then embellished using lots and lots of beads. Paula says that it is a great activity for a summer day, out on the porch, with a bunch of friends and some good wine. Sounds like fun to me!
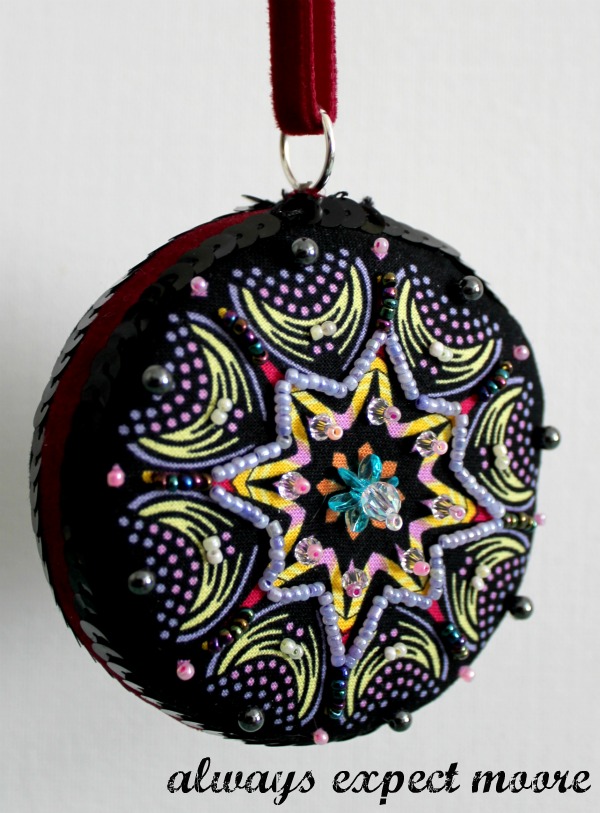
Though the weather here has turned towards spring, I’m not able to get all my creative friends out on my porch, and pregnancy prevents me from enjoying the wine… so I came up with a mini version inspired by her ornament. This one is great for working on in your craft room while sipping ginger ale, and watching an animated movie with your son. Not exactly the same ambiance… but the result is pretty fun, regardless! Here is the back of the ornament. I decided to try a different pattern, rather than make both sides the same:
The base of the ornament is an empty ribbon spool. The process is the same as making my ribbon spool ornament with the following changes:
1. Instead of using plain fabric, use the Patternista panel, cut in a circle large enough to cover the side of the ribbon spool and wrap over the edges.
2. Before stitching the sides together, I attached the center bead on each side. I did this similar to attaching a button. I stitched through the center of the fabric, through the middle of the spool, and through the center of the fabric on the other side. I went back and forth several times. This ensured that the center of the fabric design stayed at the center of the ornament even when stitching around the outside (which can pull the fabric out of center).
3. I covered my edges with both velvet ribbon and sequins for extra embellishment.
4. Using the fabric as my guide, I stitched on beads. I used dark monofilament thread (which will disguise itself in the fabric) and a long slender beading needle. For rows of beads longer than 4 beads, I made sure to tack down the strand in the middle so that it would be more secure. Here is a close-up:

You can see that my ornament is a “little” smaller than the original!

Just in case you’re able to manage a group of friends, a couple bottles of wine, and a free evening of crafting fun… here is the free pattern from Benartex to make the large, spherical Patternista Ornament. And don’t forget to send me an invite – I may not be able to enjoy the wine, but I’ll love all the rest!
Always,


Comments & Reviews
Oooo I really LOVE this! Great job!