• Skip to primary navigation
  • Skip to main content
  • Skip to primary sidebar
Home About Subscribe Summer Sew Camp Disclosures

Always Expect Moore

Quilts & Pattern Design

  • Cricut Maker BOTW
  • Quilty5k
  • Gallery Wall QAL
  • Trunk Show
  • Guild Resources
  • Pattern Shop
  • Free Patterns
Home About Subscribe Summer Sew Camp Disclosures
  • Cricut Maker BOTW
  • Quilty5k
  • Gallery Wall QAL
  • Trunk Show
  • Guild Resources
  • Pattern Shop
  • Free Patterns
Home » Blog » Uncategorized » Pumpkin Week – Table Runner

Pumpkin Week – Table Runner

Created On: October 10, 2010  |  Updated: October 10, 2010  |   2 Comments

It has been so much fun this week sharing all of these pumpkin projects with you! My house is now all set for fall and Halloween decorations (I’ve even got some extras to send to a certain special helper – you know who you are!), and we’re all about five pounds heavier because of all the baking! : )

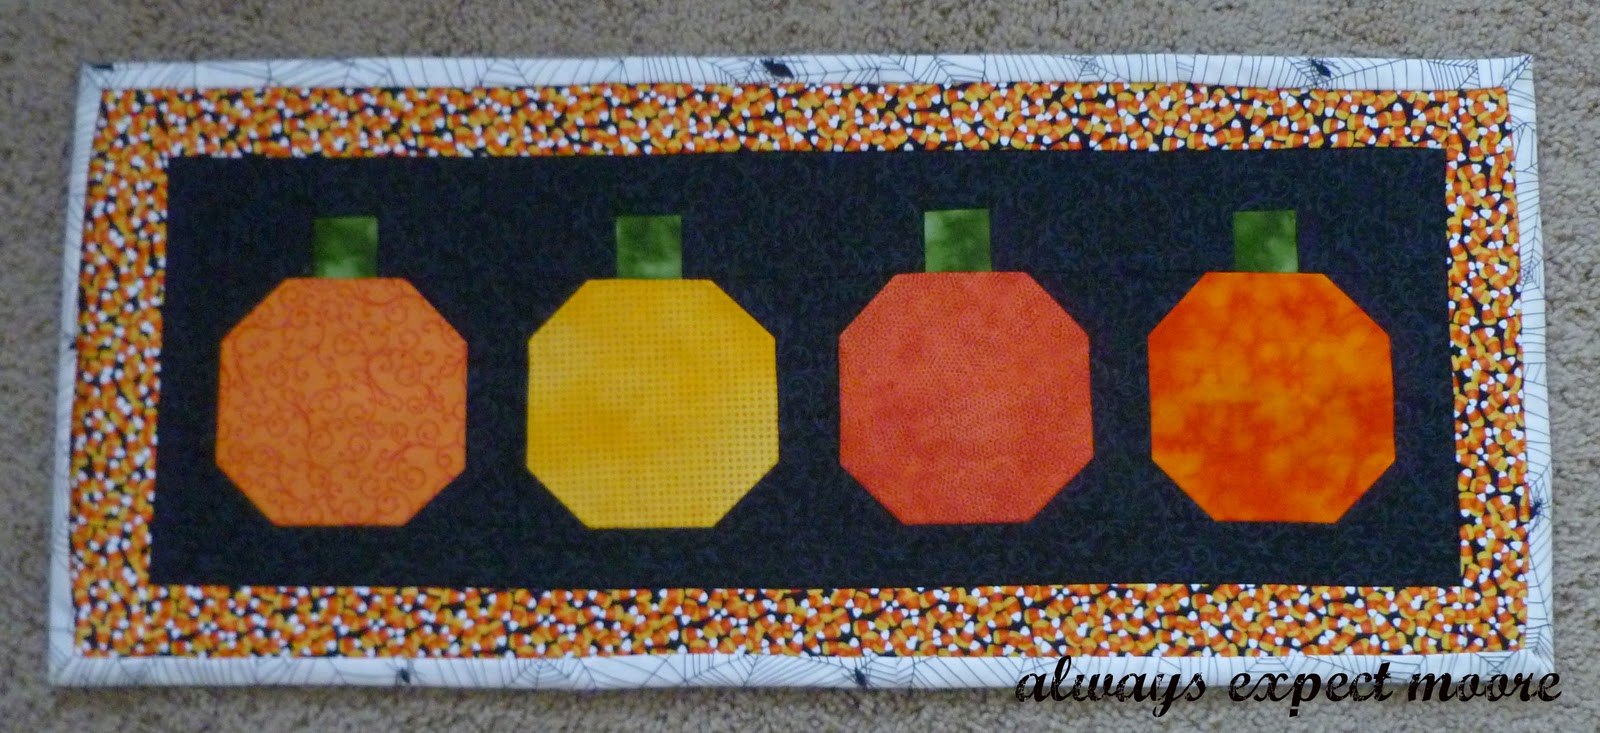
This final project, a quilted table runner, is a little more involved than the other projects that I’ve shared this week, but so worth it! Although I love a quick and simple project that can get finished in a simple naptime, there are some times when I want to put time and care into a project that takes a little more dedication. This is still a pretty basic table runner. It would be fun to applique some pumpkin leaves, stitch on some vines, or even applique some Jack-O-Lantern faces!

I started with 4 6″x6″ squares in different colors/patterns of orange, and 16 2″x2″ squares in a simple black print. I sewed a small square into each corner at an angle like this:
 
I trimmed off the excess in the corners. and pressed back the black squares, so that I still had a 6″x6″ square, now with black corners. This makes the pumpkin “base.”
For the pumpkin top, I sewed together 3 pieces of black and one piece of green like this:

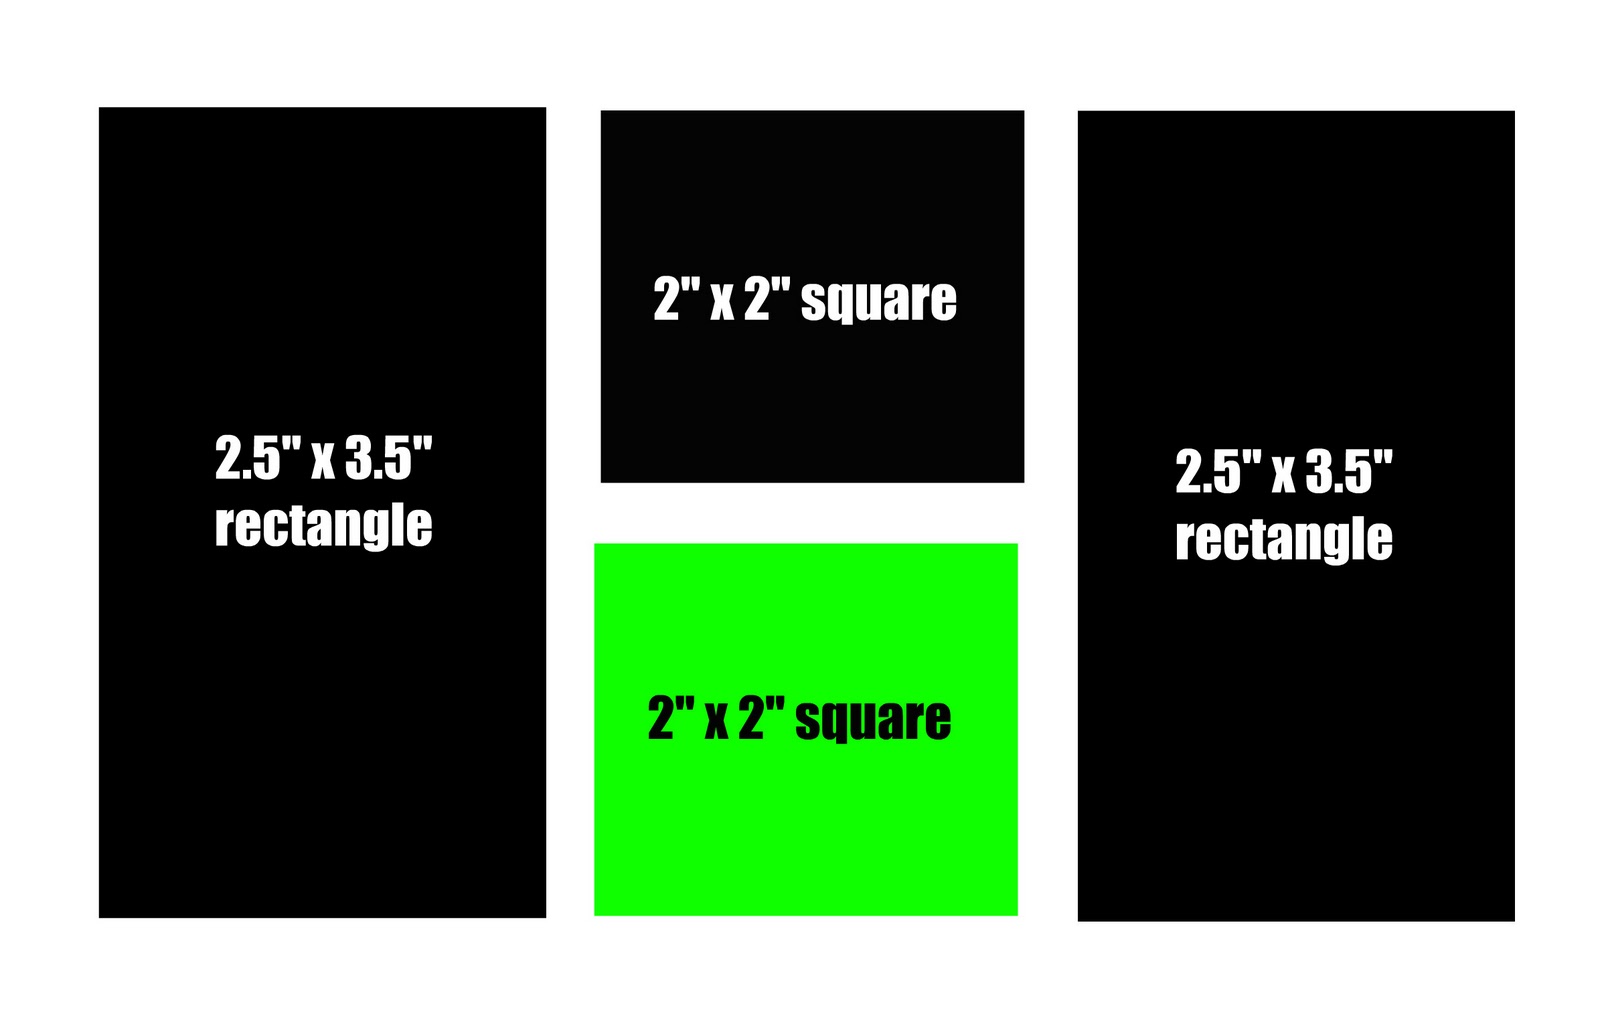
 First, I sewed the green 2×2 to the black 2×2, and pressed open the seams. I then added the two side rectangles, and pressed the seams. Once I had the top done, I sewed it to the bottom like this:

I added 2″ strips to the right side of each pumpkin:

 Then sewed them all together, adding another strip to the left side, and one to the bottom:

For fun, I used 3″ pieces of candy corn fabric for the border:

I finished the whole thing with some spider-web fabric as binding, and was all done!
If you’d like details on how to finish a quilted table runner, check out these links:
Finishing Your Quilt
Quilting 101

Always,

posted in: Uncategorized

Previous
Pumpkin Week Daily Dozen
Next
Creating is in My Blood

Reader Interactions

    Leave A Reply! Cancel reply

    Share your thoughts!
    Your email address will not be published. Required fields are marked with *

    This site uses Akismet to reduce spam. Learn how your comment data is processed.

    Comments & Reviews

  1. Mandi says

    October 10, 2010

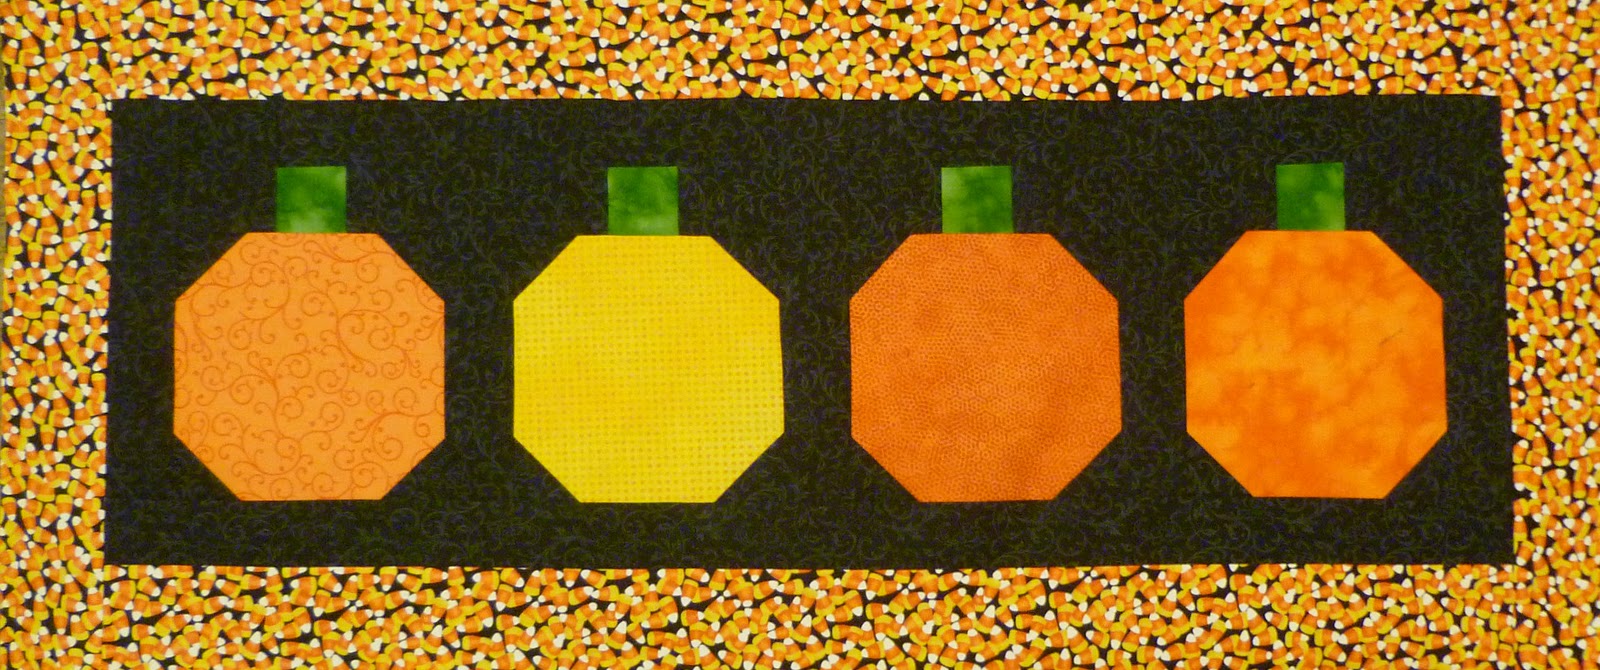
    The runner looks great! I’m glad you got a chance to finish it. You’re right though, it would look amazing with some leaves or something. 😉

    Reply
  2. ale balanzario says

    October 12, 2010

    Your runners looks great, love the little pumpkins, they look very good together in a quilt.

    Please, visit my blog, I have a little pumpking tutorial. hope you like it.

    Ale.

    http://withblueberryheartquiltscorner.blogspot.com/2010/10/little-pouch.html

    Reply

Primary Sidebar

Hi, I'm Carolina!

I’m a Quilt Pattern Designer, Award Winning Quilter, and fan of all things quilting. I live in San Diego with my husband, our two boys and our pets. I love keeping both my hands and mind busy, so I’m always working on lots of projects. You’ll find lots of them shared here!

More About Me

Let's Keep In Touch!

I'll let you know about what's new in quilting, freebies you'll want to snag, and brighten your inbox about once a week!

subscribe
90% Faster Than Rotary Cutters

Fat Quarter Shop Quilting Fabrics and Supplies

Instagram Facebook Pinterest YouTube

Recent Posts

  • Flying Pig Quilt Block
  • Bunny and Carrot Quilt Block
  • Free Fancy Drink Quilt Block
  • Dutch Row Houses Quilt Block
  • Quilted Sports Jersey Numbers

Archives

Featured Projects

  • Everything you want to know about Pre Cut Fabrics!
  • Scrappy Placemat - easy to make scrap project
    Scrappy Placemat using Strips and Scrap Tape
  • Sewing Kaleidoscope SVG File
  • Drawstring Backpack
  • Carolina holding fabric marking pens
    Choosing Fabric Marking Pens

Let's Keep In Touch!

Brighten your inbox about once a week!

Always Expect Moore Submark Shop Patterns

Browse

  • Ruler of the Month
  • Quilty5k
  • QuiltMath
  • Cricut Maker BOTW

Shop

  • Digital Download Patterns
  • Quilting Notions
  • Quilt Stickers
  • Quilt Tees

Connect

  • YouTube
  • Instagram
  • Facebook Group
  • TikTok
©2025, Always Expect Moore. All Rights Reserved. About Disclosures
Back To Top
Design by Pixel Me Designs
×

Let's Keep In Touch!

I'll let you know about what's new in quilting, freebies you'll want to snag, and brighten your inbox about once a week!