I’m excited to share part 2 of my “Quilting Made Easy” series with Riley Blake and Cricut. When Cricut offered to send me a Riley Blake quilt kit of my choice to share with y’all, and show you how easy it is to whip up a quilt when Cricut takes care of the bulk of the cutting, I was excited! I love sharing innovative ways to approach quilting, and these quilt kits are a fantastic way for both beginners and experienced quilters to put together quilts that look beautiful every time!
Last week I showed you how easy it was to pick out a fun fabric kit, and to pick a pattern to go with it. Today I’m opening up the pattern and doing all the cutting.

If you’d rather hang out with me while I go over all the details, I put together a video where I take you step-by-step through the cutting process. You can pause, rewind, and watch at your own pace. I’ve put the video here:
If you’d like to read through the steps, I have you covered as well.
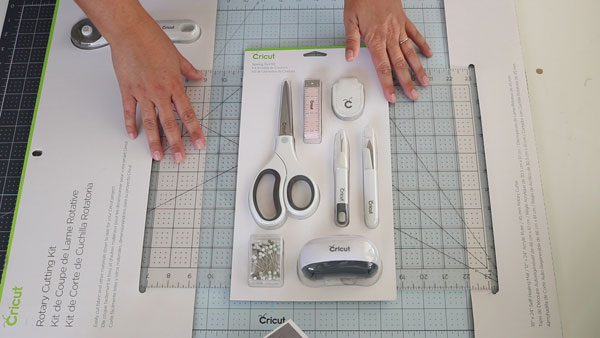
First, let’s talk tools. Cricut has some great kits that are perfect for doing all the pre-cutting needed. They have a rotary blade, ruler, and mat set that is exactly right for cutting those large 12″ wide strips needed for the Cricut mat. Be sure to check out the Cricut cutting tools – they are the experts when it comes to sharp blades that cut well!
Start by removing the fabric from the zippered bag it came in (by the way, this zippered bag becomes an awesome shoe bag for traveling!), and pull out the paper it came with as well.
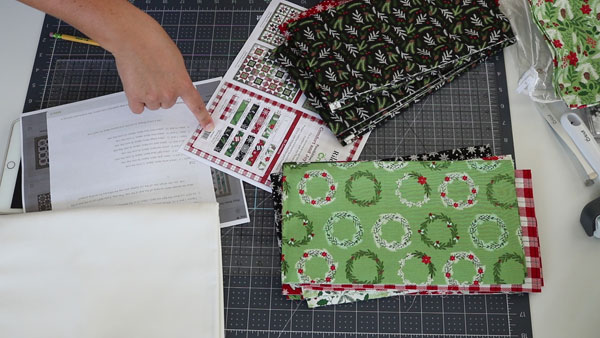
I also printed a screen shot of the cutting instructions, since those are not available as a PDF. I put all the fabrics in order – fabric 1 through 11. I removed fabric 11, which was the 3/4 yard piece of fabric. Beware, it is the exact same as fabric 4, which is a 2/3 piece. Make sure you’re setting aside the 3/4 yard piece which will be used for the binding later.
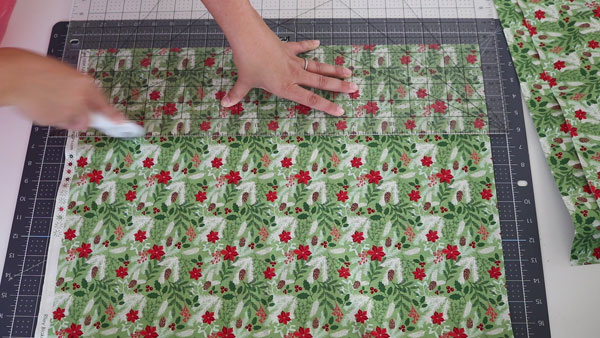
From fabric 1, cut two 12″ wide strips.
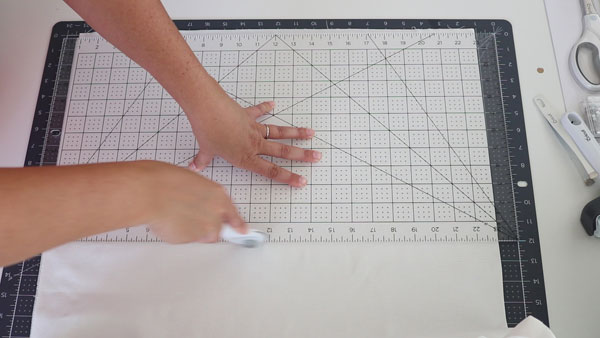
Cut fabric 4 into two 1/3 yard pieces (1/3 yard is 12″, so you’ll be cutting it in half to make two 12″ strips).
Then from your inner border fabric (fabric 3) cut 5 strips, each 2″ wide.
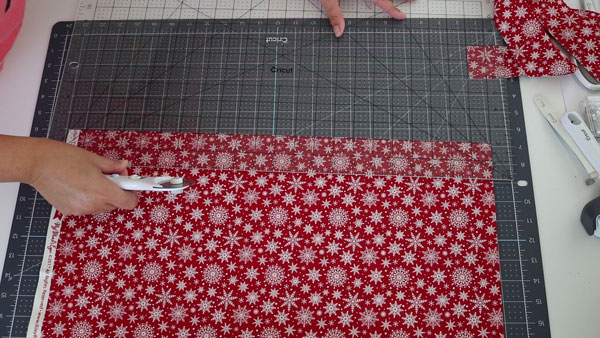
From the outer border fabric, cut 5 strips, each 5.5″ wide.
I know what you’re thinking – this is supposed to be all about how great the Cricut machine is for cutting fabric, and we haven’t even pulled out the Cricut machine yet! Yes, that is true. The Cricut Maker is great for cutting fabric. But for some projects, a little pre-cutting is needed. There are 11 fabrics in this kit. We have pre-cut 4 of them, and put a fifth aside. Now we are ready to pull out the Cricut Maker to do the rest of the cutting for us!
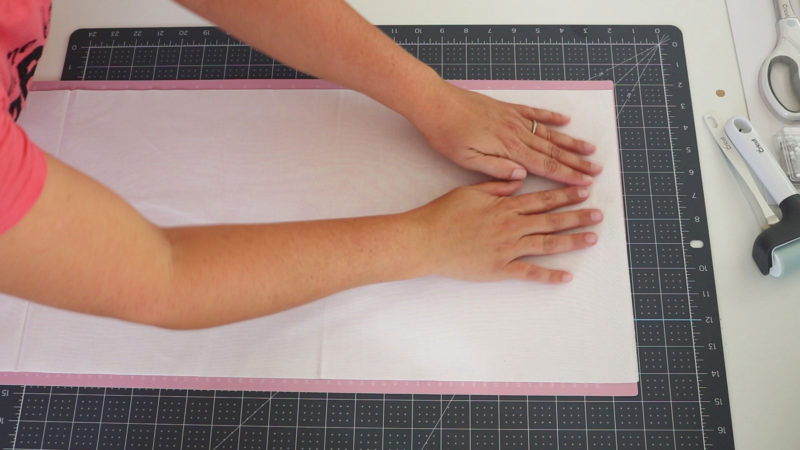
Start by placing the fabric on the mat. Float the fabric over the pink mat until it is lined up on the edges, and the top edge is above the top cutting line, but below the top edge of the mat. Then press it down. You can use the brayer to secure it if you like.
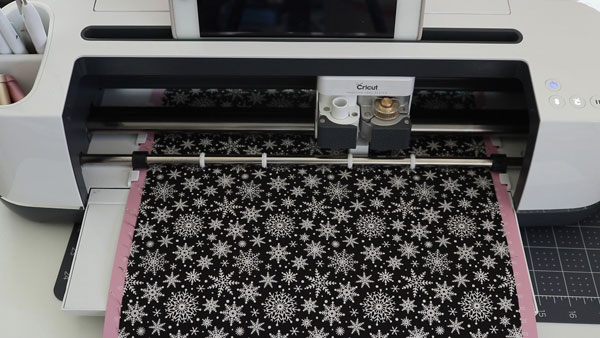
Now you are ready to get cutting! For most cuts, you can use a single strip of fabric for 2 mats. The first mat is a 12×24″ mat. Place the fabric on the mat. Then trim off the extra fabric from the bottom. Put this on a 12×12″ mat (or on a 12×24″ mat – you can always use a larger mat) for the second mat of that fabric.
If you didn’t print out the screen shot of the cutting instructions, I’ve got you covered! Here you go:
Fabric 1 – Mats 1 and 2
Fabric 2 – Outer border – was cut into 5.5″ strips in an earlier step.
Fabric 3 – Inner border – was cut into 2″ strips in an earlier step.
Fabric 9 – Mats 3 and 4
Fabric 6 – Mats 5 and 6
Fabric 5 – Mats 7 and 8
Fabric 4 – Mats 9 and 10
Fabric 8 – Mats 11 and 12
Fabric 7 – Mats 13 and 14
Fabric 10 – Mats 15 and 16
Fabric 11 – Set aside for binding
You probably noticed that all those fabrics are NOT in number order. This is because we want to make sure that our light and dark fabrics are balanced in the quilt. Each quilt has those lights and darks set up in a different order, so the cutting order for the fabrics can change.
Once you have your first mat ready to go, you can start cutting the rest of your fabrics! It is lovely to cut it with the Maker, because once you have the mats and fabric in order, you can let your mind wander. When cutting with a traditional rotary cutter and ruler, I have to be vigilant and remember to “measure twice, cut once” or risk a mis-cut! A miscut can mean a waste of fabric – possibly running out of fabric if the miscut is bad enough! I didn’t have that issue with the maker. I kept feeding in the mats in order, and could even hold a conversation with my 6 year old while getting all the mats cut – and I never had a miscut!
I’ll be back in TWO weeks with the third installment of this quilting journey. Next week I’ll be off at the Cricut Mountain Make-a-thon teaching a class on “How to Design a Quilt Block like a Pro” as well as learning from some of the other fabulous ladies (and gentleman) who are teaching at the event!
This is a sponsored conversation written by me on behalf of Cricut. The opinions and text are all mine.

Leave A Reply!