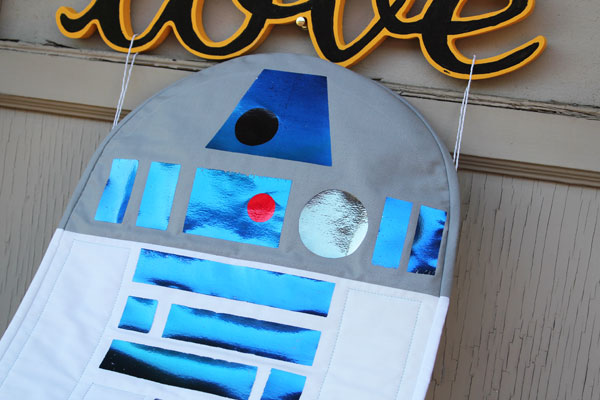
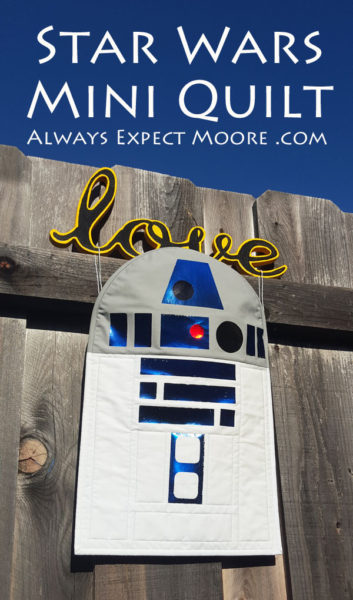
My kids are crazy for Star Wars, and their favorite droid is R2D2. Which is why I made them this fun R2D2 quilt to hang on their wall. It is very simple to make – no curved piecing, no fancy quilting – just straight stitching and quilting using a walking foot.
To make this mini quilt you’ll need:
Fat Quarter Grey Fabric
Fat Quarter White Fabric
1/2 yard backing fabric
Thermoweb DecoFoil Hot Melt Adhesive
Thermoweb Decofoil in Blue, Red, Black, and Pewter
Fairfield Cotton Batting
Thermoweb Basting Spray
Iron and Ironing Board
Sewing Machine with Walking foot and grey thread
Rotary Cutter and Ruler
Needle to Bury Threads
Cut your fabric. You’ll need a 12×12″ piece of the white fabric and a 12×10″ piece of the grey fabric. Put the rest of the fabric aside for the backing and binding.
Sew the two pieces of fabric together along the 12″ side.
Press seam towards the dark side (see what I did there? The “Dark Side”? hahaha!)
Measure 6″ in on the seam, and 1.5″ up. Mark this point. Use this as the center to mark a half-circle along the top. 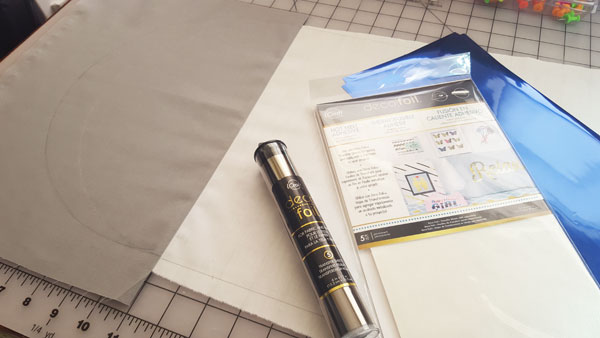
Cut the Hotmelt adhesive. You’ll need:
2 – 1″x2″
2 – 3/4″x2″
2 – 1″x1″
1 – 1″x6″
2 – 1″x4.5″
1 – 2″x4″ with 1.5″ boxes cut out of the middle
1 – 2″x3″
1 – 3″x4″ cut into a trapezoid
1 – 2″ circle
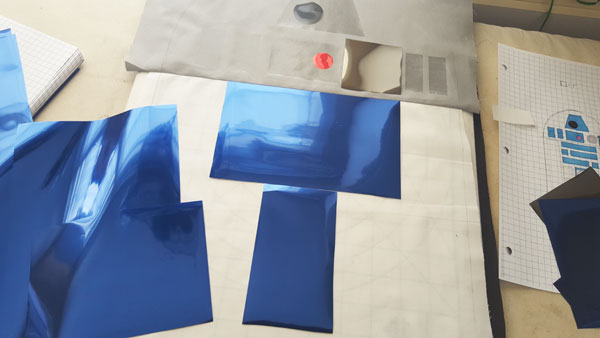
Place the HotMelt pieces onto the fabric according to the photo. Fuse in place. Allow to cool, then remove the paper backing.
If you’d like your R2D2 Quilt fully quilted, base the mini, and quilt around all the hotmelt adhesive now, before adding the foil. This will ensure that the foil isn’t scratched by the walking foot later. I skipped this step, because a wall hanging doesn’t need a lot of quilting.
Cut a 2″ circle from the black Decofoil and a 1″ circle from the red DecoFoil. Place on top of the HotMelt. DO NOT FUSE YET. This is my layered foil technique.
Cut a square large enough to cover the 2″ circle out of the Pewter, and put in place. Cut the blue DecoFoil to cover all the other pieces.
Fuse the DecoFoil in place according to the instructions on the package.
Allow the adhesive to cool COMPLETELY before peeling off the DecoFoil, removing early or not fusing completely will result in incomplete coverage.
Baste the batting, backing, and top together with the basting spray, or your preferred method of basting.
Using the chalk marking pencil, draw the additional un-foiled panels on R2D2, using the placement of the foil pieces as your guides.
With your walking foot, stitch around the additional side panels to define them. Tie off the threads, and bury them.
Trim the curve along the top with scissors.
Bind, using two-colored binding if you prefer. Make sure to use bias-cut binding along the curve.
My boys were absolutely thrilled with their mini R2D2 Quilt, and couldn’t wait to hang it in their room! It goes great with the BB8 Pouf that I made for them as well. You can whip up this R2D2 quilt in an afternoon – the Star Wars fan in your life will love you for it!