• Skip to primary navigation
  • Skip to main content
  • Skip to primary sidebar
Home About Subscribe Summer Sew Camp Disclosures

Always Expect Moore

Quilts & Pattern Design

  • Cricut Maker BOTW
  • Quilty5k
  • Gallery Wall QAL
  • Trunk Show
  • Guild Resources
  • Pattern Shop
  • Free Patterns
Home About Subscribe Summer Sew Camp Disclosures
  • Cricut Maker BOTW
  • Quilty5k
  • Gallery Wall QAL
  • Trunk Show
  • Guild Resources
  • Pattern Shop
  • Free Patterns
Home » Blog » Baby Lock » Spider Web Table Topper

Spider Web Table Topper

Created On: October 6, 2021  |  Updated: October 6, 2021  |   1 Comment

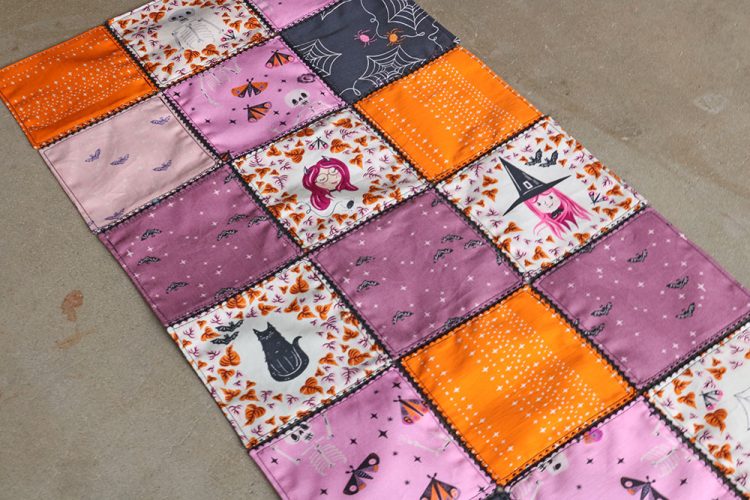
If you’re looking for a fun and unique Halloween decor piece, look no further than this Spider Web Table Topper. While the lace-like technique used to put these pieces together is perfect for some spooky fun, it will work perfectly in seasonal decor of all kinds – just change out the thread color for a completely different look!

You can watch this short video below to see how it works. I’ve also included written instructions below to outline the steps.

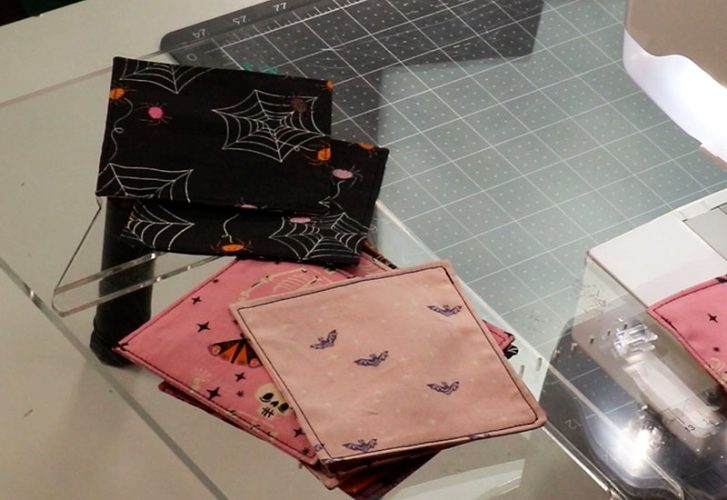
Start by cutting 4 1/2″ x 4 1/2″ squares from Halloween fabrics. I used Spooky and Sweeter by Art Gallery Fabrics, and cut a total of 48 squares. You can cut more squares for a bigger table topper, and you can cut your squares bigger if you like. This project is completely customizable.

Pair up the squares, right-sides-together. Stitch around all 4 sides, leaving a 2″ gap on one side.

Clip the corners. Turn right side out. Use a turning tool to poke out the corners so that they are crisp.

Press flat. Top stitch all the way around the edge of the square, locking your stitches when you meet up with the beginning point.

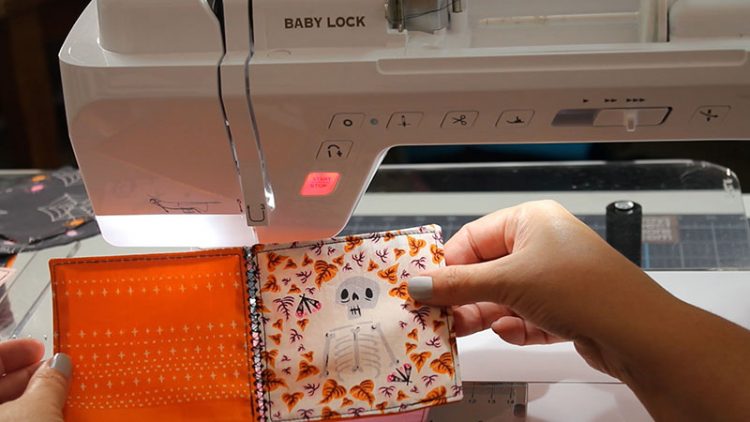
Install the 5mm Bridging Plate onto your Baby Lock machine. It is as easy as removing the Bobbin Plate and replacing it with the Bridging Plate.

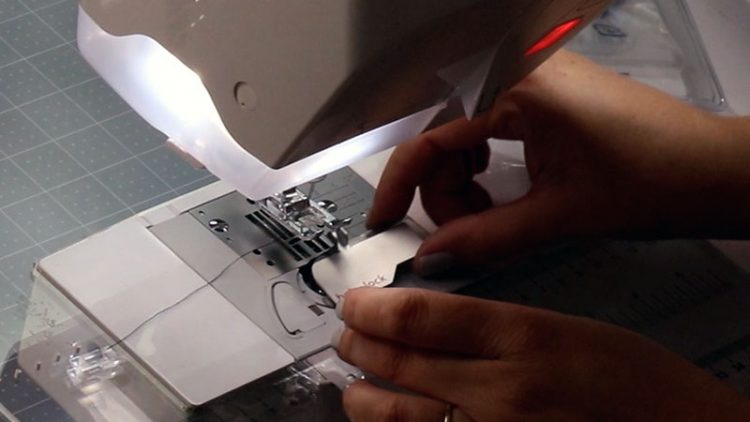
Thread your machine like you normally would. Select a decorative stitch (I chose 3-11) and set the width to 7mm so that it is wider than the 5mm Bridging Plate.

Switch to your N foot. Place one square on either side of the Bridging Plate, and carefully feed under the needle. Keep an eye on the spacing under the needle to make sure that it is catching both sides with each stitch.

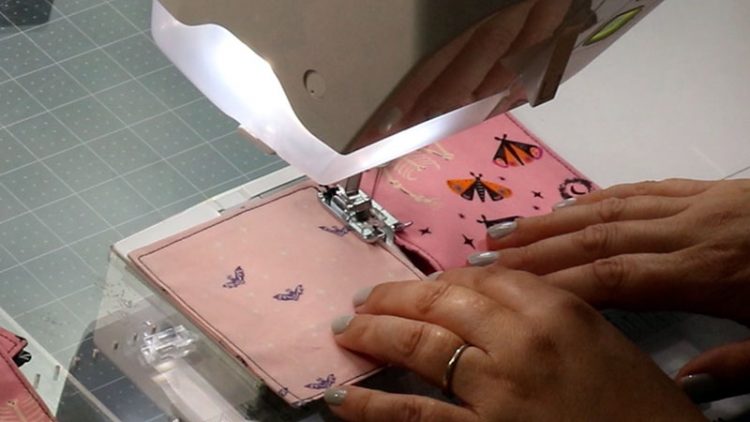
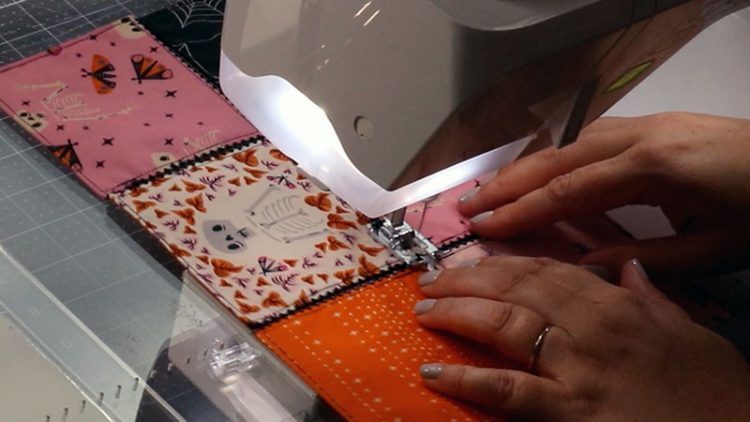
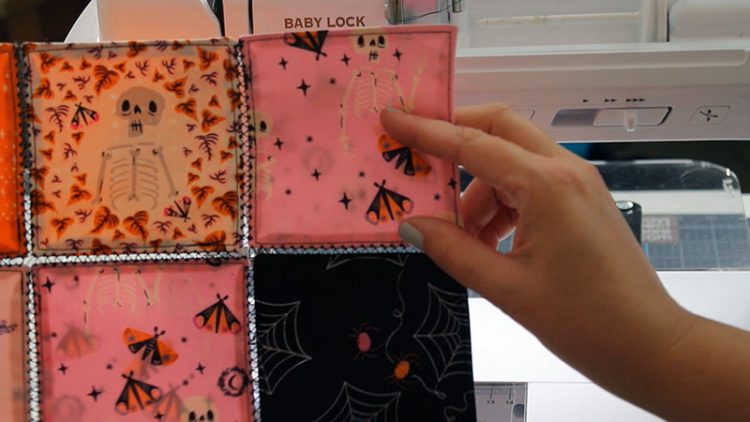
Continue, making 8 rows of 3.

Stitch the rows together in the same manner to make the completed table topper. When you get to the gap, lift up your presser foot, advance the project forward under the presser foot, and then continue.

That’s it! The table topper looks upscale but it is easy enough for a beginner to make. The secret (as always) is having the right tools!

I stitched up this whole project on my Baby Lock Aria. If you’d like to learn more about the Baby Lock Aria or find a local dealer that carries the Baby Lock Aria, check out the Baby Lock website. You can also ask your dealer about getting bridging plates for your machine.

posted in: Baby Lock, Holiday Crafts, Home Decor, how to, Sewing, Sewing Tutorials, Video

Previous
Rocket Quilt Block
Next
Halloween Gnomes Quilt

Reader Interactions

    Leave A Reply! Cancel reply

    Share your thoughts!
    Your email address will not be published. Required fields are marked with *

    This site uses Akismet to reduce spam. Learn how your comment data is processed.

    Comments & Reviews

  1. Anne says

    October 20, 2021

    What weight, brand of thread are you using for the ” bridging seams”? Cool video.

    Reply

Primary Sidebar

Hi, I'm Carolina!

I’m a Quilt Pattern Designer, Award Winning Quilter, and fan of all things quilting. I live in San Diego with my husband, our two boys and our pets. I love keeping both my hands and mind busy, so I’m always working on lots of projects. You’ll find lots of them shared here!

More About Me

Let's Keep In Touch!

I'll let you know about what's new in quilting, freebies you'll want to snag, and brighten your inbox about once a week!

subscribe
90% Faster Than Rotary Cutters

Fat Quarter Shop Quilting Fabrics and Supplies

Instagram Facebook Pinterest YouTube

Recent Posts

  • Flying Pig Quilt Block
  • Bunny and Carrot Quilt Block
  • Free Fancy Drink Quilt Block
  • Dutch Row Houses Quilt Block
  • Quilted Sports Jersey Numbers

Archives

Featured Projects

  • Everything you want to know about Pre Cut Fabrics!
  • Scrappy Placemat - easy to make scrap project
    Scrappy Placemat using Strips and Scrap Tape
  • Sewing Kaleidoscope SVG File
  • Drawstring Backpack
  • Carolina holding fabric marking pens
    Choosing Fabric Marking Pens

Let's Keep In Touch!

Brighten your inbox about once a week!

Always Expect Moore Submark Shop Patterns

Browse

  • Ruler of the Month
  • Quilty5k
  • QuiltMath
  • Cricut Maker BOTW

Shop

  • Digital Download Patterns
  • Quilting Notions
  • Quilt Stickers
  • Quilt Tees

Connect

  • YouTube
  • Instagram
  • Facebook Group
  • TikTok
©2025, Always Expect Moore. All Rights Reserved. About Disclosures
Back To Top
Design by Pixel Me Designs
×

Let's Keep In Touch!

I'll let you know about what's new in quilting, freebies you'll want to snag, and brighten your inbox about once a week!