• Skip to primary navigation
  • Skip to main content
  • Skip to primary sidebar
Home About Subscribe Summer Sew Camp Disclosures

Always Expect Moore

Quilts & Pattern Design

  • Cricut Maker BOTW
  • Quilty5k
  • Gallery Wall QAL
  • Trunk Show
  • Guild Resources
  • Pattern Shop
  • Free Patterns
Home About Subscribe Summer Sew Camp Disclosures
  • Cricut Maker BOTW
  • Quilty5k
  • Gallery Wall QAL
  • Trunk Show
  • Guild Resources
  • Pattern Shop
  • Free Patterns
Home » Blog » Craft Tutorials » Woven Top Zippered Pouch

Woven Top Zippered Pouch

Created On: April 24, 2017  |  Updated: May 24, 2017  |   Leave a comment

I’m not much of a scrap quilter. I often pile my scraps into a box until it overflows, then mail it to a friend who likes to quilt with scraps. But every now and then I’m inspired to get scrappy… like with these Art Gallery Fabrics Scraps that I wove together to make a zippered pouch! I took photos along the way so you can use my method to make one of your own!

Woven Top Zippered Pouch Tutorial

I’m showing you how the weaving of the top panel was done, and giving basic instructions for finishing the zippered pouch. If you want more detailed zippered pouch instructions, check out this zippered pouch tutorial.

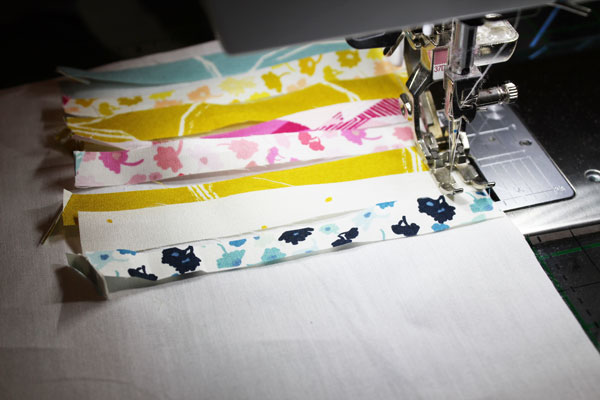
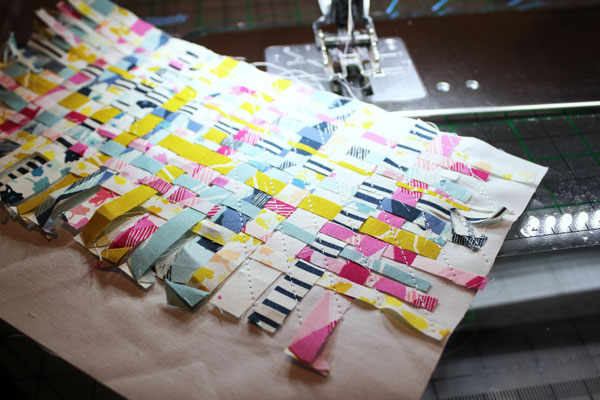
Start by cutting a piece of background fabric a little bigger than your small scrap strips. Lay the short pieces down, parallel to one another. Stitch across the top to secure in place.

stitch down short pieces

Weave a long piece through the short strips.

add cross strips

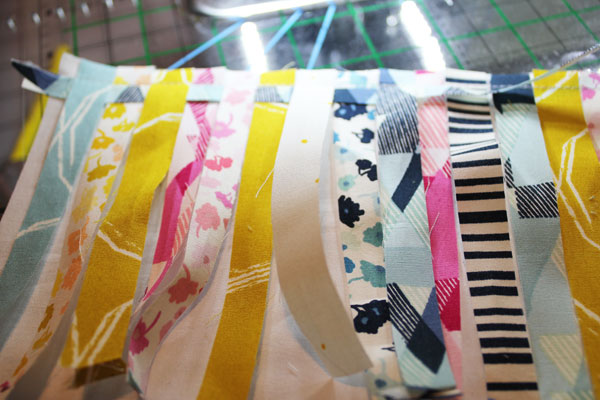
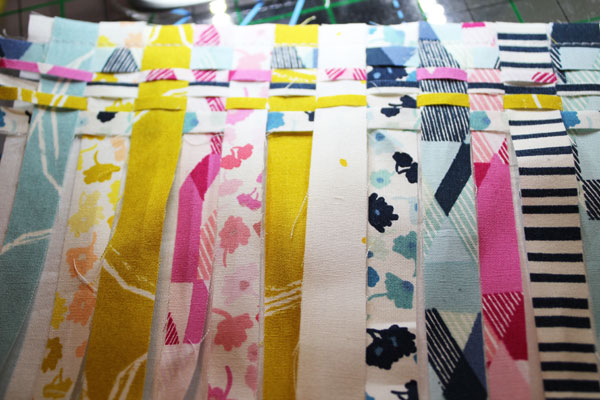
Keep weaving long strips through, until you get to the bottom.

weave strips

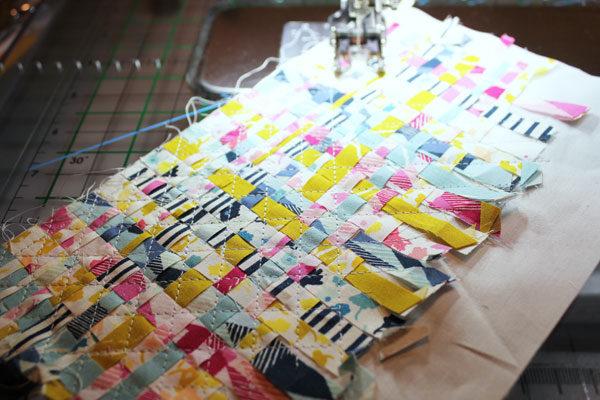
Using a walking foot, stitch diagonal rows across to secure all the strips in place. You can use a ruler to make sure the first row is at a 45 degree angle. Then use the edge of the foot to line up subsequent rows.

stitch down woven rows

stitch rows

Stitch at a 90 degree angle, to create cross-hatch stitching that secures all the strips in place.

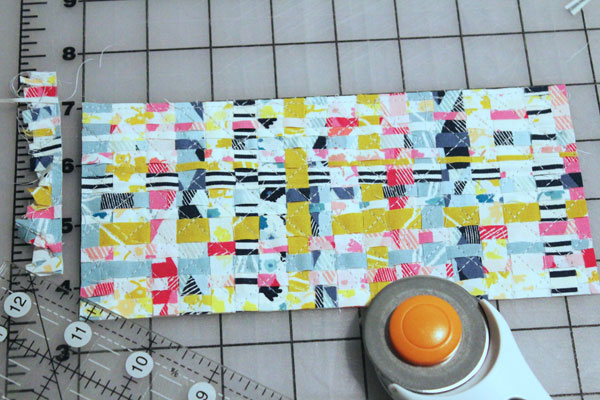
Make a second panel the same way you created this first, and trim up the edges.

trim up top

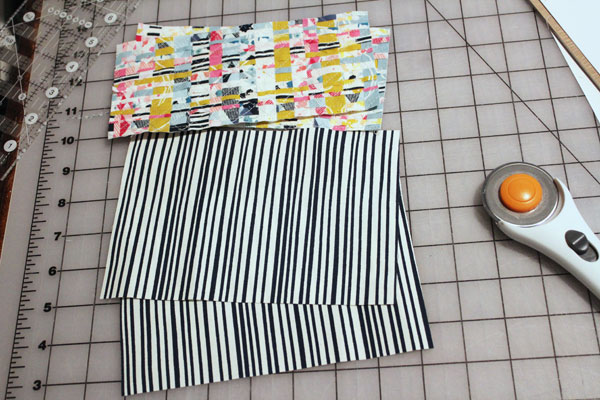
Cut bottom pieces the same width as the panels, and as long as you need to make the size bag you want.

stitch top and bottom pieces

Press open the seam.

Add fusible fleece to the back of each piece. Cut lining pieces the same size.
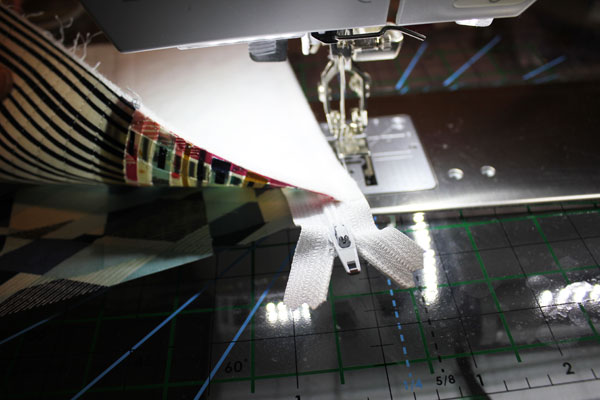
Add the zipper.

Box the corners.

Your zippered pouch is complete!


posted in: Craft Tutorials, how to, Sewing, Sewing Tutorials

Previous
Camper Hoop Art
Next
The Anatomy of a Win

Reader Interactions

Leave A Reply! Cancel reply

Share your thoughts!
Your email address will not be published. Required fields are marked with *

This site uses Akismet to reduce spam. Learn how your comment data is processed.

Primary Sidebar

Hi, I'm Carolina!

I’m a Quilt Pattern Designer, Award Winning Quilter, and fan of all things quilting. I live in San Diego with my husband, our two boys and our pets. I love keeping both my hands and mind busy, so I’m always working on lots of projects. You’ll find lots of them shared here!

More About Me

Let's Keep In Touch!

I'll let you know about what's new in quilting, freebies you'll want to snag, and brighten your inbox about once a week!

subscribe
90% Faster Than Rotary Cutters

Fat Quarter Shop Quilting Fabrics and Supplies

Instagram Facebook Pinterest YouTube

Recent Posts

  • Flying Pig Quilt Block
  • Bunny and Carrot Quilt Block
  • Free Fancy Drink Quilt Block
  • Dutch Row Houses Quilt Block
  • Quilted Sports Jersey Numbers

Archives

Featured Projects

  • Everything you want to know about Pre Cut Fabrics!
  • Scrappy Placemat - easy to make scrap project
    Scrappy Placemat using Strips and Scrap Tape
  • Sewing Kaleidoscope SVG File
  • Drawstring Backpack
  • Carolina holding fabric marking pens
    Choosing Fabric Marking Pens

Let's Keep In Touch!

Brighten your inbox about once a week!

Always Expect Moore Submark Shop Patterns

Browse

  • Ruler of the Month
  • Quilty5k
  • QuiltMath
  • Cricut Maker BOTW

Shop

  • Digital Download Patterns
  • Quilting Notions
  • Quilt Stickers
  • Quilt Tees

Connect

  • YouTube
  • Instagram
  • Facebook Group
  • TikTok
©2025, Always Expect Moore. All Rights Reserved. About Disclosures
Back To Top
Design by Pixel Me Designs
×

Let's Keep In Touch!

I'll let you know about what's new in quilting, freebies you'll want to snag, and brighten your inbox about once a week!