 Today we have Laurie Healy stopping by to guest post. Laurie is the mother of the creative and talented LollyChops. Those of us who are readers of Lolly’s blog know Laurie as “MomChops,” and have seen her amazing sewing (and amazing aprons) and crochet work (and awesome crochet rose and butterfly) featured over at LollyChops. I am super excited that she has come to share a project with us here at ExpectMoore today! Take it away Laurie!
First let me say thank you to Carolina for asking me to participate in her “Pocket Week” – Thanks Carolina! 🙂
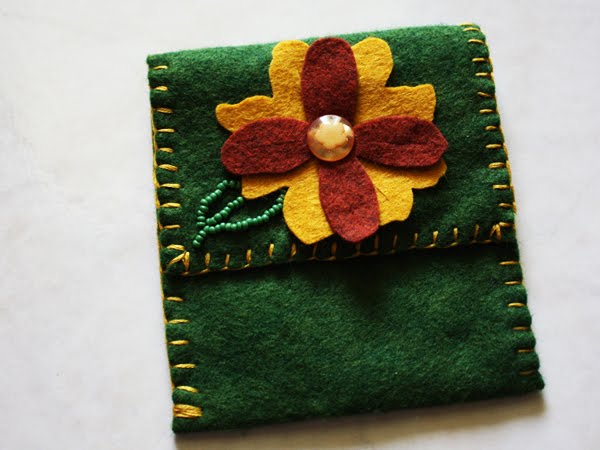
I really enjoy making lined felt bags in all kinds of sizes. They are quick and easy, fun to decorate, and great for small gifts. This particular one is change purse size and is hand stitched using a blanket stitch, but you can also hand stitch using a running stitch, or do it on a sewing machine which really speeds things up!
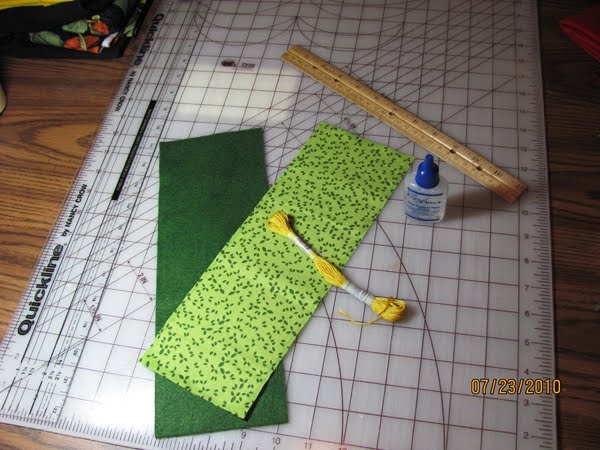
Materials:
Piece of felt (wool or whatever you like) 4″ x 12″;
A coordinating piece of fabric (cotton or cotton blend is best), cut just slightly
smaller than 4″ x 12″;
DMC or a similar 6-strand embroidery floss in a matching or coordinating color
Fray-Check
Scissors
Embroidery needle size 24 or 25 (sharp point, large eye)
Felt glue
Sew-on Snap
Optional items that might come in handy:
Needle threader
Dressmaker’s pencil or Quilter’s marking pen
12 inch ruler
small pieces of felt for embellishment
small buttons or beads
The last two items are for embellishment on the shown change purse, but you can embelish it anyway you like.
TO START:
Cut your coordinating fabric just slightly smaller than your piece of felt. This keeps it from showing when you fold the felt. Once cut, put Fray-Check on all the edges of the fabric. Let the Fray-Check dry for about 15 minutes, just so you can work with the fabric.
Once the Fray-Check is dried, use a little felt glue to tack the fabric to the felt. You don’t have to use a lot, just a swirl here or there, or a few dots placed over the whole piece. You are trying to keep the fabric from sliding around while you work with the two pieces together. Let the felt glue dry for about 30 minutes. If you have doubts, read the instructions that are on your felt glue bottle.

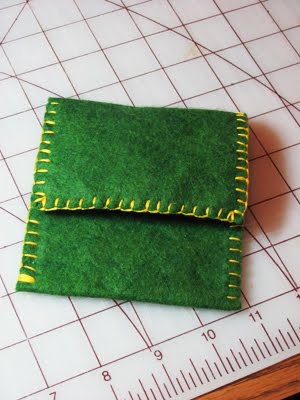
Once dry enough to work with, fold up the bottom 4 inches of the felt/fabric so that the fabric is on the inside. This makes your pocket. The top 3+”, once folded down, will be the top closure of your purse. I like to pin the folded up part with a couple of pins, just to help keep it in place. Sometimes when working with two materials together, they can shift on you and then your finished piece looks wonky. We don’t want wonky! 🙂
Next, cut a piece of your embroidery floss (all 6 strands) about a yard long. You can quickly estimate a yard by holding one end in your right hand, stretch your arm out straight from your side. Hold the other end in your left hand, and put it to your nose. Cut at the nose point and you will have approximately a yard. Before yard sticks were readily available, that is how dry-goods merchants measured cloth for their customers. You can imagine a dry-good merchant with particularly long arms was a very popular fellow with his customers! 🙂
Once you have your floss cut, thread your embroidery needle. This is quite a bit of floss to work with, so pull nearly half of it through the needle, keeping 4 to 6 inches “single”. This will be the part you work with as you go along. You will need to keep moving the needle so you continue to have that much “single” thread to work with. Make a knot in the longer end.

You are going to stitch from one bottom corner, around the piece, to the next bottom corner. You do not stitch the folded side.

BLANKET STITCH: To start your blanket stitch, and to hide your knot, start your stitch between the layers, coming out of the back of the purse. Put the needle back in near the same spot you came out, but through both layers of fabric/felt. A loop will form. Put the needle back through that loop and pull snugly. That gives you your starting blanket stitch which will be nice and straight. Go all the way around the three edges of the piece with your blanket stitch. To end the blanket stitch, at the opposite bottom corner, at the last stitch, when you have pulled it snugly and the thread is coming out the top, put your needle back into the base stitch, then put a small crosswise stitch across the bottom, tying a knot with the final loop; put the needle back through the piece and trim the thread on the opposite side.

HINT: Using a dressmaker’s pencil or quilter’s marking pen, mark a line about 1/4″ from the outside edge all around the piece (except for the folded bottom, which will not be sewn). Use this line as a guide for where to put your needle for each stitch, giving them all a uniform depth. The marks will disappear or rub out once the piece is finished.
Now sew on your snap, being careful not to go all the way through the felt. Another nice thing about felt, it is nice and thick so you can sew stuff on without having to go all the way through most of the time.
Now you’re ready to decorate! Decoration is only limited by your imagination and what you have on hand.


I used some felt pieces cut on a Sizzix in flower shapes. Then sewed a button in the middle of it. If you do this, use a little felt glue on your flower pieces to help keep them down. I added a few beads in the shape of a leaf. You pretty much have to go through all layers with beads, so make sure you use a thread that matches your felt/fabric. You could also decorate with little buttons, a piece of old lace, or even some crocheted flowers and leaves. Your decoration can make each little purse unique.
Now you’re done!
I hope you enjoy making and using your little change purse. Another useful little “Pocket”!
Thanks again for having me, Carolina!
MomChops
aka Laurie Healy
I love it! Thanks so much Laurie (can I call you MomChops?) for sharing such a fantastic tutorial with us today! If I knew how to crochet, I would totally make you a new pair of slippers. But… I don’t… so… um… well, thanks! : )

Comments & Reviews
Just a quick note to let you know that a link to this post will be placed on CraftCrave today [03 Aug 12:00pm GMT]. Thanks, Maria
Love this tutorial! Perfect for my daughter! I am following you now!
Way to go Mom!!!!! Love the tutorial!
Love this change purse Mom Chops! You did a fab job on the tutorial and I love the colors you chose! By the way,I am loving my apron! I meant to have you and Lolly sign it, will bring it up next time! *hugs from Conroe, TX
I love it, thanks for the tutorial!
Love the tutuorial Momchops, I can see where Lolly gets her talent from 🙂