• Skip to primary navigation
  • Skip to main content
  • Skip to primary sidebar
Home About Subscribe Summer Sew Camp Disclosures

Always Expect Moore

Quilts & Pattern Design

  • Cricut Maker BOTW
  • Quilty5k
  • Gallery Wall QAL
  • Trunk Show
  • Guild Resources
  • Pattern Shop
  • Free Patterns
Home About Subscribe Summer Sew Camp Disclosures
  • Cricut Maker BOTW
  • Quilty5k
  • Gallery Wall QAL
  • Trunk Show
  • Guild Resources
  • Pattern Shop
  • Free Patterns
Home » Blog » Craft Tutorials » Beating on Walls Canvas

Beating on Walls Canvas

Created On: November 2, 2013  |  Updated: November 2, 2013  |   1 Comment

Cool 2 Cast Quote Canvas


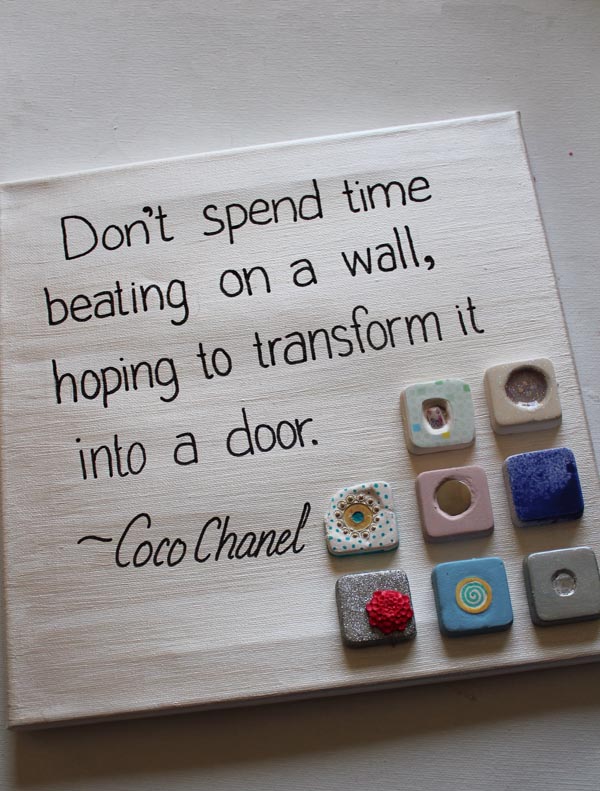
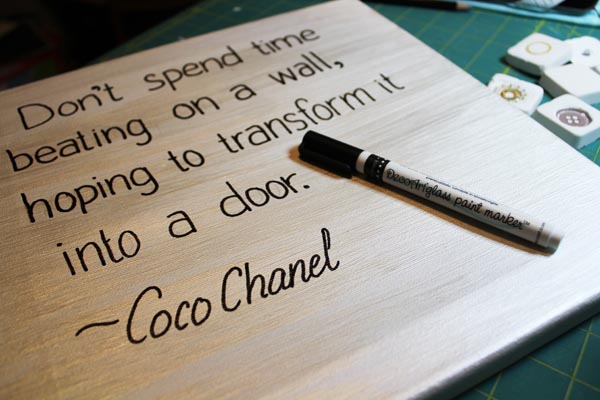
When I found this quote, I knew I wanted to turn it into a canvas. It is something that I should remember. I’m very guilty of beating on walls, trying to turn them into doors. I’m hoping I’ve gotten a little better at differentiating doors from walls as I’ve gotten a little older… but I think I still have some room for improvement!

I wanted to have something that looked a little like a brick wall – but in a fun, mixed-media way. I knew just what to use. I’d been sent some Cool2Cast to review for Craft Test Dummies, and it is perfect for mixed-media projects.

Making the canvas was actually pretty easy to do… and lots of fun since I got to play with all kinds of craft supplies in making it.

I started by getting my mold. This is a mold for making brownie bites, but I don’t use it for that. It has held different kinds of resin and epoxy, so now it is exclusively a crafting mold. I put different buttons in the bottoms of the cavities of the mold. Then I mixed up my Cool2Cast and poured it into the cavities, trying to fill each one about the same amount.

pour in cool 2 cast

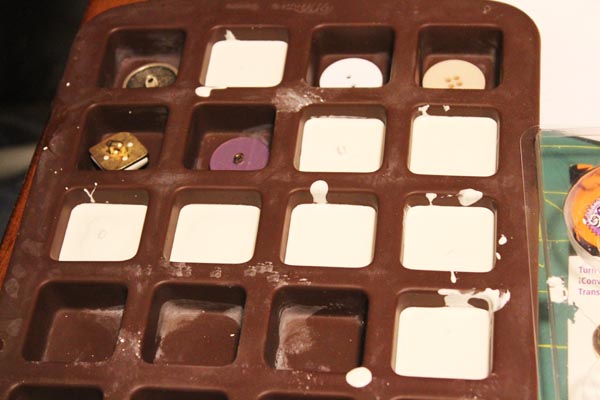
I let the Cool2Cast set for the required time, then popped it out of the molds.

remove from molds

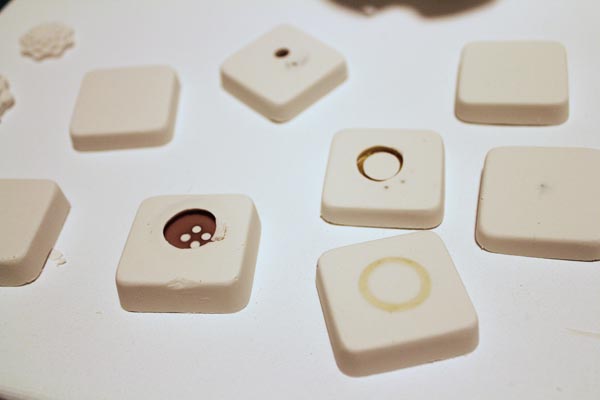
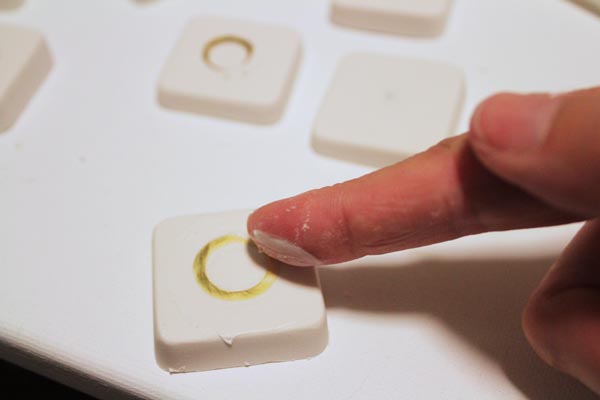
The medium was still soft enough for me to scratch off any that that covered the buttons. I dipped my finger in water to rub away any remnants of Cool2Cast, then wiped the buttons clean with a paper towel.

wet wipe away excess

I let the squares dry completely overnight. I painted my canvas with a pearlized acrylic paint, and let it dry overnight as well.

The next day, I laid the tiles out on the canvas to figure out placement for my lettering. First I lightly sketched out the letters in pencil for placement, then I used my DecoArt Glass writing pen to write out my quote.

write quote

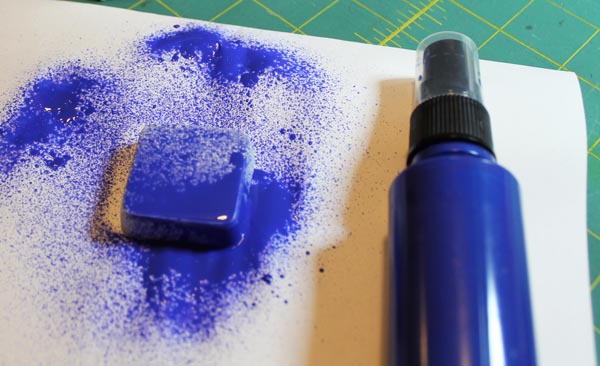
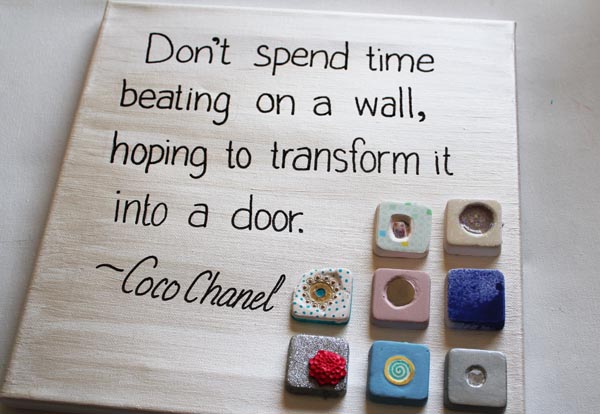
Then I painted the pieces. I used different paints, sprays, and markers on the different pieces for a fun, mixed-media look.

spray with paint

paint

After the paint dried, I glued all the tiles down onto the canvas. That was it!

quote canvas

posted in: Craft Tutorials, DIY Wall Art, Home Decor

Previous
Halloween Wrap-Up
Next
Whimsical Holiday Entertaining Recipes

Reader Interactions

    Leave A Reply! Cancel reply

    Share your thoughts!
    Your email address will not be published. Required fields are marked with *

    This site uses Akismet to reduce spam. Learn how your comment data is processed.

    Comments & Reviews

  1. Britni @ Play. Party. Pin. says

    November 2, 2013

    Using the brownie bites pan for these tiles is genius, might have to borrow that idea if I can find one for cheap. Thanks for the tip!

    Reply

Primary Sidebar

Hi, I'm Carolina!

I’m a Quilt Pattern Designer, Award Winning Quilter, and fan of all things quilting. I live in San Diego with my husband, our two boys and our pets. I love keeping both my hands and mind busy, so I’m always working on lots of projects. You’ll find lots of them shared here!

More About Me

Let's Keep In Touch!

I'll let you know about what's new in quilting, freebies you'll want to snag, and brighten your inbox about once a week!

subscribe
90% Faster Than Rotary Cutters

Fat Quarter Shop Quilting Fabrics and Supplies

Instagram Facebook Pinterest YouTube

Recent Posts

  • Flying Pig Quilt Block
  • Bunny and Carrot Quilt Block
  • Free Fancy Drink Quilt Block
  • Dutch Row Houses Quilt Block
  • Quilted Sports Jersey Numbers

Archives

Featured Projects

  • Everything you want to know about Pre Cut Fabrics!
  • Scrappy Placemat - easy to make scrap project
    Scrappy Placemat using Strips and Scrap Tape
  • Sewing Kaleidoscope SVG File
  • Drawstring Backpack
  • Carolina holding fabric marking pens
    Choosing Fabric Marking Pens

Let's Keep In Touch!

Brighten your inbox about once a week!

Always Expect Moore Submark Shop Patterns

Browse

  • Ruler of the Month
  • Quilty5k
  • QuiltMath
  • Cricut Maker BOTW

Shop

  • Digital Download Patterns
  • Quilting Notions
  • Quilt Stickers
  • Quilt Tees

Connect

  • YouTube
  • Instagram
  • Facebook Group
  • TikTok
©2025, Always Expect Moore. All Rights Reserved. About Disclosures
Back To Top
Design by Pixel Me Designs
×

Let's Keep In Touch!

I'll let you know about what's new in quilting, freebies you'll want to snag, and brighten your inbox about once a week!