• Skip to primary navigation
  • Skip to main content
  • Skip to primary sidebar
Home About Subscribe Summer Sew Camp Disclosures

Always Expect Moore

Quilts & Pattern Design

  • Cricut Maker BOTW
  • Quilty5k
  • Gallery Wall QAL
  • Trunk Show
  • Guild Resources
  • Pattern Shop
  • Free Patterns
Home About Subscribe Summer Sew Camp Disclosures
  • Cricut Maker BOTW
  • Quilty5k
  • Gallery Wall QAL
  • Trunk Show
  • Guild Resources
  • Pattern Shop
  • Free Patterns
Home » Blog » Uncategorized » Free Pieced Placemat

Free Pieced Placemat

Created On: July 27, 2012  |  Updated: July 27, 2012  |   2 Comments

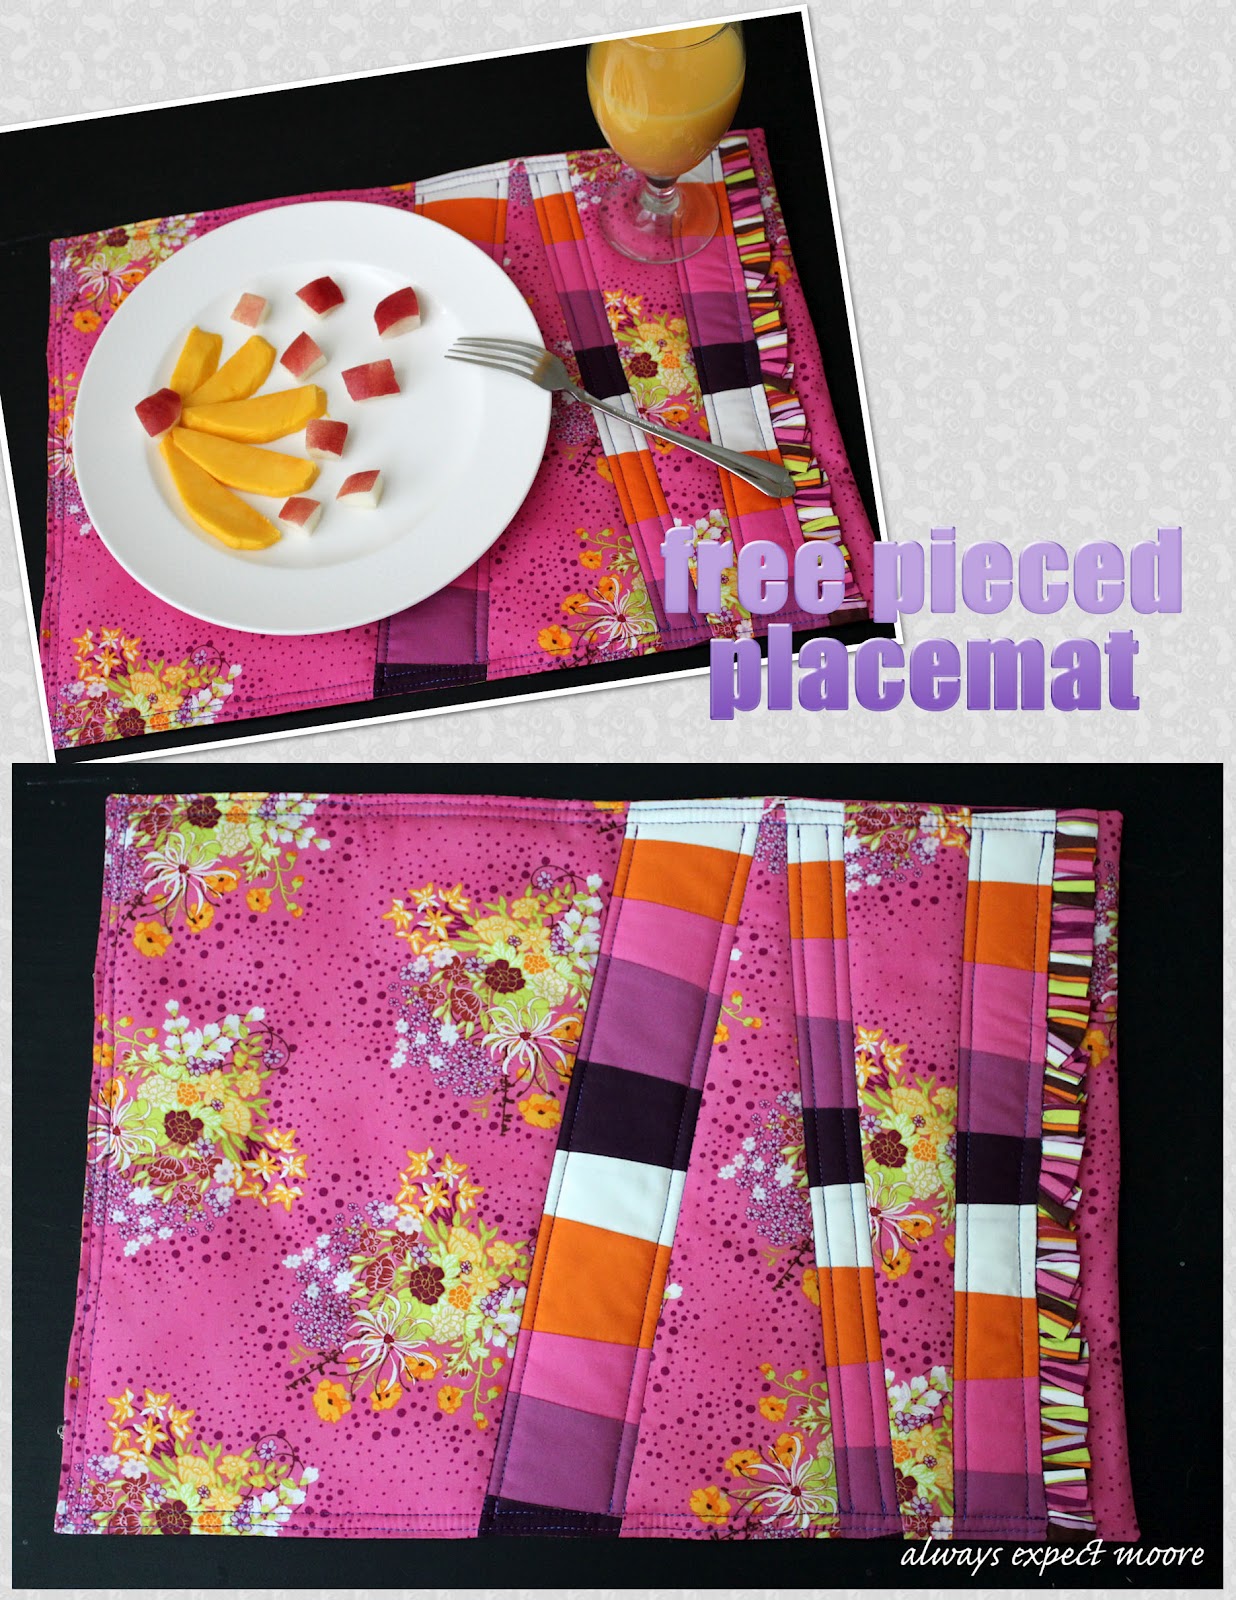
I’m elbow-deep into the current Art Gallery Fabrics Challenge, so I guess that means it is time to show you what I did last month! No winning entry here, just a fun way to make a colorful placemat. The requirements were to make a placemat with a ruffle.

Free piecing is simple to do, and fun because you plan and make decisions as you go. The impromptu nature is very liberating.

 I started by cutting two pieces the size of a placemat – I just used a placemat I had on hand for size. I Pieced together strips of solid fabric in a very imprecise way, and cut a strip of stripe to use as my ruffle.


 I laid the stripe down at an angle, and cut the backing fabric.
I stitched in a strip of the stripe fabric.
I then pinned the backing fabric to the edge of the stripe, making sure to offset the edges to account for the seam.

I repeated the process with another strip, at a different angle. I did try to line up the stripes a little.

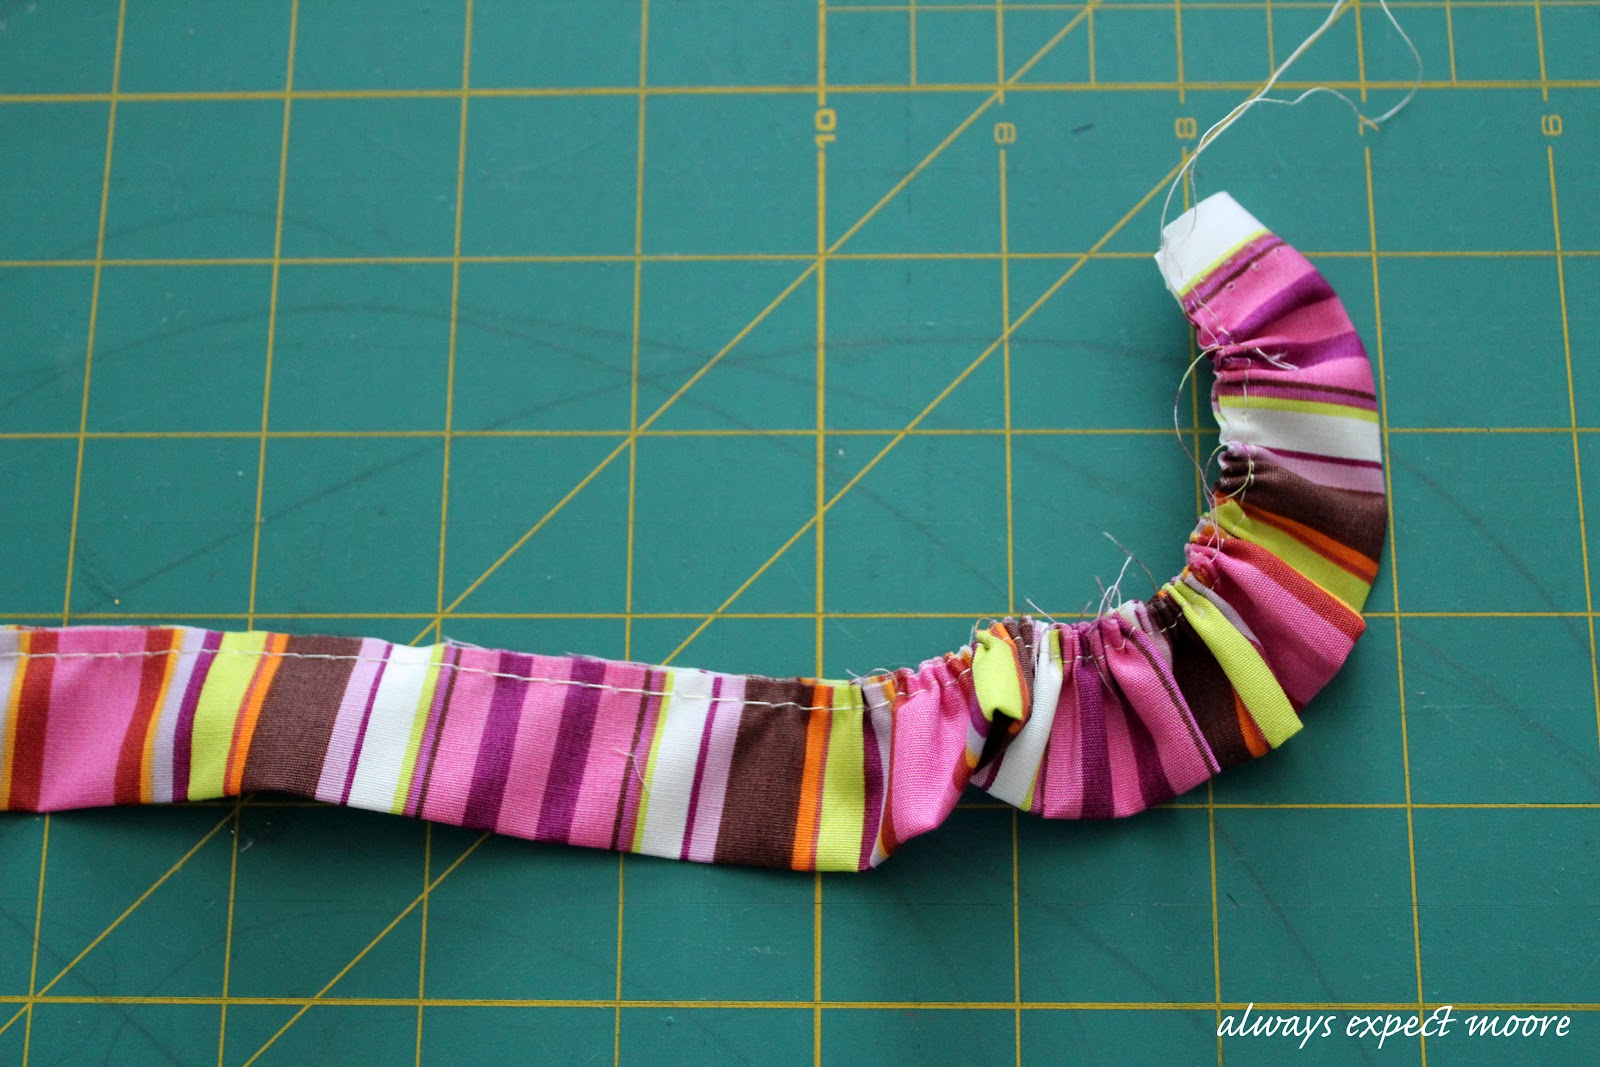
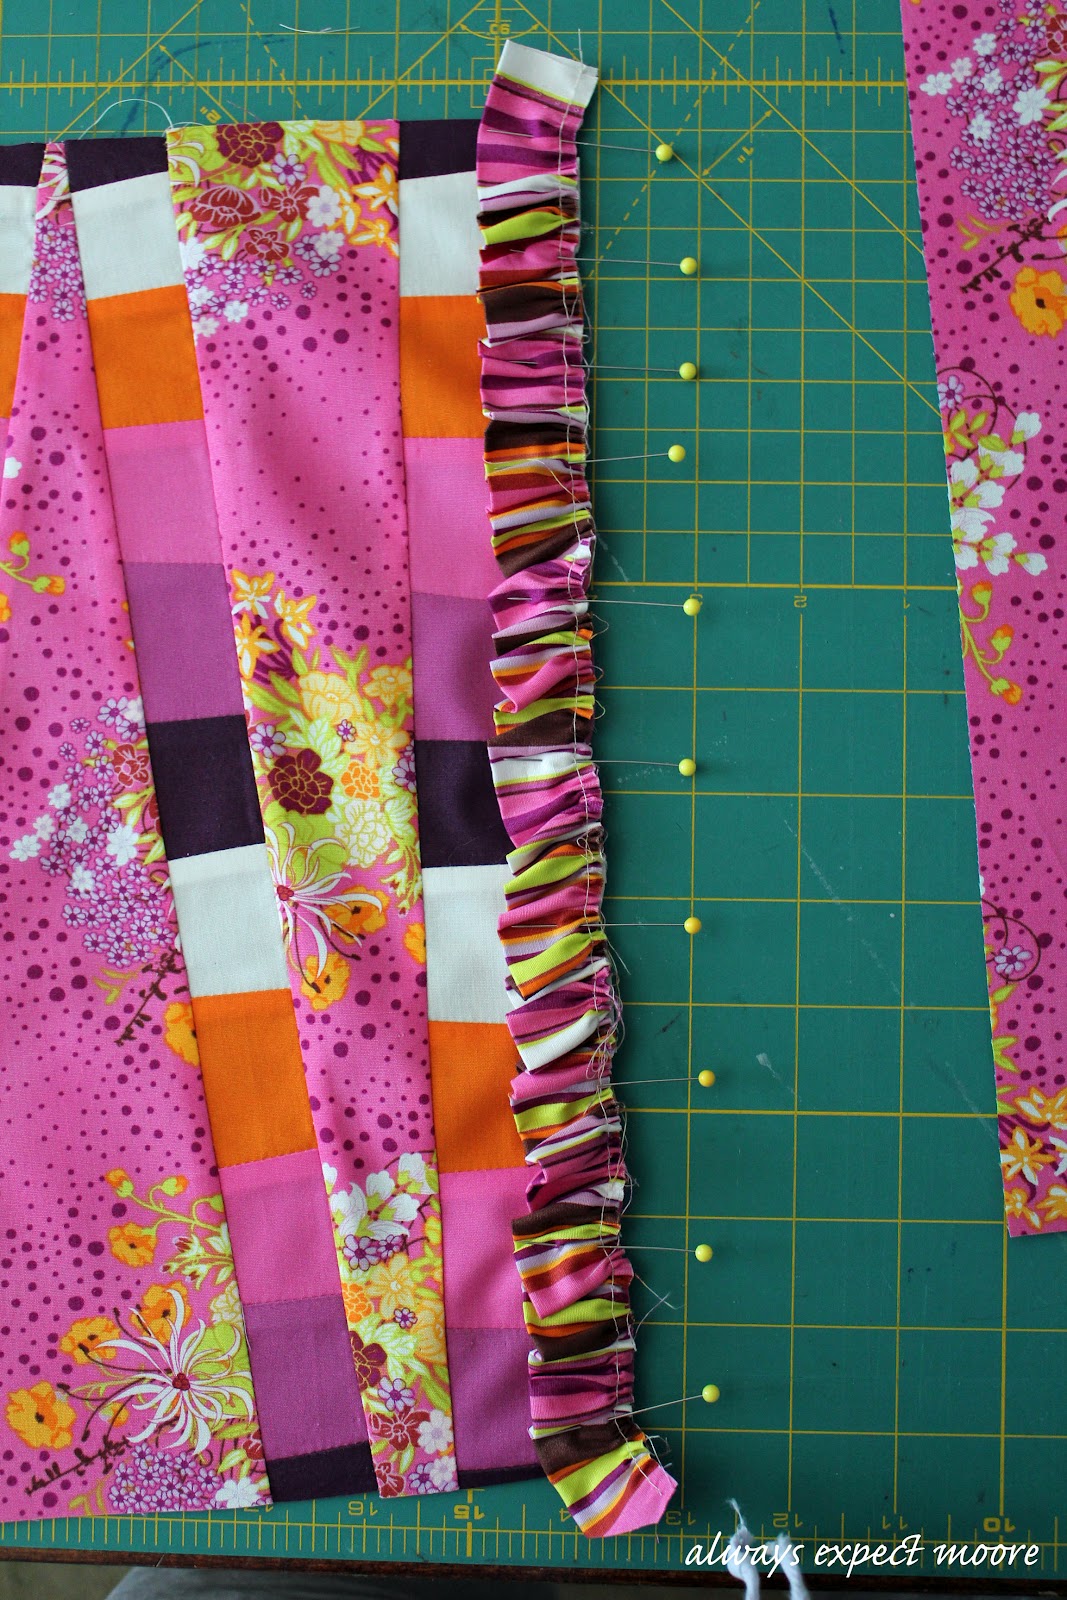
After stitching in my strips of stripes, I pressed the strip for the ruffle in half, increased my stitch length as high as it goes, and stitched down the raw edge. Then pulled one of the threads to ruffle the fabric.

I added the ruffle to the final stripe strip before attaching the placemat piece.

Once I had the top fully pieced, I cut it to size, and cut a piece of batting the same size.

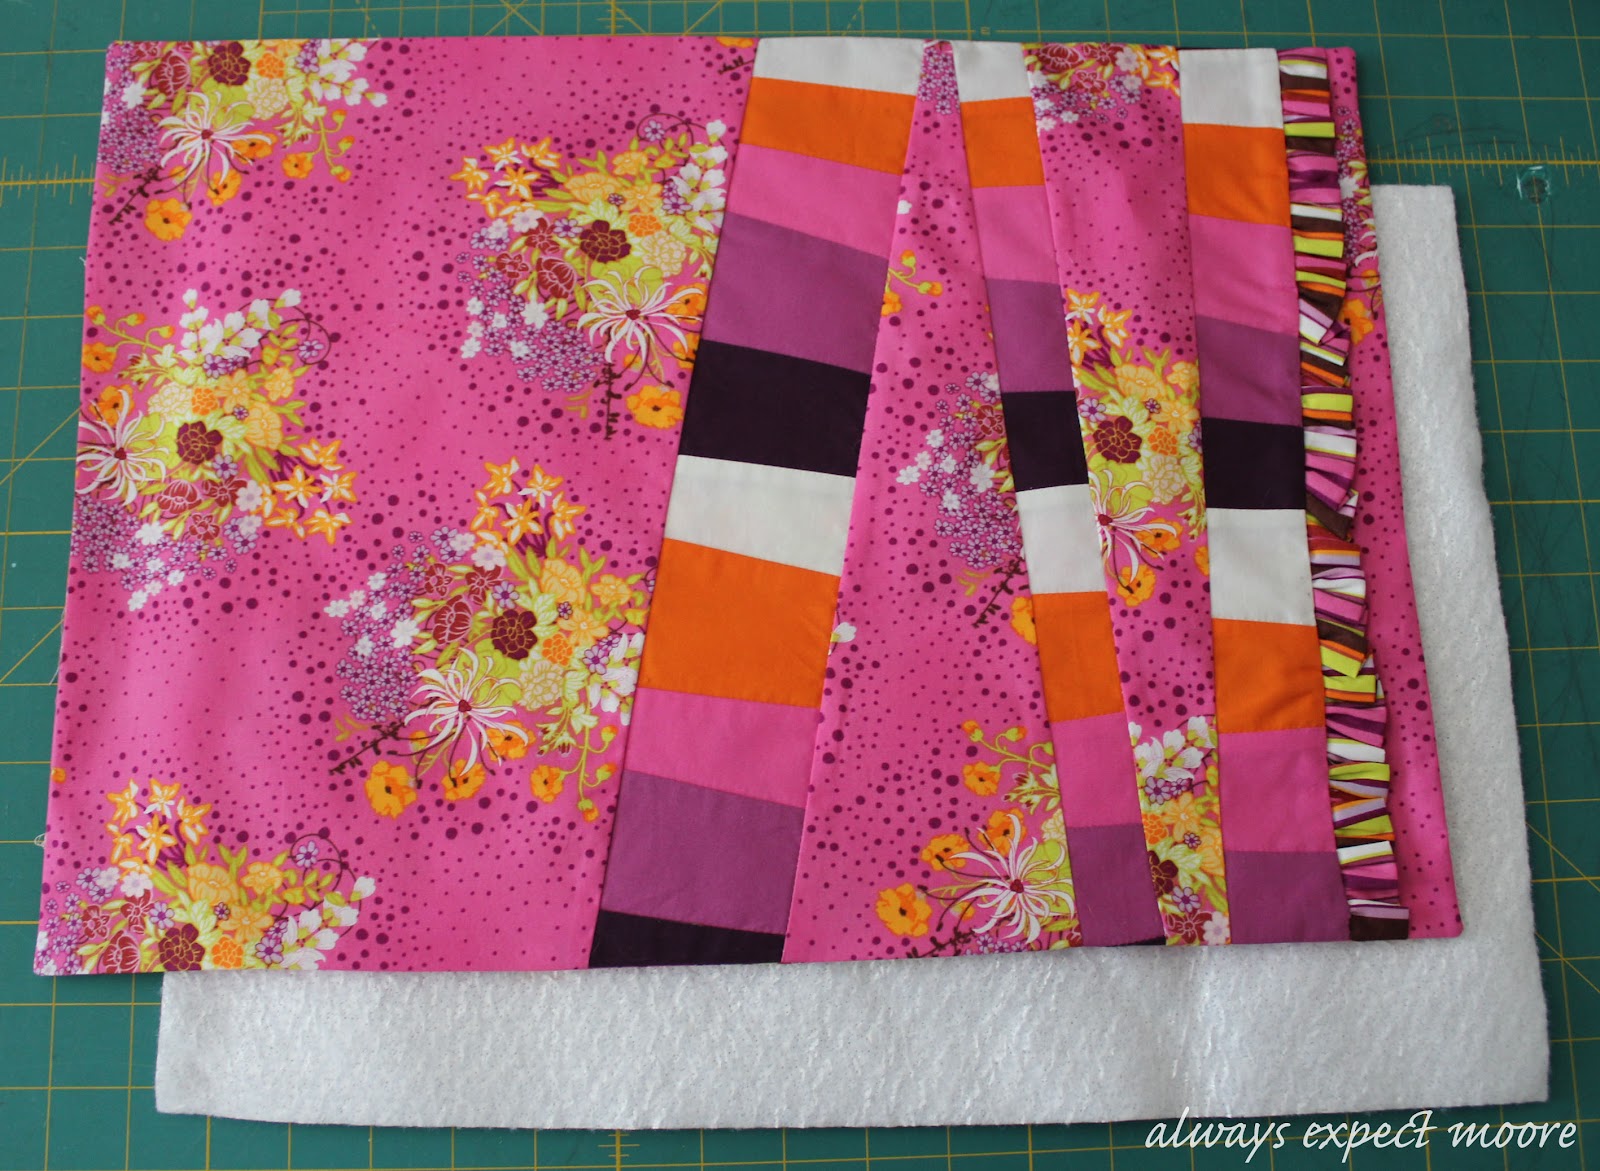
I put the back and front right sides together with the batting in the middle, stitched almost all the way around (leaving a hole for turning). Trimmed the corners and turned the placemat right side out, then stitched the hole closed and quilted the top to finish.

posted in: Uncategorized

Previous
Bright Neon Baby Onesie from a T-Shirt
Next
Lay Flat Photo Book from Snapfish

Reader Interactions

    Leave A Reply! Cancel reply

    Share your thoughts!
    Your email address will not be published. Required fields are marked with *

    This site uses Akismet to reduce spam. Learn how your comment data is processed.

    Comments & Reviews

  1. p.s.phyllis sews says

    July 27, 2012

    That’s fun fabric you put together! Love it when the project goes together so easily as it looks like yours did! Congratulations!

    Reply
  2. Brandie @ Home Cooking Memories says

    July 28, 2012

    Oooh I really like those stripes going across the pattern. Cool look!

    Reply

Primary Sidebar

Hi, I'm Carolina!

I’m a Quilt Pattern Designer, Award Winning Quilter, and fan of all things quilting. I live in San Diego with my husband, our two boys and our pets. I love keeping both my hands and mind busy, so I’m always working on lots of projects. You’ll find lots of them shared here!

More About Me

Let's Keep In Touch!

I'll let you know about what's new in quilting, freebies you'll want to snag, and brighten your inbox about once a week!

subscribe
90% Faster Than Rotary Cutters

Fat Quarter Shop Quilting Fabrics and Supplies

Instagram Facebook Pinterest YouTube

Recent Posts

  • Flying Pig Quilt Block
  • Bunny and Carrot Quilt Block
  • Free Fancy Drink Quilt Block
  • Dutch Row Houses Quilt Block
  • Quilted Sports Jersey Numbers

Archives

Featured Projects

  • Everything you want to know about Pre Cut Fabrics!
  • Scrappy Placemat - easy to make scrap project
    Scrappy Placemat using Strips and Scrap Tape
  • Sewing Kaleidoscope SVG File
  • Drawstring Backpack
  • Carolina holding fabric marking pens
    Choosing Fabric Marking Pens

Let's Keep In Touch!

Brighten your inbox about once a week!

Always Expect Moore Submark Shop Patterns

Browse

  • Ruler of the Month
  • Quilty5k
  • QuiltMath
  • Cricut Maker BOTW

Shop

  • Digital Download Patterns
  • Quilting Notions
  • Quilt Stickers
  • Quilt Tees

Connect

  • YouTube
  • Instagram
  • Facebook Group
  • TikTok
©2025, Always Expect Moore. All Rights Reserved. About Disclosures
Back To Top
Design by Pixel Me Designs
×

Let's Keep In Touch!

I'll let you know about what's new in quilting, freebies you'll want to snag, and brighten your inbox about once a week!