• Skip to primary navigation
  • Skip to main content
  • Skip to primary sidebar
Home About Subscribe Summer Sew Camp Disclosures

Always Expect Moore

Quilts & Pattern Design

  • Cricut Maker BOTW
  • Quilty5k
  • Gallery Wall QAL
  • Trunk Show
  • Guild Resources
  • Pattern Shop
  • Free Patterns
Home About Subscribe Summer Sew Camp Disclosures
  • Cricut Maker BOTW
  • Quilty5k
  • Gallery Wall QAL
  • Trunk Show
  • Guild Resources
  • Pattern Shop
  • Free Patterns
Home » Blog » Craft Tutorials » Smooth Finish Styrofoam Eye Box

Smooth Finish Styrofoam Eye Box

Created On: October 17, 2013  |  Updated: October 17, 2013  |   Leave a comment

eyeball box

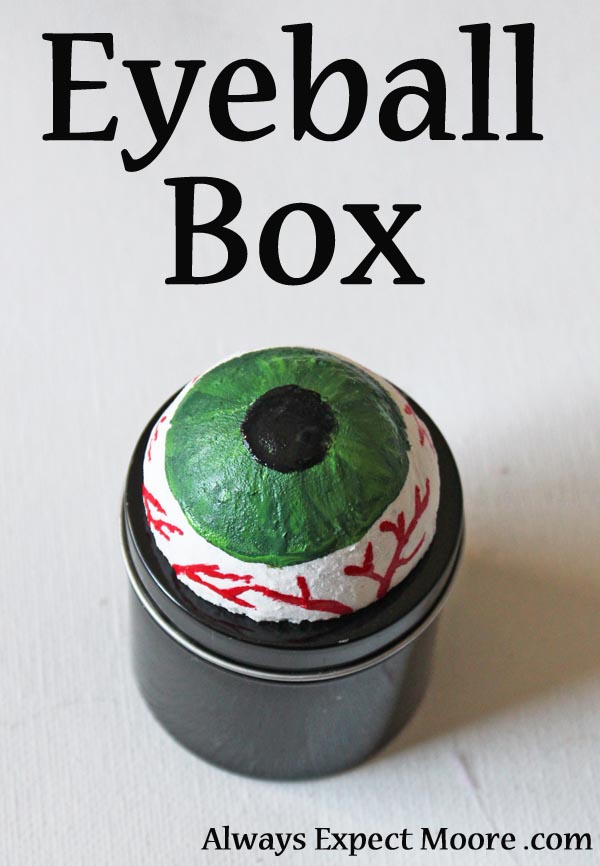
I got to play with Styrofoam’s Smooth Finish, and decided that with Halloween coming, it was the perfect chance to make an eyeball box. It took less than 30 minutes of hands-on time to put it together, and I’m loving the way it turned out! My kiddos think it is pretty awesome, too.

To make your own eyeball box you need:
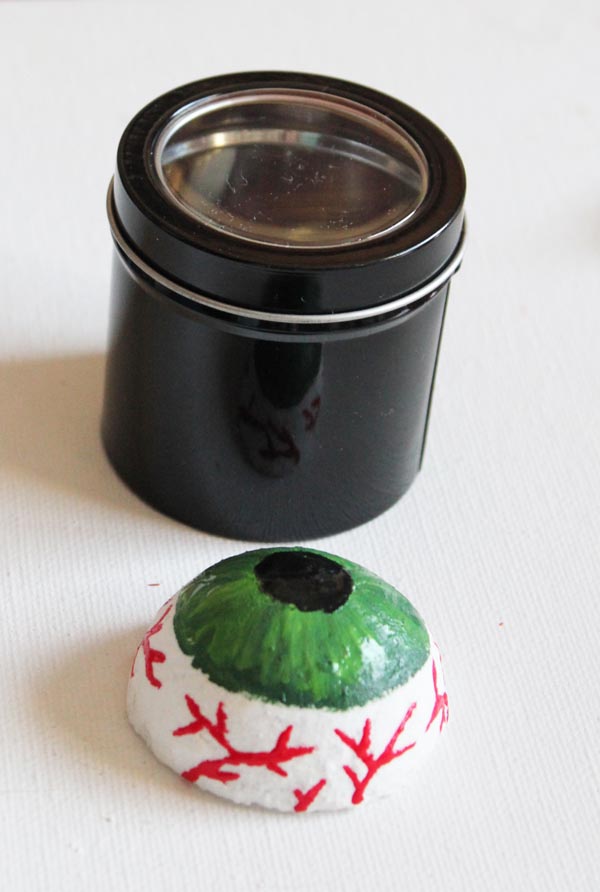
Small tin (got mine in the discount section at Michael’s)
Styrofoam Ball
Smooth Finish
Sponge or paper towel
Water
Fine grit sandpaper
Paint & Paintbrushes
Glue

Start by cutting your foam ball in half, and putting on the Smooth Finish. Once you have it in all the nooks and crannies, wipe it down with a wet sponge or damp paper towel to smooth it.

wipe down the smooth finish

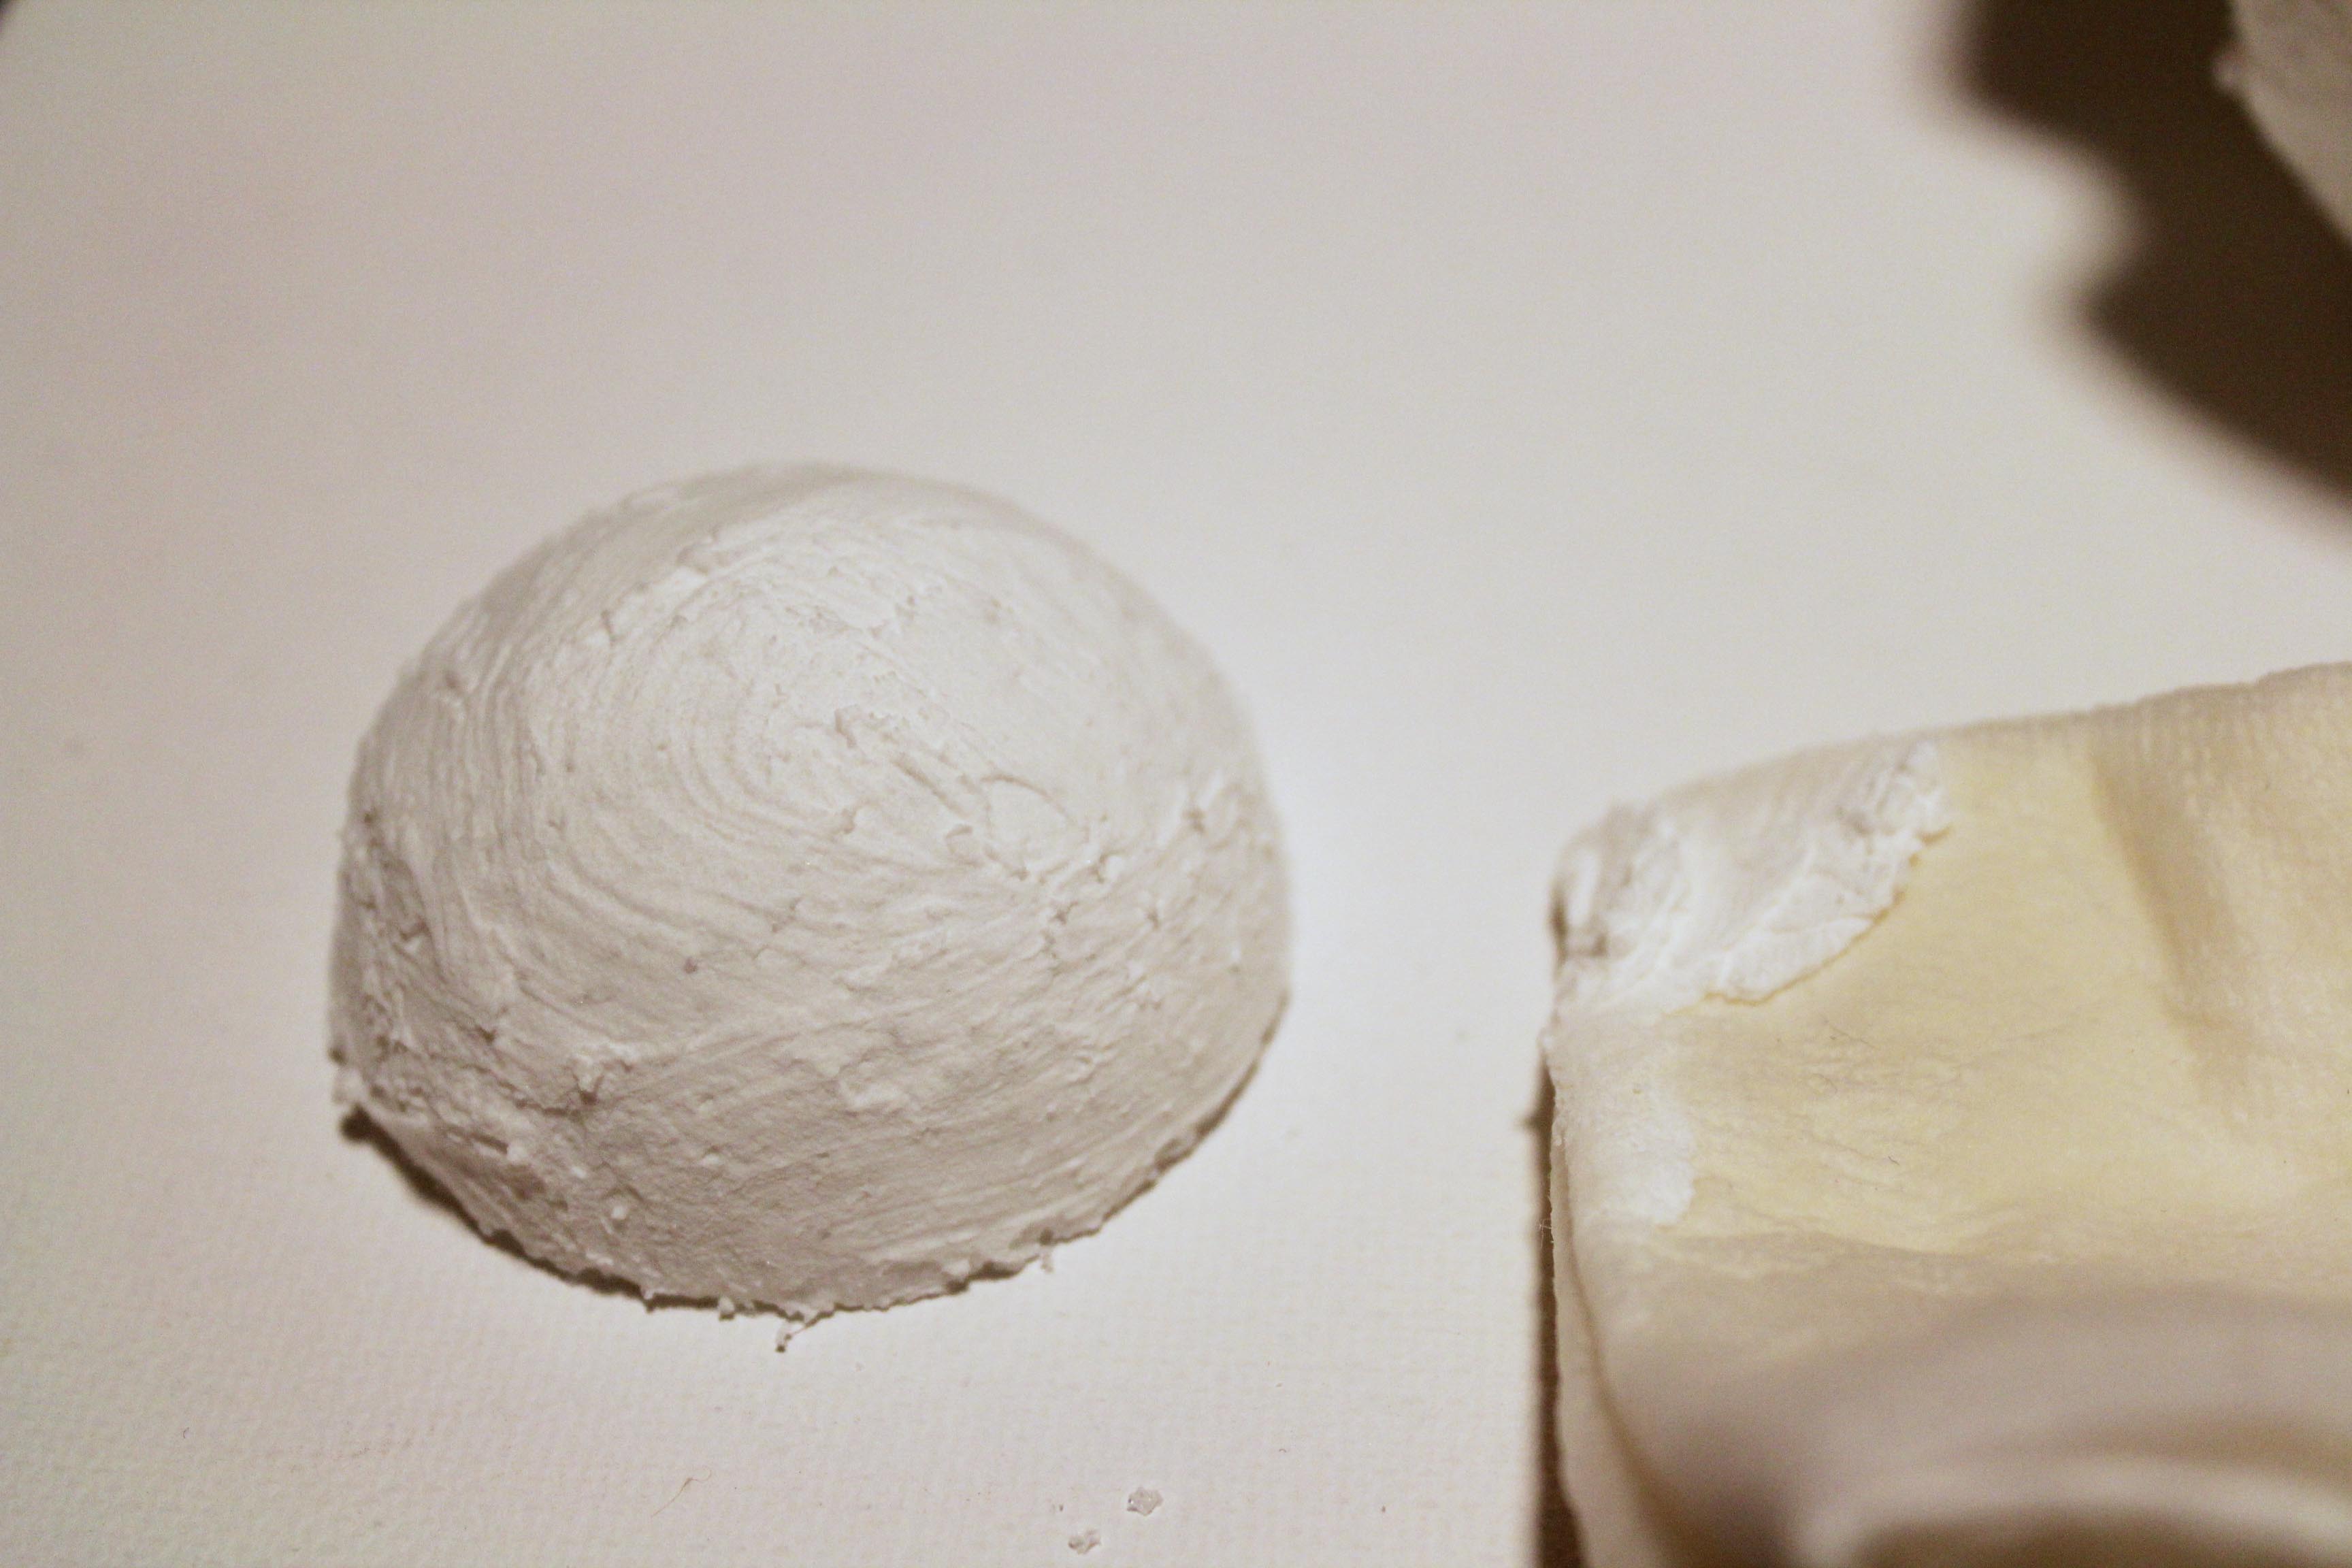
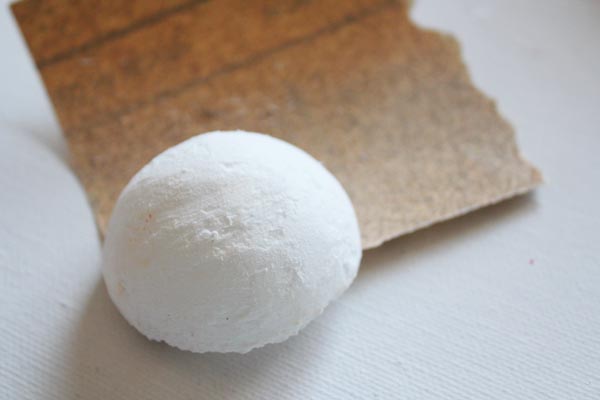
Let dry fully. Overnight. Or a couple days… whichever. Then use fine grit sandpaper to smooth out any rough spots.

sand smooth

Pick your paint colors. I chose 2 tones of green for the eye, in addition to red and black (not shown).

select paints

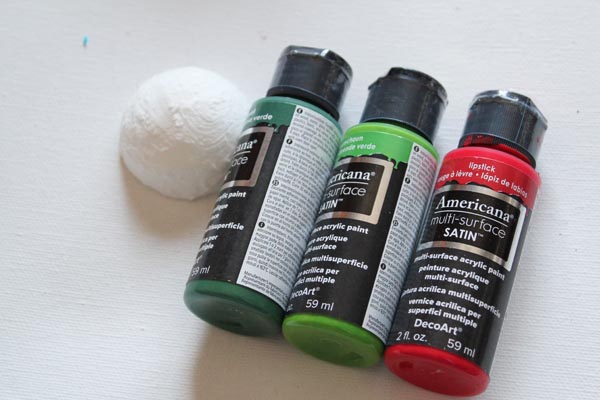
Start by painting the iris.

paint on iris

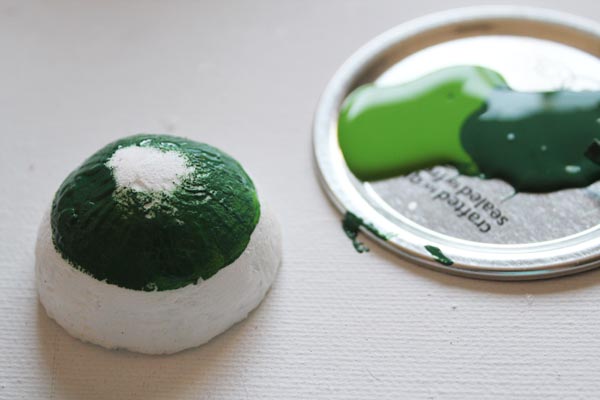
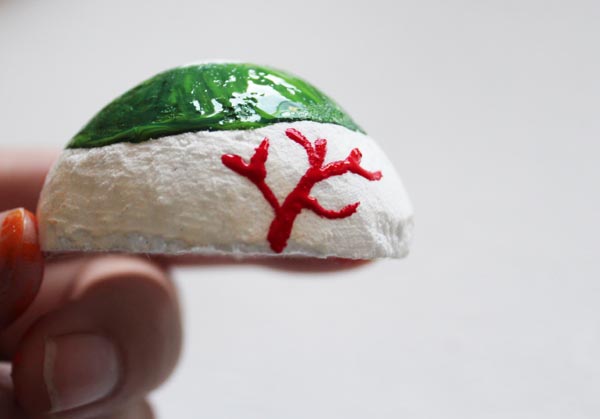
Use both colors to get a more realistic look. Then paint on red blood vessels with a fine-tipped paintbrush.

paint on veins

Add the black pupil in the middle.

glue on to tin

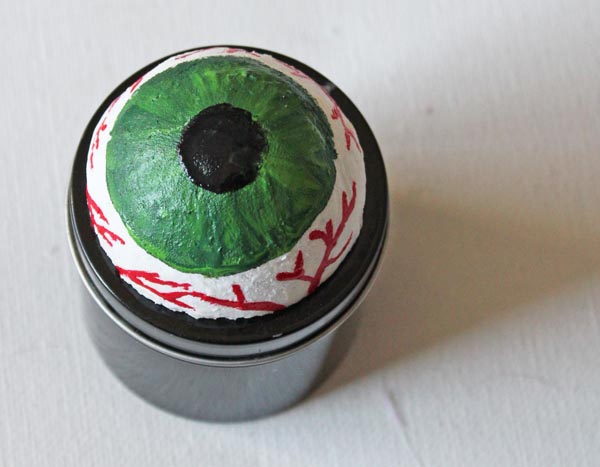
Lastly, glue the eyeball to the top of your tin, and you’re all done!

eyball box with smooth finish

posted in: Craft Tutorials

Previous
Catbearding and other kitty love… (like cat litter)
Next
Awesome YouTube Channels and a GIVEAWAY!

Reader Interactions

Leave A Reply! Cancel reply

Share your thoughts!
Your email address will not be published. Required fields are marked with *

This site uses Akismet to reduce spam. Learn how your comment data is processed.

Primary Sidebar

Hi, I'm Carolina!

I’m a Quilt Pattern Designer, Award Winning Quilter, and fan of all things quilting. I live in San Diego with my husband, our two boys and our pets. I love keeping both my hands and mind busy, so I’m always working on lots of projects. You’ll find lots of them shared here!

More About Me

Let's Keep In Touch!

I'll let you know about what's new in quilting, freebies you'll want to snag, and brighten your inbox about once a week!

subscribe
90% Faster Than Rotary Cutters

Fat Quarter Shop Quilting Fabrics and Supplies

Instagram Facebook Pinterest YouTube

Recent Posts

  • Flying Pig Quilt Block
  • Bunny and Carrot Quilt Block
  • Free Fancy Drink Quilt Block
  • Dutch Row Houses Quilt Block
  • Quilted Sports Jersey Numbers

Archives

Featured Projects

  • Everything you want to know about Pre Cut Fabrics!
  • Scrappy Placemat - easy to make scrap project
    Scrappy Placemat using Strips and Scrap Tape
  • Sewing Kaleidoscope SVG File
  • Drawstring Backpack
  • Carolina holding fabric marking pens
    Choosing Fabric Marking Pens

Let's Keep In Touch!

Brighten your inbox about once a week!

Always Expect Moore Submark Shop Patterns

Browse

  • Ruler of the Month
  • Quilty5k
  • QuiltMath
  • Cricut Maker BOTW

Shop

  • Digital Download Patterns
  • Quilting Notions
  • Quilt Stickers
  • Quilt Tees

Connect

  • YouTube
  • Instagram
  • Facebook Group
  • TikTok
©2025, Always Expect Moore. All Rights Reserved. About Disclosures
Back To Top
Design by Pixel Me Designs
×

Let's Keep In Touch!

I'll let you know about what's new in quilting, freebies you'll want to snag, and brighten your inbox about once a week!