• Skip to primary navigation
  • Skip to main content
  • Skip to primary sidebar
Home About Subscribe Summer Sew Camp Disclosures

Always Expect Moore

Quilts & Pattern Design

  • Cricut Maker BOTW
  • Quilty5k
  • Gallery Wall QAL
  • Trunk Show
  • Guild Resources
  • Pattern Shop
  • Free Patterns
Home About Subscribe Summer Sew Camp Disclosures
  • Cricut Maker BOTW
  • Quilty5k
  • Gallery Wall QAL
  • Trunk Show
  • Guild Resources
  • Pattern Shop
  • Free Patterns
Home » Blog » Uncategorized » Tie Dye Sampler Quilt

Tie Dye Sampler Quilt

Created On: June 15, 2012  |  Updated: June 15, 2012  |   1 Comment

I’ll admit.. It has been a long time sine I’ve done any Tie Dye. The last time was in Girl Scouts, and involved large vats of dye… and plenty of adult supervision. I decided to try out some traditional Tie Dye methods to dye the fabric for this Tie Dye Sampler Quilt… check back tomorrow for a fun non-traditional project!

I was super excited to try out this new tie dye from Tulip. No giant vats, no worrying about water temperature – just add water to the fill line of the bottle, shake until the powder is dissolved, and start squirting! All the techniques I used for the blocks and backing (excluding the heart) are outlined in the package insert.

Along with my tie dye kit, I picked up a bottle of Tie Dye Resist, and some craft aprons (so that the dye didn’t travel to my clothes).

To make the quilt I bought 5 yards of plain white flannel. Flannel is 100% cotton, so would accept the dye well. I wanted a nice, soft, fuzzy quilt – the flannel was perfect for that. And, sweet serendipity, it was on sale!

I washed the whole 5 yard piece of fabric, and ran it through the dryer. Pre-washing fabrics is important in dying, because it removes any sizing or chemicals that might interfere with the dye. In this case, it also helped take any “shrink” out of the fabric so that the quilt does not pucker up as much in future washings.

After taking the fabric out of the dryer, I cut it up. I cut a large, 65″ x WOF piece for the quilt back. I then cut 4 – 15″ strips, which I sub-cut to get 3 – 15″ squares out of each strip for a total of 12 squares. The 15″ squares would later be cut down into 12.5″ squares to make 12″ finished blocks.  The remaining fabric I kept for my binding.

Because these fabric squares are going to be washed later, it is a good idea to either cut them with a pinking blade or trim them with pinking shears at this point. This will prevent extreme fraying in the wash. The extra inches on the fabric squares are to account for the inevitable fraying that happens when washing fabric… but pinking the edges will also help prevent all those threads and strings from becoming a tangled mess in the wash. I neglected this step, and though my fabric wasn’t any worse for the wear, I did spend an extra 20 minutes cutting threads and de-tangling a jumbled mess after the next washing.

Once the fabric was cut – it was time to dye! I started with the resist. Quilts need quilt labels, so I thought it would be fun to dye the “label” right into the fabric! I wrote “Made for Logan” on the back of the quilt back.

While the resist was drying, I prepared my quilt square fabric. Rather than make 12 completely different blocks, I used 2 stacked pieces of fabric for each different method, so that each block would have a mate. I did 3 spiral method block sets, and 3 bulls-eye method block sets. The rubber bands come in the kit. On the left, you can see the detailed insert that shows how to create the different designs.

On my thoroughly covered surface, I applied the dye to both sides of the fabric.

I wanted a stripey binding (love striped bindings!) on my quilt, so I used the accordion-fold method to make the binding.

 I had some leftover rectangular bits of fabric from cutting the squares, and I used a couple of these to pick up the drips of dye. I just put the fabric down on the drop cloth and let it absorb the dye drips, then picked up the fabric and moved it to another spot, and another, until I had absorbed all the extra dye. This pick-up-put-down created pretty splotches, rather than smears. I then sprayed the dry, dyed fabric with water so that the splotches would blend. This will be used in tomorrow’s project.

Now that I had all my blocks done, it was time to dye the backing. I used this video to learn how to dye a heart, and created a heart around my resist on the backing fabric.

I covered the heart in a plastic bag to protect it from the blue dye, and then used the crumple method to dye the rest of the backing fabric.

 
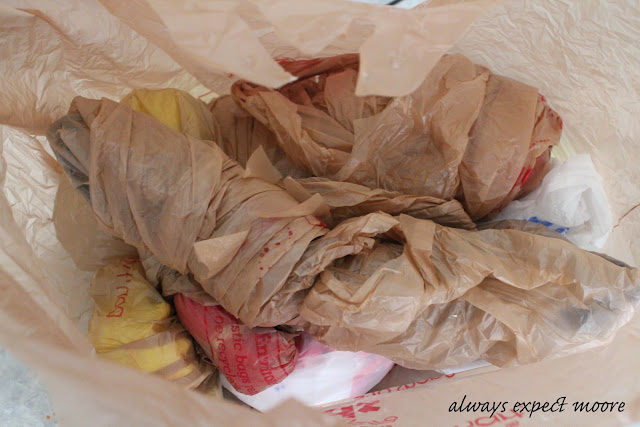
All the pieces were wrapped up in individual plastic bags, and left to cure for at least 6 hours…
 
After 6 hours of waiting, it was time to rinse the fabric! I set my empty washing machine on the hottest setting and the largest load, and let it fill up with water, adding just a little detergent. I then unwrapped the pieces quickly, and tossed them in the water – then let the washer do it’s job! I was a little worried that the colors would run together and I would end up with a bunch of muddy-colored blobs of fabric, but they turned out great!
I ironed them all flat, and then squared up my blocks to 12.5″. I kept an eye on the designs, and if there was a particular part of the design I liked best, I made sure that it didn’t get trimmed away. I also kept my trimmings for tomorrow’s project… 
To trim the blocks, I cut one side, and then a perpendicular side at a 90 degree angle. I then cut the opposite sides 12.5 inches away, to make the 12.5″ square blocks
 
Here is the stripey binding – this is probably my favorite of all the dyed results! I cut this into 2.5″ strips, which is my preferred width for binding quilts. I needed 5 strips for this quilt.
 
 I laid out the trimmed blocks until I liked the placement, then stitched them into rows of 3. Then I stitched the 4 rows together to make the quilt top. I spray-basted it to the batting and backing, and quilted it. I decided to go with simple quilting that wouldn’t take away from the tie dye designs, so I did a stitch-in-the-ditch between the blocks, and then an X in the middle of each block.
All that was left was to attach the binding!
Here is the back of the quilt! My heart isn’t as heart-shaped as I would like, and I didn’t let the resist dry quite long enough, so the wording is very faint… but I LOVE the blue crinkle effect on the backing! I’m tempted to create a whole-cloth quilt with this method… so don’t be surprised if you see one on this blog in the future! 🙂
 
Finished Quilt Size: 36″ x 48″
There are so many awesome things you can do with tie dye! Check out all the fabulous ideas that are being shared online by following I Love to Create on Twitter, becoming a fan on Facebook, and follow them on Pinterest!
Also, check out all these other awesome Tie Dye projects that my friends out in blogland have shared this week:

Tulip Tie Dye Kits are available at Walmart, Walmart Canada, Michaels, JoAnn, A.C. Moore, Hobby Lobby, Hancock Fabrics, Meijer. Tie dye kit contents and colors may vary by store.
I wrote this post as part of a paid campaign with iLoveToCreate.com and Blueprint Social. The opinions in this post are my own.

posted in: Uncategorized

Previous
Dresdens yet to come…
Next
Tie Dye Zippered Pouches

Reader Interactions

    Leave A Reply! Cancel reply

    Share your thoughts!
    Your email address will not be published. Required fields are marked with *

    This site uses Akismet to reduce spam. Learn how your comment data is processed.

    Comments & Reviews

  1. Christina Dickson says

    December 11, 2012

    How large is your quilt at the end? It looks great! Can’t wait to start my own

    Reply

Primary Sidebar

Hi, I'm Carolina!

I’m a Quilt Pattern Designer, Award Winning Quilter, and fan of all things quilting. I live in San Diego with my husband, our two boys and our pets. I love keeping both my hands and mind busy, so I’m always working on lots of projects. You’ll find lots of them shared here!

More About Me

Let's Keep In Touch!

I'll let you know about what's new in quilting, freebies you'll want to snag, and brighten your inbox about once a week!

Thank you for subscribing!
subscribe
90% Faster Than Rotary Cutters

Fat Quarter Shop Quilting Fabrics and Supplies

Projects With Pre-Cuts - 7 Colorful Designs

Featured Projects

  • Everything you want to know about Pre Cut Fabrics!
  • Scrappy Placemat - easy to make scrap project
    Scrappy Placemat using Strips and Scrap Tape
  • Sewing Kaleidoscope SVG File
  • Drawstring Backpack
  • Carolina holding fabric marking pens
    Choosing Fabric Marking Pens

Let's Keep In Touch!

Brighten your inbox about once a week!

Always Expect Moore Submark Shop Patterns

Browse

  • Ruler of the Month
  • Quilty5k
  • QuiltMath
  • Cricut Maker BOTW

Shop

  • Digital Download Patterns
  • Quilting Notions
  • Quilt Stickers
  • Quilt Tees

Connect

  • YouTube
  • Instagram
  • Facebook Group
  • TikTok
©2023, Always Expect Moore. All Rights Reserved. About Disclosures
Back To Top
Design by Pixel Me Designs
×

Let's Keep In Touch!

I'll let you know about what's new in quilting, freebies you'll want to snag, and brighten your inbox about once a week!

Thank you for subscribing!