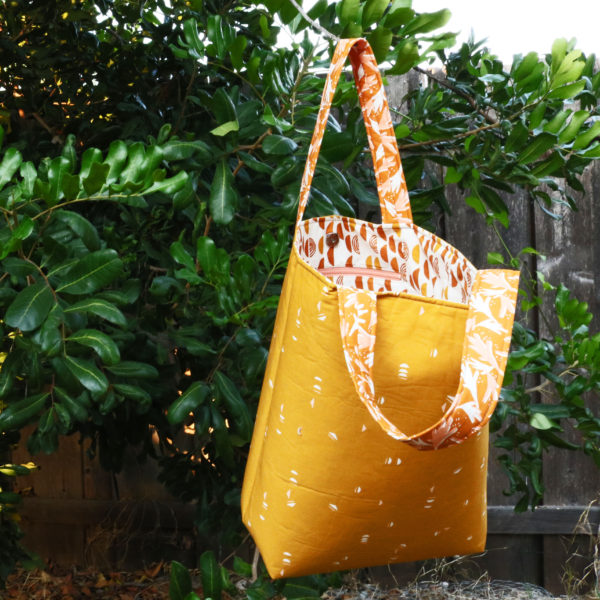
Today I’m sharing with you this Tote Pattern and super detailed tutorial as part of Baby Lock Summer School. Earlier this year, I announced that I am a Baby Lock Influencer, and I love working with their machines! And they’ve invited many of us to be instructors at their Baby Lock Summer School this year! I thought a Tote would be a great beginner-friendly project because it is so useful, nothing makes me feel better than having someone compliment my bag and getting to say “Thanks, I made it,” plus… I get to share some really simple techniques with you that make people say “Wow, really?” As we take it step-by-step, you’ll see how simple it really is to create a functional and fashionable tote – even if you’re new to sewing!

I’m going to show you the absolute most simple way to add a zippered pocket (you don’t even need to switch to a zipper foot), and I’m going to show you how simple it is to add a magnetic snap (no special tools required – I promise)!!
To get started, sign up for my email list right here, and I’ll send you a download link for the pattern. It is two pages which includes the materials list, cutting instructions, and illustrated instructions. If you’re already familiar with most sewing techniques, the pattern has all you need to make the tote. If you’re still learning, keep reading and I’ll walk you through the steps in more detail.
Also, if you’re new to sewing (or if you want to teach children in your life how to sew) I have a really fun and FREE Summer Sew Camp with over a dozen sewing videos that will take you step-by-step though simple projects from a pillowcase to an apron to an eyemask and a zippered pouch! Great for teaching kids how to sew, but also fabulous for adults who want some practice. And, I don’t try to sell you anything – this isn’t an intro course that doesn’t really teach you anything as a way to sell you an expensive course. It is exactly as advertised – over a dozen videos and projects that are perfect for beginners.
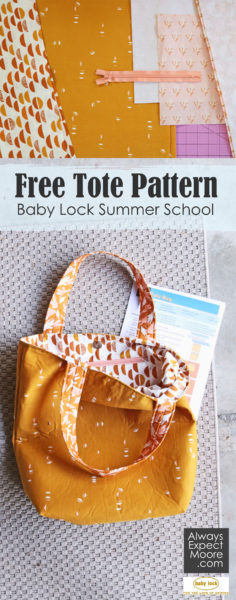
Let’s get started on gathering our supplies. You’ll need four fabrics – your outer, inner, pocket, and handle fabrics. If you like, you can have them all be the same. I love some variety, so I went with different fabrics for each. There are tons of fabulous fabrics out there! The fabrics I used are all from Art Gallery Fabrics’ new fabric line, Terrakotta. You’ll also need an 8″ zipper (though if you have a longer one handy you’d like to use, that is totally fine), and a magnetic snap. If you don’t want a magnetic snap, you can skip this step. But it is so simple to add, and I love a bag that I can close.
You’ll also need some lightweight interfacing. This gives support at the pocket, and where the snaps are added. And you’ll need some fusible fleece. This is my favorite for giving body to a bag. Without fusible fleece, the bag will just flop over, and every item you put in the bag will make it look lumpy. The fleece helps it to stand up on its own, and makes it look nicer and more professional.
You’ll also need pins, scissors, a bodkin or safety pin, ruler, fabric marking pen, your sewing machine (I used my Baby Lock Aria, but my Baby Lock Jubilant that I use in my Summer Sew Camp videos would work great as well), and some school glue. No need for special sewing machine feet – I used my quarter inch foot, but you can use a standard foot if you prefer.
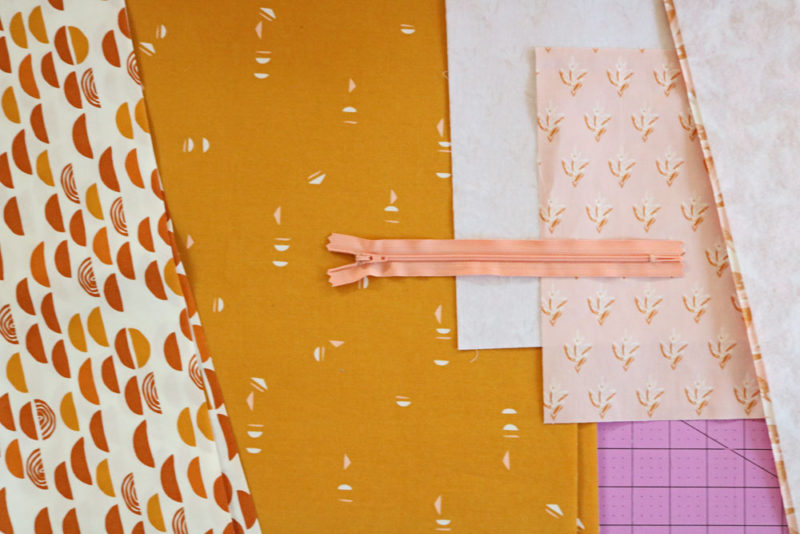
Cut all your fabrics as listed in the pattern. You can use whatever cutting method you like. I’m a fan of rotary cutting, but if you’re working with a younger child, I’d recommend marking the fabrics with a fabric marking pen, and having them cut the pieces with scissors. Accuracy is important in sewing, but this project is fairly forgiving.
Fuse the fusible fleece strips for the handles to the back of the handle pieces. You’ll want to center it, but don’t worry about being perfect. When fusing fusible fleece, you’ll want to fuse it on both sides. And remind children that even after you lift the iron, the fabric is still HOT, so they should wait for it to cool before touching ironed fabric.
Fold the handle pieces in half, and stitch down the long end. We’re using a 1/4″ seam allowance on all of our sewing, but if you just want to use the edge of your presser foot (even if it isn’t a 1/4″ foot), you will be fine. With some projects, that 1/4″ accuracy is essential. It isn’t with this project.
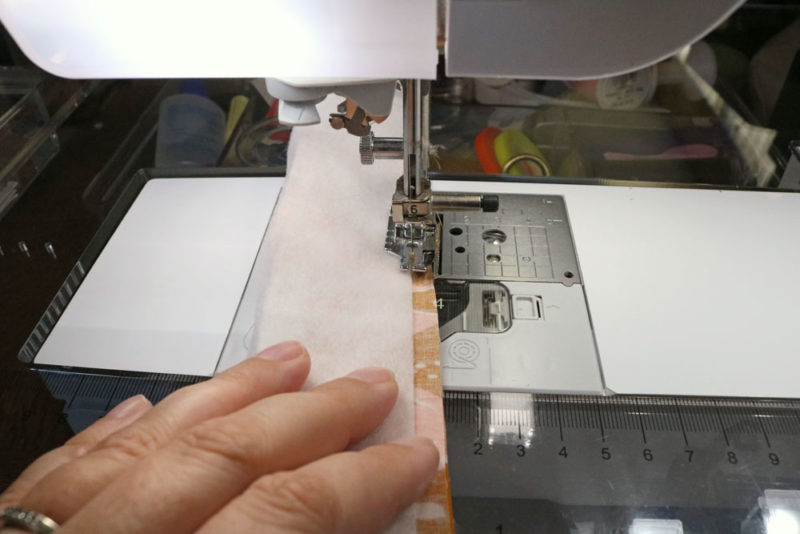
Turn the handle right-side-out. If you have a bodkin, that’s great. If not, just use a safety pin. Pin it to one end, then insert the safety pin in that end, and feed it towards the other end with your fingers. Smooth out the handle as needed as you move it along.
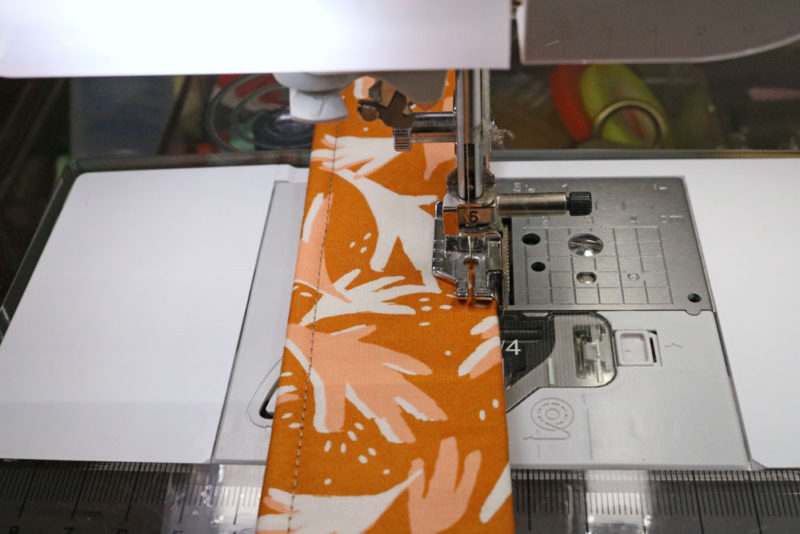
Once you have the handles turned right side out, adjust them so that the seam you just stitched is in the center of the back, and press flat. It doesn’t need to be perfect. Once you’ve pressed your handles, take them to the sewing machine and stitch down both sides. This keeps your handle flat, and also is one of the tricks for having a professional looking bag.
When you’re done top stitching the handles, you can set them aside.
Now we’re going to work on the zippered pocket. This is really the easiest way to add a zippered pocket, and if you’ve ever shied away from zippers in the past, you’re going to love this technique!
Fuse the lightweight interfacing square to the back of one of the pocket lining squares. Then draw on this interfacing. We’re drawing 1″ down from the top, 1/4″ down from there, and 1/4″ down from there, and then closing our box on each side with a line.
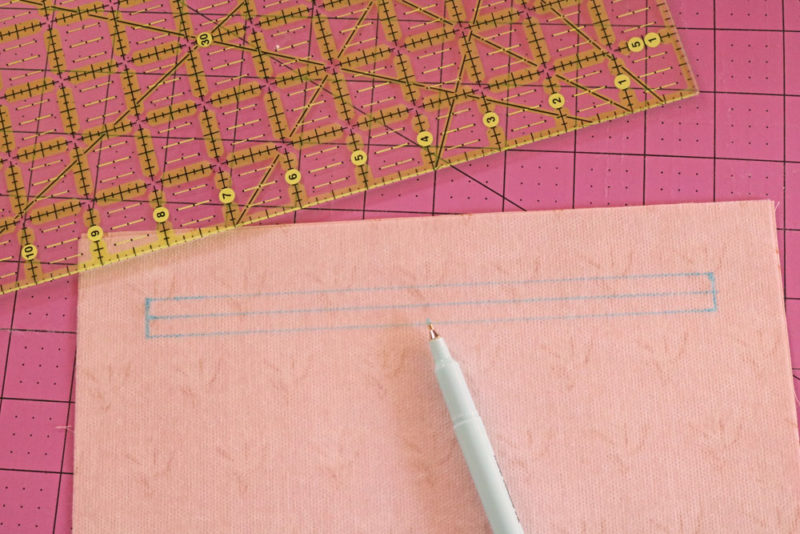
Once you’ve drawn these lines, measure the placement on the bag lining piece, and then pin it in place. You’ll be pinning them right sides together.
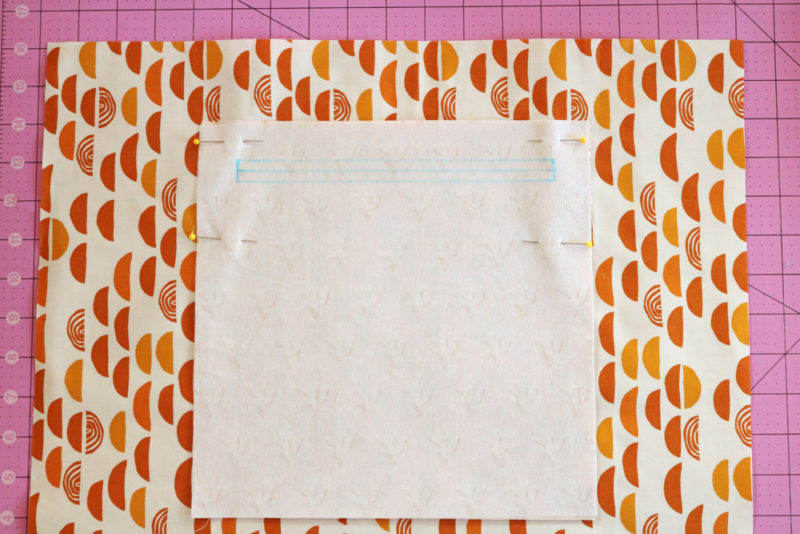
Stitch all the way around the box. Ignore the center line for now. We’ll be using that for cutting in a little bit, so it is important, but not when stitching. Once you’ve gone all the way around, overlap your stitching at the beginning with some stitching at the end. This helps to secure it.
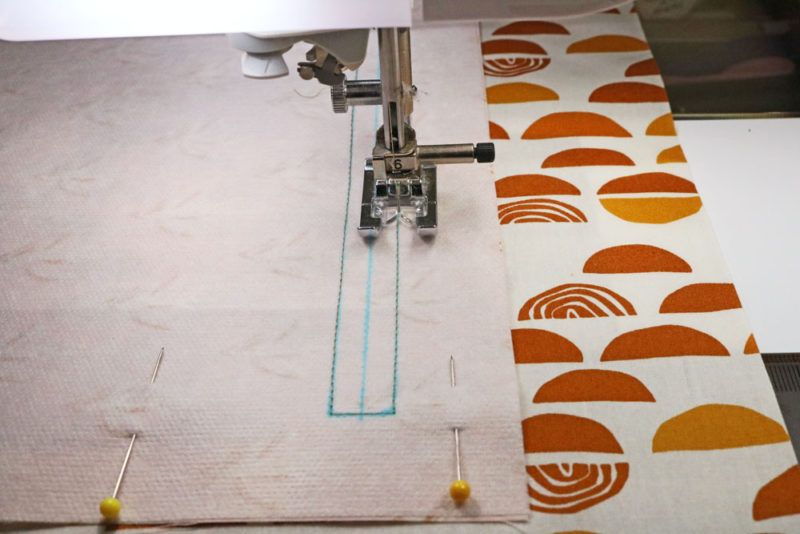
Now cut on the line. I find the easiest way to start this cut is to fold the fabric and then snip into the fold. Then cut the line but NOT all the way to the end. (If you forget, and cut to the end, don’t worry, it will be covered up in a future step, you haven’t ruined everything, I promise.)
At the ends (even if you cut all the way down the line) snip in towards the corners. Be careful not to cut the stitching you just added. Cutting in towards the corners will give you a pretty shape in our next step.
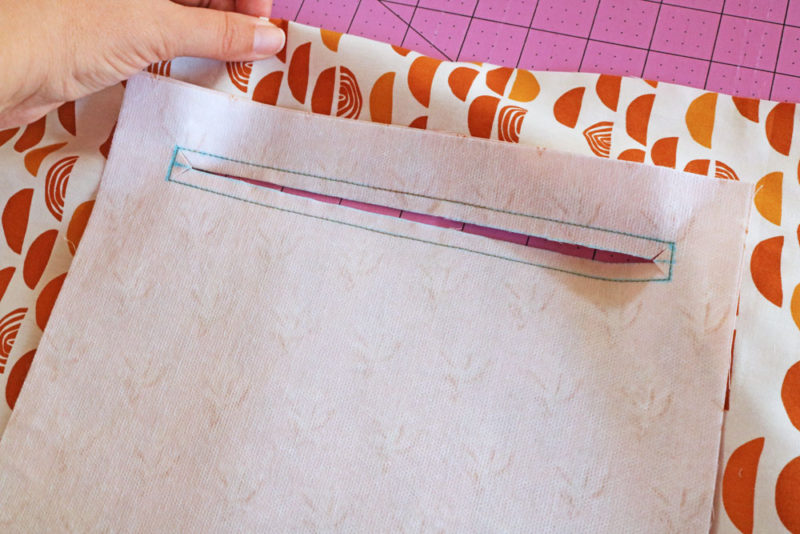
Push the pocket lining through the hole you just created, so now the fabrics are wrong-sides-together. It won’t look super pretty at first. Carefully line up the edges to make a smooth rectangular slot (kind of like a mail slot), and press the fabrics to get a crisp edge.
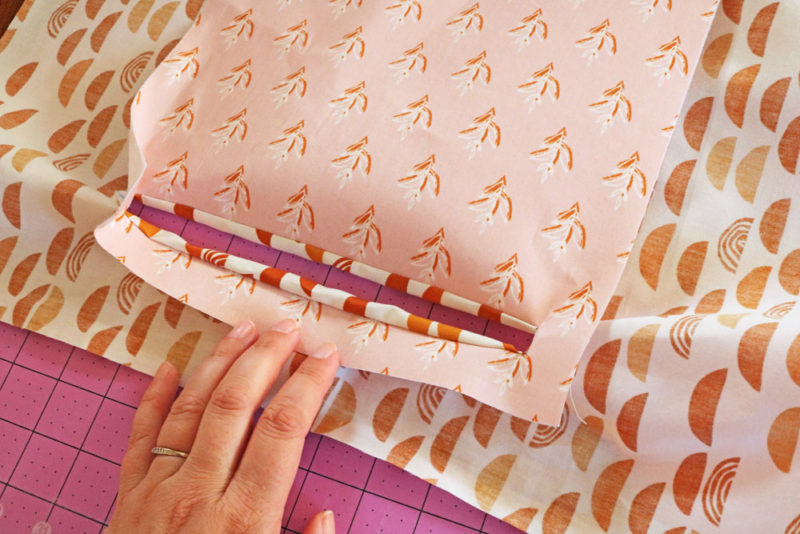
We’re ready to add the zipper. you can pin it in place so that the front of the zipper faces the lining fabric, but I think that is harder. I have a “hack” for inserting a zipper like this.
Use a very thin line of glue all the way around the “mail slot” opening we just created.
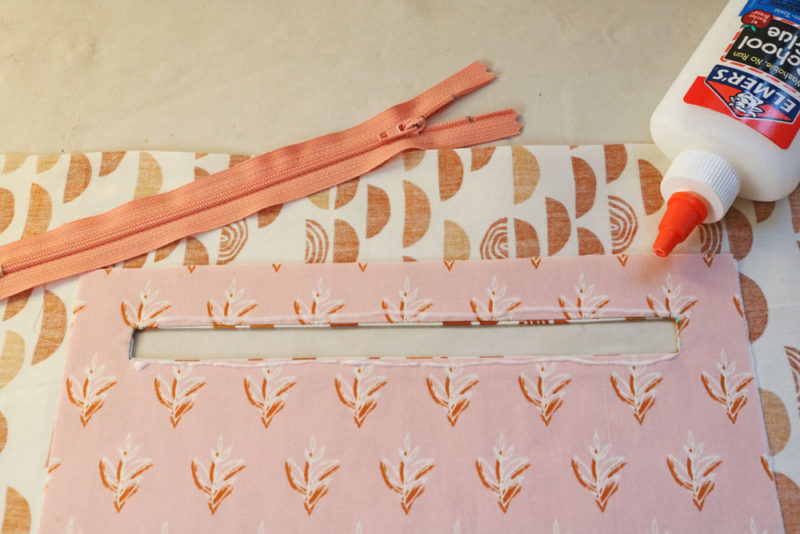
Then place the zipper right-side-down so that the zipper pull is in the hole, and facing the lining of the bag. Use a hot iron to press it. This will dry and set the glue.
If you’re using a longer zipper, just let the extra hang off one side. After you’ve stitched the zipper in place in the next step, you can cut off the excess with some sharp scissors.
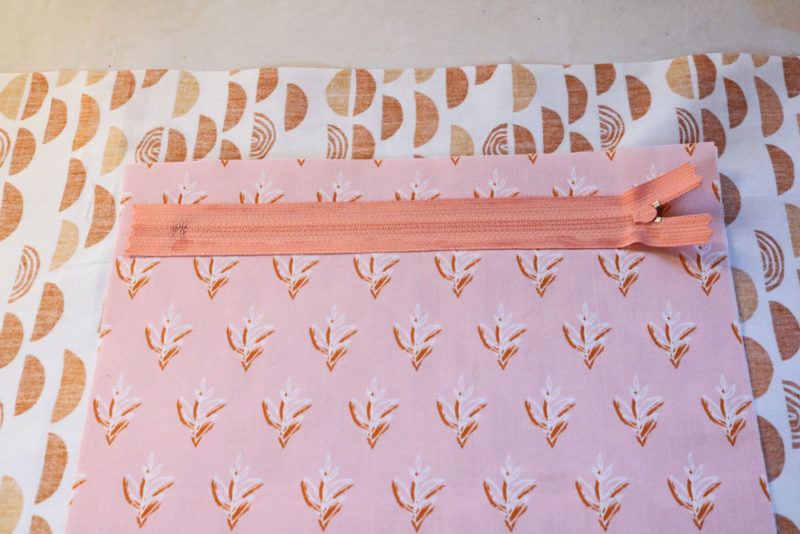
Now that the zipper is glued in place, you can take it to your sewing machine and stitch all the way around (just like we did before!) but this time, if the zipper gets in your way, stop, and open or close the zipper to move the zipper pull. Make sure that you don’t try to stitch over any metal parts of the zipper. These can and will damage your needle, and a broken needle can do serious damage to a sewing machine.
If you need to get the zipper pull to the other side of your presser foot, stop with the needle down, lift up the presser foot, move the zipper pull, and then put the presser foot down to continue stitching. Having the needle down will hold your place so the stitching line stays smooth and pretty.
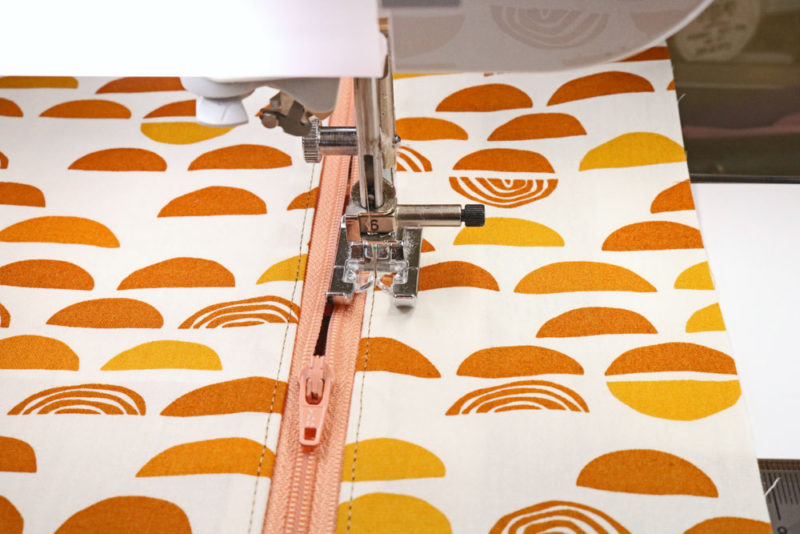
From the back, you can still see all the edges of the zipper, but these are going to be hidden inside the pocket. Nobody will ever see them. And, you just installed a zipper in a bag!!
We need to finish up the pocket. Grab the other pocket piece, and place it right-sides-together with the first. Pin around all the edges.
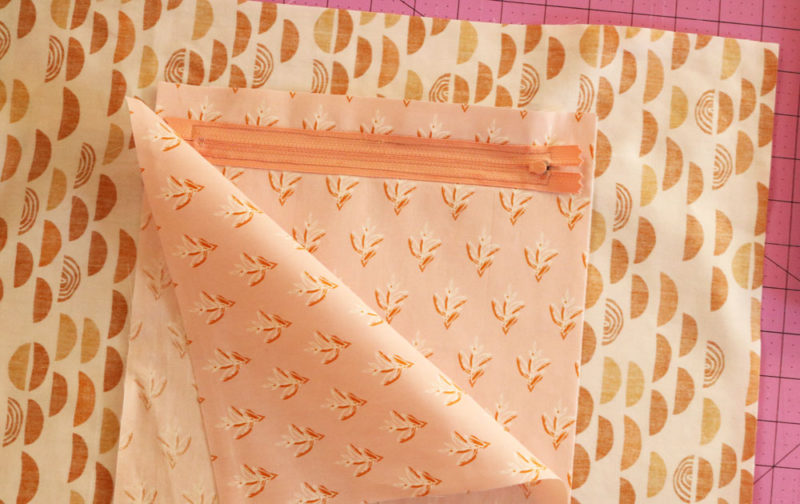
We’re only pinning the two pocket layers, not the lining layers.
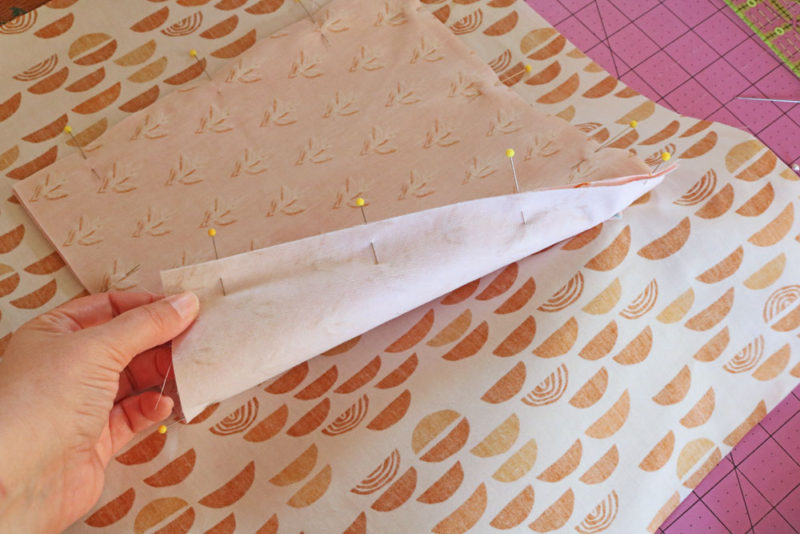
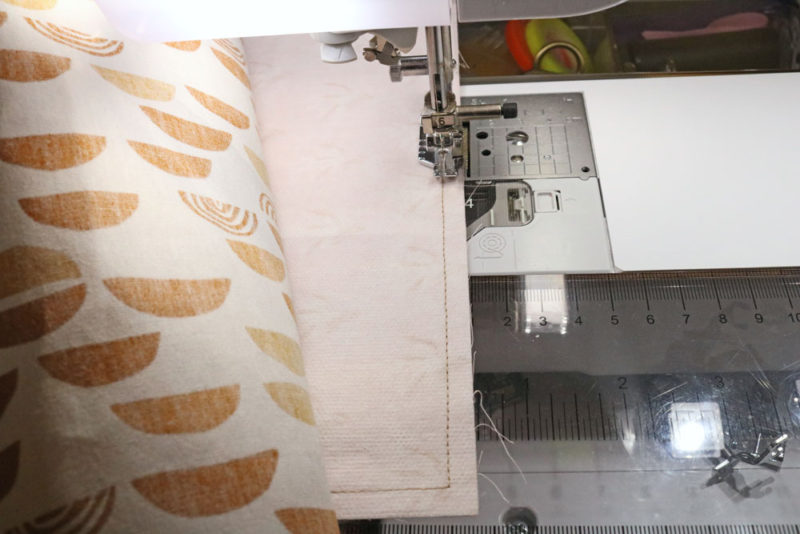
Now stitch all the way around the pocket, making sure to move the lining out of the way so that you’re only stitching these two layers together.
That finishes up our pocket! We’re ready to add the magnetic snap.
As I mentioned before, you can skip the magnetic snap if you like. But, once you see how easy it is, I think you’ll want to add it.
Measure the placement of your snap on the wrong side of the fabric for both of your lining pieces. This may mean that you need to move the top of the pocket out of the way. That is totally fine.
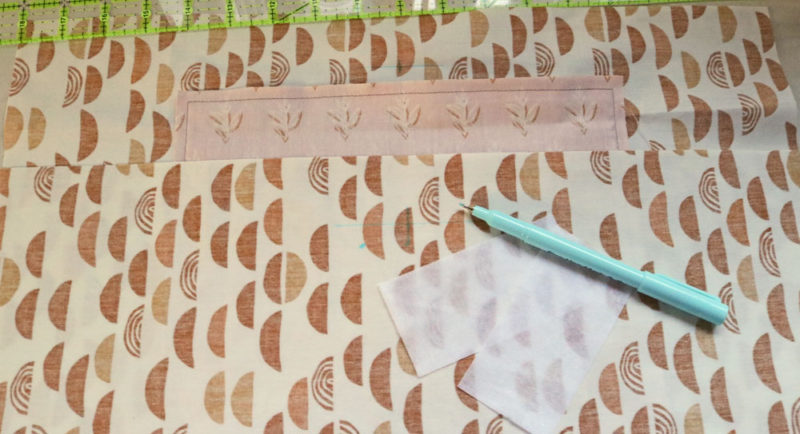
Then fuse the small pieces of lightweight interfacing over these marks. This helps give the snap some extra support.
The snap has four parts. The “female” part of the snap (looks like a belly button), the “male” part of the snap (also a belly button, but an outie rather than an innie), and two support discs.
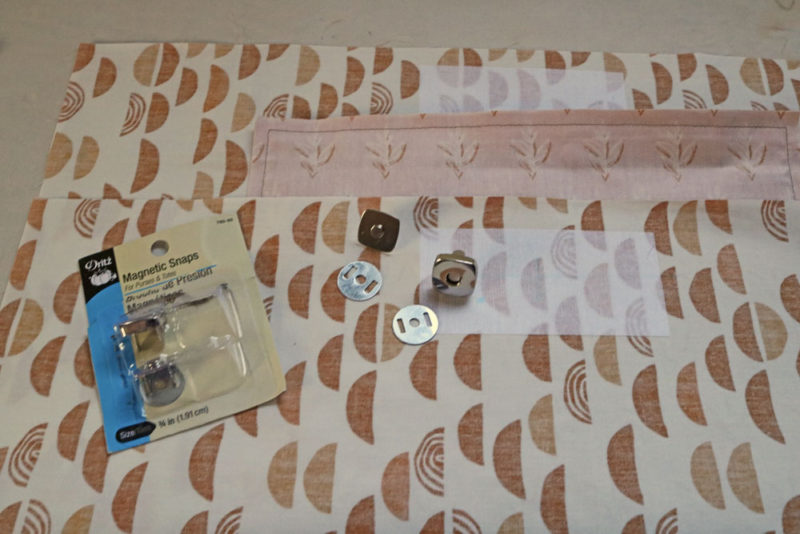
Press the prongs of the snap into the fabric over the placement mark to make two dents in the fabric. This lets you know where to cut your slits. Cut a small slit in each spot. Cut the slit half the size you think you’ll need. The fabric will stretch. And if you cut it too small, you can always snip it a few threads larger, but once you cut it too big, it is harder to fix.
Push the prongs into the too-small holes that you cut. Then add a support disk to the back, and (using your fingers or pliers – I find I can do it with just my fingers), press the prongs open until they are flush with the fabric.
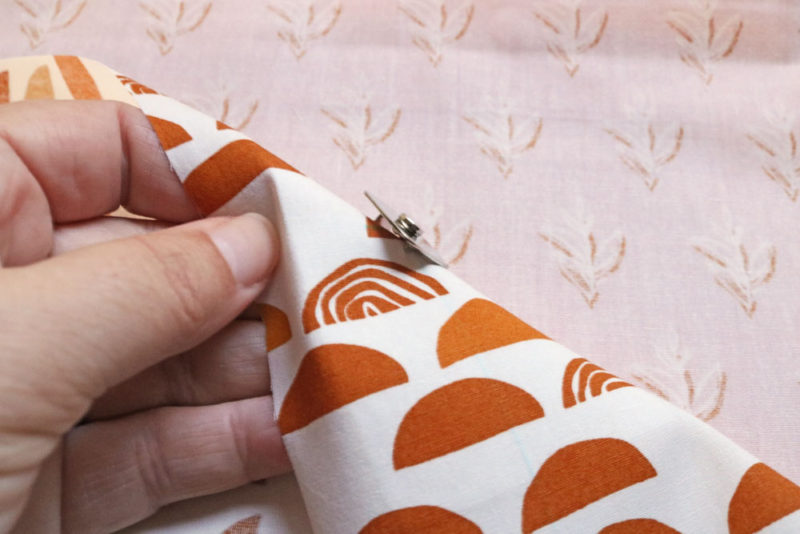
Repeat with the snap on the other side (it does not matter which piece is on which side, as long as you have one innie and one outie). And that is it! You’ve attached your snap!
Fuse the fusible fleece to the wrong side of both the outer bag fabrics.
Now we’re ready to box the corners. Boxing the corners is how we get the lovely 3D bag shape, instead of a flat, 2-D bag.
With your ruler, measure a 3″ square on the bottom corner of one of the lining pieces.
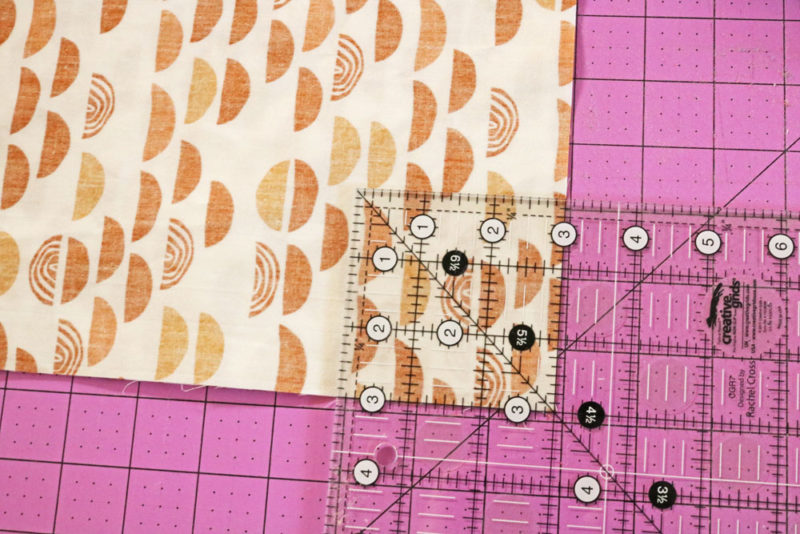
Cut out this 3″ corner. If you’re handy with a rotary cutter, you can do it with a rotary cutter. But, if you’re worried you’ll cut past the ruler, mark the corner with a marking pen and then cut it with scissors. Repeat for both bottom corners on both lining pieces, and both bottom corners on both outer pieces.
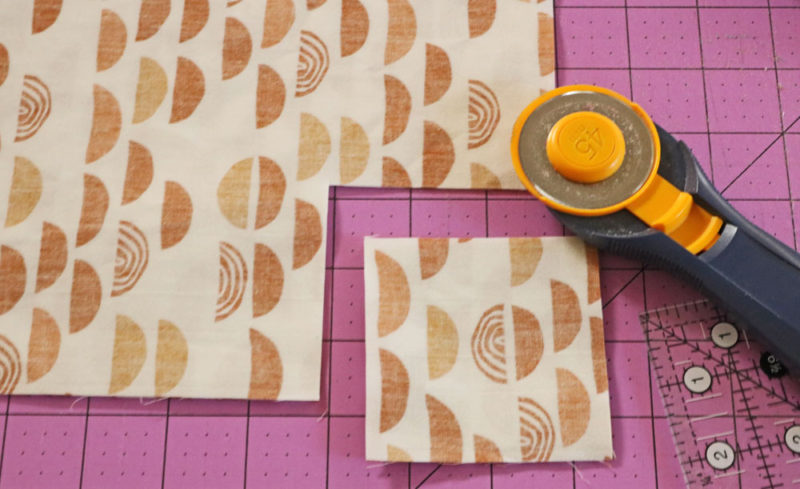
Fold a lining piece so that the two cuts you just made are touching one another, and the lining piece is folded on the diagonal. Stitch this seam, locking your stitches by going forward and back at the beginning and end.
Repeat for all eight boxed corners (two on each of the two lining pieces, and two on each of the two outer pieces).
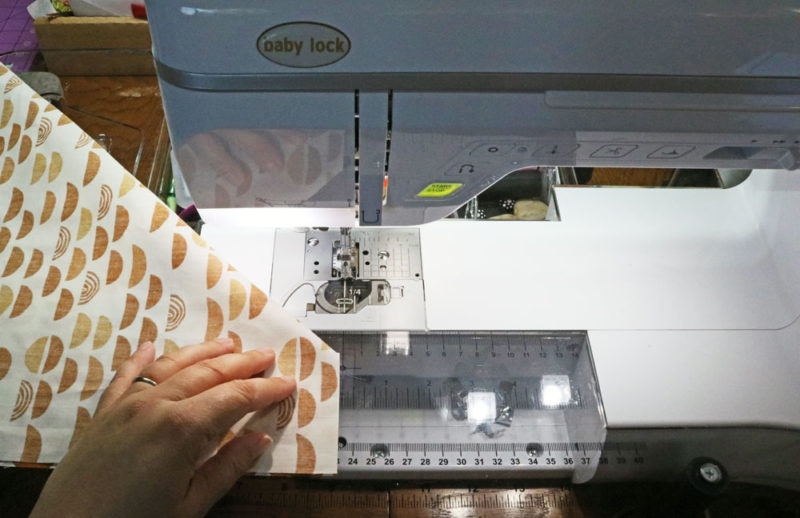
We’re now in the home stretch of making this bag! Pin the two lining pieces and the two outer pieces together along the sides and the bottom – leaving the top open. Then stitch around all three sides. On the lining piece, you want to leave a 5″ hole along the bottom that you don’t stitch. This is how you’ll turn the bag right-side-out in a few steps.
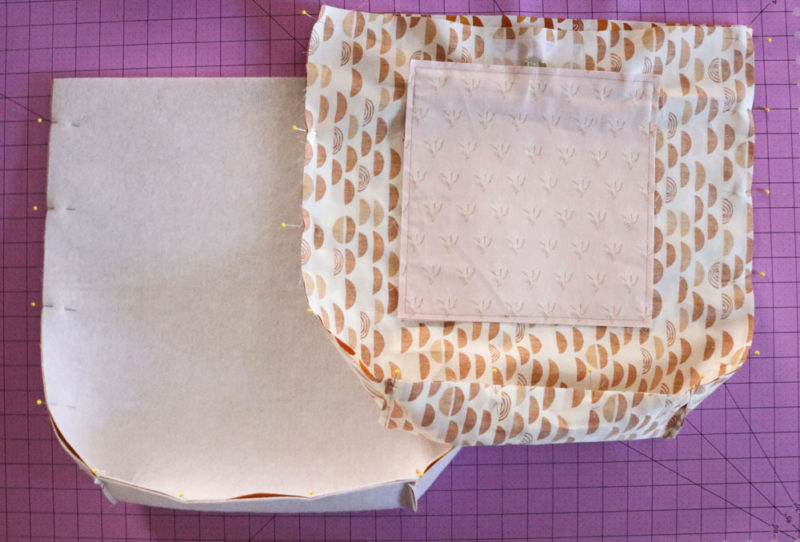
Turn the lining right-side-out, then put it inside the outer part of the bag. Line up the side seams and pin. Measure in from the side seams for the placement of the handles. Put the handles between the two layers, making sure they are not twisted, and pin in place. Pin the lining and the outer together all the way around the top. Then stitch all the way around, making sure to catch the handles.
Turn right side out through the hole you left in the bottom, If you forgot to leave a hole in the bottom, you can use a seam ripper to pick out the stitches and make a hole in the seam at the bottom.
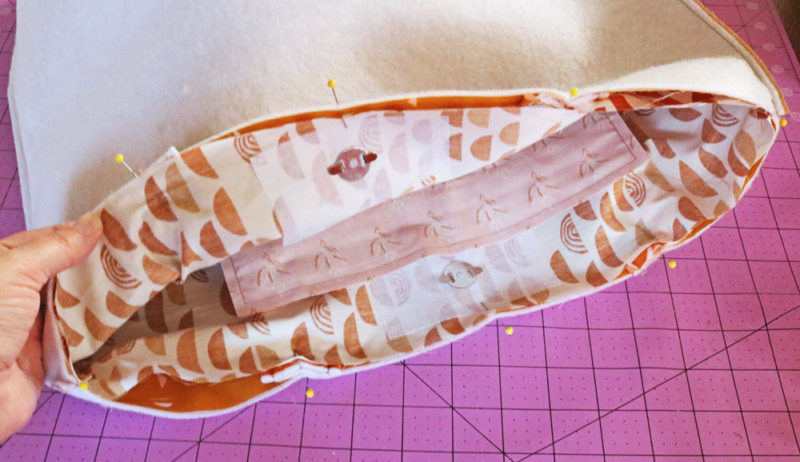
When turning it right side out, there may be a point where it looks like a balled-up mess. This is my favorite part… it means I’m about to see the bag I made!!
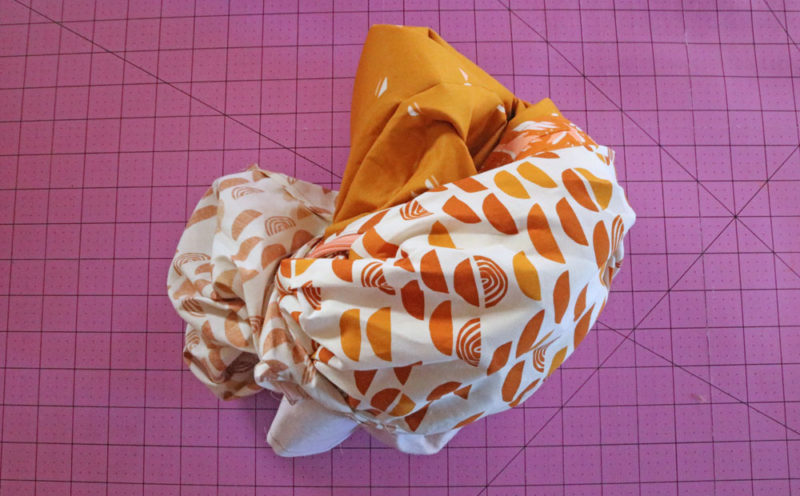
Once you have it all right-side out, tuck the lining into the bag. Carefully match up the top seams, and pin. Then you can stitch all the way around the top, giving the bag a finished look, just like the handles. Make sure the handles are in the “up” position so that you don’t stitch your handles as you’re top stitching the edge of your bag.
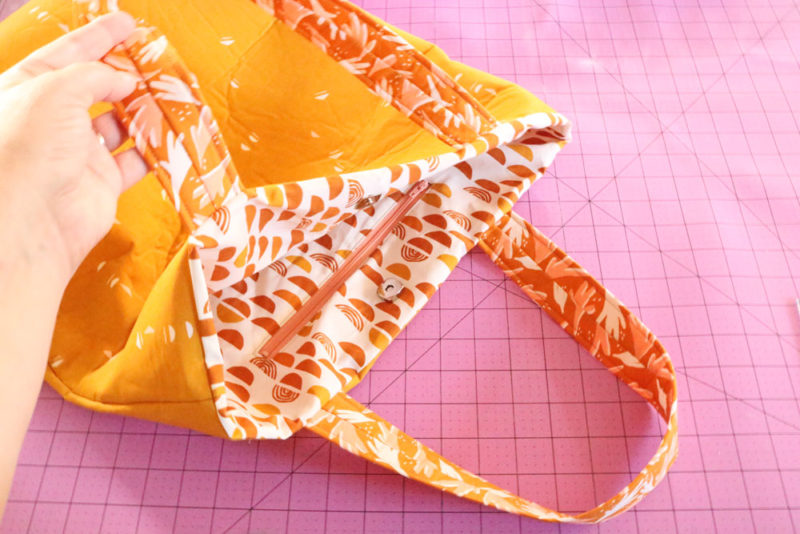
Stitch up the hole in the bottom, either by hand or by machine, and your bag is ready to use!
You can see all the fabulous Baby Lock Summer School Instructors and their projects on the Baby Lock Blog, or you can click below to go see the projects on each of the instructors’ sites:
Manatee Stuffed Animal by Lindsay Conner
Rag Doll by Evy Hawkins
Roll up Pencil pouch by Alex Sorensen
Bean Bag by Candice Ayala
Patchwork Quilt by Amy Smart
Patchwork Pillow by Heather Valentine
Monster Customized Hoodie by Russell Conte
Eli’s First Quilt by Lindsey Conner
If you haven’t already, make sure that you check out my 100% free Summer Sew Camp with over a dozen sewing videos! There are downloadable instruction sheets as well, and they are perfect, simple projects. You can pick one to stitch up each afternoon!

Comments & Reviews
Cute tote, and a brilliant way to put a zipper on the pocket!
That zipper insertion technique is so cool! I will definitely try that. Thank you for that: no zipper fear 🙂
Great work n love the colors thsnkmyou for bag pattern your the bedt
Thanks! I can’t wait to see your version of the bag!
I’ll add an outside pocket too for a cell phone.
Oh! Love that idea!! Can’t wait to see your finished tote!
Hi Carolina I have signed up to get your tote pattern. But It never comes to my e-mail did I do something wrong I really would like to make this tote. So can you send me the pattern?
Sent it to you! <3
Enjoy!
Can you please send me the tote bag pattern?
Looks like it was sent to you… probably ended up in your spam folder. I have re-sent it.
Very nice tote. I would love to try it, but have not received the pattern. I checked my spam folder and it is not there. Would you please try and resend it? Thanks for sharing this pattern.
Not sure why it didn’t send the first time, but I went ahead and sent it to you again. Hopefully it arrives safely. <3
Perhaps i missed it — but what is the size of the finished tote? Thanks
the finished tote is about 14x16x5.5″
I am already signed up for your emails, was hoping you could send me free tote bag pattern. Received your pincushion pattern last week and have made 4, so far, we’ll need to do ladder stitch and sew on buttons. Love them they are so fun to make!
Yup! Just fill out the form. 🙂
I signed up for this pattern and others. I don;t know what or where “Box” is. I’d like to print this out so i can add it to my Baby Lock notebook, but it won’t print. It did download. Nevermind. I’ll looke elsewhere
You sign up on the form, and get the link. It is that simple. But it sounds like you’ve gotten it figured out?
Hi, I never recieved the pattern in my e-mail. Karen
Could you please remove my e-mail address on my last post please? thank you, Karen
done! 🙂
I am using a fabric with a one way pattern. Should I cut it so the bottom of the bag is the 20” side or the 18” side. It seems that it would make a difference, but maybe not. Please let me know. Thank you. Other than that, the directions are very good.
20″ is the height, 18″ is the width.
Hello,
I sent a request for the pattern and never received it.
Thanks,
Hi! I’ve sent it directly to you just now. Let me know if that doesn’t work.
Found you via MSQC BLOCK.
Yay! Glad you’re here!